Azure

All posts relating to Microsoft Azure services including information about new services and features as well as deep dives on configuring and using the services.

Repairing a Damaged SQL Azure Sync Group

As a follow-up to my TechNet Guide published previously on Configuring a Windows Azure SQL Sync Group, in this post, I will explain how to repair a broken sync group.

Firstly, let me explain how I broke it. I have two SQL Azure databases in sync: one database in the North Europe region and another in the West Europe region. Following some security advice for WordPress, I decided I wanted to change the table prefixes for my database from the defaults of wp_. I made all of the required change to the config.php file, on the database tables and all the other changes required as per the article guide I used at http://wpcanada.ca/2009/how-to-change-wordpress-table-prefix/. After doing this, I couldn’t do anything to the blog: edit posts, author new posts, delete posts. I busted out SQL Server Management Studio to manually delete the post I was trying to clear out and I got an error message that there was a problem with the trigger.

I’m not a SQL expert so I hadn’t encountered triggers before but I could tell from the trigger name, wp_posts_dss_delete_trigger what this was. The trigger was based on the old wp_ table prefixes and now my prefixes are different. I logged into Windows Azure Management console and tried to update the database schema through the Sync Group configuration which succeeded but nothing was working still.

After much T-SQL research and experimentation, I got the fix.

Backup Everything

I can’t stress this point enough which is why it is in red, a colour which I normally try to avoid at all costs.

If you chose to follow this post to help recover a broken SQL Azure Sync Group and a potentially broken application trying to use that database, please make sure you back everything up. The changes we will make to the database in the following steps have the potential to ruin your day if done improperly and I can’t be responsible for any data loss as a result.

The easiest way to backup a SQL Azure database is from the Windows Azure Management portal which allows you to generate a .bacpac file which is an export of the entire database schema and table contents. This .bacpac file will be written to a Windows Azure Storage BLOB Container of your choice.

Clear and Delete the Sync Group

Firstly, you need to clear out the Sync Group. Full instructions for this are on Windows Azure MSDN at http://msdn.microsoft.com/en-us/library/windowsazure/jj991914.aspx but in a nutshell, remove any reference databases from the Sync Group first, leaving only the Hub database. Once this is done, delete the Sync Group, leaving you with standalone, non-communicative databases.

Next, login to your SQL Azure database using either the Windows Azure SQL Management console or via SQL Server Management Studio from your own machine. You should be connecting to the database which was formerly the Hub database as this is our primary and the one which needs rescuing. We’ll deal with the Reference databases at the end of the process.

Drop the Sync Group Database Tables

View the tables in the database and you should see a number of tables which have the prefix DataSync instead of the usual dbo. There are four tables as standard for all databases which have the following names:

  • DataSync.provision_marker_dss
  • DataSync.schema_info_dss
  • DataSync.scope_config_dss
  • DataSync.scope_info_dss

There will also be other DataSync tables which match you existing pre-change table names. Drop all of the DataSync tables. The T-SQL query for this is as follows:

DROP TABLE DataSync.provision_marker_dss
DROP TABLE DataSync.schema_info_dss
DROP TABLE DataSync.scope_config_dss
DROP TABLE DataSync.scope_info_dss

Repeat this process for your custom name DataSync tables. In my case these were WordPress table names such as DataSync.wp_posts_dss_tracking.

Drop the Sync Group Triggers

This was the hardest part for me to find information on and complete. With all of the tables dropped, we’re halfway there but the triggers are the actual problem not the tables. Each table has three associated triggers for INSERT, UPDATE and DELETE actions. The triggers are what tells the Sync Group that the Hub database has a change that needs to be replicated to other copies of the database.

First, we need to find all of your triggers. The following code is courtesy of Joe Stefanelli on Stack Overflow athttp://stackoverflow.com/questions/4305691/need-to-list-all-triggers-in-sql-server-database-with-table-name-and-tables-sch.

SELECT sysobjects.name AS trigger_name 
    ,USER_NAME(sysobjects.uid) AS trigger_owner 
    ,s.name AS table_schema 
    ,OBJECT_NAME(parent_obj) AS table_name 
    ,OBJECTPROPERTY( id, 'ExecIsUpdateTrigger') AS isupdate 
    ,OBJECTPROPERTY( id, 'ExecIsDeleteTrigger') AS isdelete 
    ,OBJECTPROPERTY( id, 'ExecIsInsertTrigger') AS isinsert 
    ,OBJECTPROPERTY( id, 'ExecIsAfterTrigger') AS isafter 
    ,OBJECTPROPERTY( id, 'ExecIsInsteadOfTrigger') AS isinsteadof 
    ,OBJECTPROPERTY(id, 'ExecIsTriggerDisabled') AS [disabled] 
FROM sysobjects 

INNER JOIN sysusers ON sysobjects.uid = sysusers.uid 

INNER JOIN sys.tables t ON sysobjects.parent_obj = t.object_id 

INNER JOIN sys.schemas s ON t.schema_id = s.schema_id 

WHERE sysobjects.type = 'TR'

This will output a query result with a list of all of the triggers on the database, the trigger name and the table for which it is registered. Right click the trigger_name header in the query result and select the Copy option. Open a New Query window and paste the output into the query window which now gives you a list of all of the triggers. On the first line, prepend the syntax DROP TRIGGER to the line then copy the DROP TRIGGER syntax down onto the start of each line.

For me, this gave me the following query ready to execute (for WordPress remember):

DROP TRIGGER wp_term_taxonomy_dss_insert_trigger
DROP TRIGGER wp_term_taxonomy_dss_update_trigger
DROP TRIGGER wp_term_taxonomy_dss_delete_trigger
DROP TRIGGER wp_commentmeta_dss_insert_trigger
DROP TRIGGER wp_commentmeta_dss_update_trigger
DROP TRIGGER wp_commentmeta_dss_delete_trigger
DROP TRIGGER wp_terms_dss_insert_trigger
DROP TRIGGER wp_terms_dss_update_trigger
DROP TRIGGER wp_terms_dss_delete_trigger
DROP TRIGGER wp_comments_dss_insert_trigger
DROP TRIGGER wp_comments_dss_update_trigger
DROP TRIGGER wp_comments_dss_delete_trigger
DROP TRIGGER wp_usermeta_dss_insert_trigger
DROP TRIGGER wp_usermeta_dss_update_trigger
DROP TRIGGER wp_usermeta_dss_delete_trigger
DROP TRIGGER wp_links_dss_insert_trigger
DROP TRIGGER wp_links_dss_update_trigger
DROP TRIGGER wp_links_dss_delete_trigger
DROP TRIGGER wp_users_dss_insert_trigger
DROP TRIGGER wp_users_dss_update_trigger
DROP TRIGGER wp_users_dss_delete_trigger
DROP TRIGGER wp_options_dss_insert_trigger
DROP TRIGGER wp_options_dss_update_trigger
DROP TRIGGER wp_options_dss_delete_trigger
DROP TRIGGER wp_postmeta_dss_insert_trigger
DROP TRIGGER wp_postmeta_dss_update_trigger
DROP TRIGGER wp_postmeta_dss_delete_trigger
DROP TRIGGER wp_posts_dss_insert_trigger
DROP TRIGGER wp_posts_dss_update_trigger
DROP TRIGGER wp_posts_dss_delete_trigger
DROP TRIGGER wp_term_relationships_dss_insert_trigger
DROP TRIGGER wp_term_relationships_dss_update_trigger
DROP TRIGGER wp_term_relationships_dss_delete_trigger

Ensuring that your query is pointed at the correct database if you are using the SQL Server Management Studio, now press the Execute button to execute the query. You should get the response Command(s) completed successfully.

Testing the Database

With this done, the triggers are now history which should bring your database back to life. Either use your application which drives the database or if you are comfortable doing so, try some INSERT or UPDATE queries against the database to verify this. If you get any errors it means you either missed a table or a trigger during the drop phases. If your database works then congratulations, your application is no longer a brick but we now need to restore the Sync Group functionality.

Delete the Reference Database(s) (Optional)

This step is optional but I did it for cleanliness. As we’ve basically just completely doctored with the schema and operation of a database, I didn’t like the idea that my Reference replica of the database was in an even worse state. I elected to delete the Reference database and create a new database in it’s place. You can either delete the database from the Windows Azure Management portal or from SQL Server Management Studio while connected to the SQL Server.

Please make sure you delete the Reference Database and not the Hub database if you do this though as if you delete the Hub by accident then you’ve just deleted the database which we spent the time fixing up.

Recreate the Sync Group

Recreating the Sync Group to get you back in business for resilient SQL Azure databases services means following the steps in my previous post Configuring SQL Azure Sync Groups. The only thing which you need to account for is the fact that your SQL Servers already exist and your Hub database already exists. Assuming you performed the optional step above to delete the Reference databases, you’ll need to do the following:

  1. Create new Reference databases.
  2. Create a new Sync Group.
  3. Configure the Hub and Reference partnership for the Sync Group.
  4. Scan the database schema and select the options to Sync.
  5. Enable automatic time based sync (if you are using this mode).

The previous post has the full details and screenshots should you need it for referral.

Hopefully you’re all back in business now and this post has helped you get out of a hole. The lesson I learnt here is that if you are making major changes to a database which is configured in a SQL Azure Sync Group then consider removing the databases from the Sync Group and deleting the Sync Group first then, once all your changes to the schema and table names are complete, then you can re-create the Sync Group and get your resiliency back on.
Microsoft Azure Billing Alert Service

Last week, I dropped a post about how to enable and utilize the New Service Tiers for Azure SQL Databases. In this post, I’d like to show to you another preview feature available in Microsoft Azure, the Billing Alert Service. Whilst I see this service being of more interest to consumers and small enterprises consuming Microsoft Azure services, this isn’t to say that a cost conscious large organisation couldn’t benefit from this and best of all, it’s totally free to enable and consume.

Where I see value in this feature is tracking the cost of your subscriptions. Whilst it’s possible to activate a spending limit on a subscription, this isn’t without it’s own issues. A spending limit once imposed and reached will stop and terminate all services in your subscription. My blog for example went offline for 24hrs last month because I’d hit a spending limit imposed. I’ve since removed this and instead use the Billing Alert Service to help me track my spending and kerb excessive usage when I get near the amount I’m happy to spend.

It’s important to note that this is a preview feature. This doesn’t mean that the service doesn’t work but it does mean that Microsoft could make changes to the service or pull it entirely at some point so just bear this in mind.

Enabling the Billing Alert Service

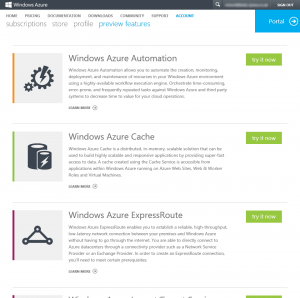
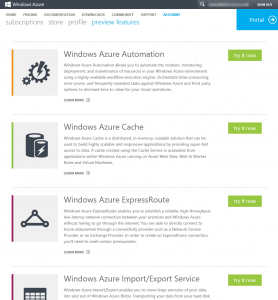
Enabling the Billing Alert Service is easy from the Microsoft Azure Account Portal which you can access at the URL https://account.windowsazure.com and login with the account used to control your subscription. From here, select the Preview Features link in the top navigation to access a list of features which are available for you to access in preview.

Azure Portal Preview Features

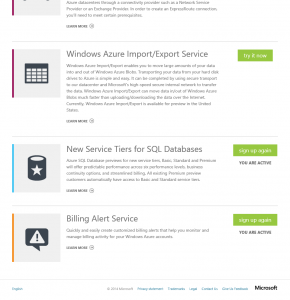
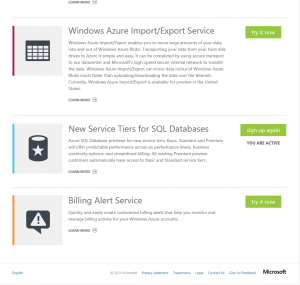
Scrolling through the list, somewhere near the bottom of the list, you will find the Billing Alert Service. Hit the Try It Now button to activate the feature.

Billing Alert Service

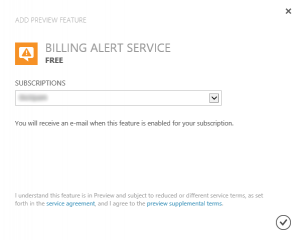
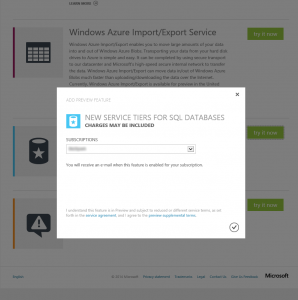
Once you’ve selected the button, you will be prompted for which subscription to activate the feature. If you have more than one subscription, select the appropriate one and click the Tick button to complete the operation which I found did take some time to complete.

Adding Billing Alert Preview Feature

Once activated, you will see the status of the feature reported below the Try It Now button as You Are Active. In the screenshot below, you can see I am currently activated for both the Billing Alert Service and the New Service Tires for SQL Databases which I covered in the previous post on Microsoft Azure preview features.

Billing Alert Service Active

With the feature now activated, we can use it to setup some billing alerts. Unlike most other features in preview in Microsoft Azure, the Billing Alert Service is accessed through the Account Portal and not the Management Portal. Click the Subscriptions link in the top bar to access a list of your subscriptions.

Configuring the Billing Alert Service

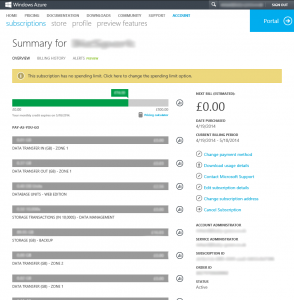
Here on the Subscriptions Overview page, the statistics for the subscription with billing amounts and usage consumption are shown and we now have a new link for Alerts Preview which is just below the main title.

Azure Subscription Overview

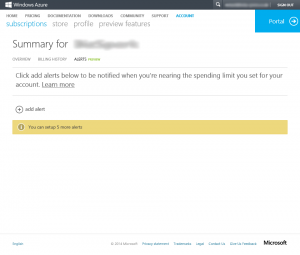
Accessing the feature for the first time, we can see that we have no alerts configured for billing and there is a link to add a new alert. The yellow information bar tells us that we can create up to five billing alerts which is probably going to be sufficient for most people. I’m going to be creating two for my subscription: one approaching my preferred monthly spending limit so that I can calm things down a little and one when I hit the preferred limit so that I can shut down anything that can wait or that I no longer need.

Billing Alert No Alerts Configured

Click the Add Alert button to get started creating a new alert.

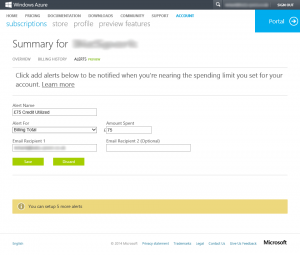
Billing Alert Configure New Alert

On the new alert page, there aren’t actually many options or settings to configure. Firstly, you need to set a title for your alert which will appear in the email which is sent out so make this factual so that you can see quickly from the email what the alert is warning you about.

Next, we can set what type of alert to send and there are currently two types. The default is what I am using, Billing Total which tracks the amount of spend. The second type is Monetary Credits which changes the context to amount remaining. If you want to track what you are spending in money then use the first option. If you are using a subscription with free spending credits such as MSDN or the like then you may wish to use the latter to track how much of your free entitlement you have left.

Once you’ve set the alert type, set what value to use. In this example, I’m sending out an alert once I’ve spent £75 in a billing month period.

Lastly, we configure the alert recipients. In my case, this is to my personal, singular email address but there is nothing to stop you from adding a distribution list address here so you could configure a distribution list in Microsoft Exchange or Office 365 with all of the parties with a vested interest in your Microsoft Azure subscription as members to receive the alerts.

Once you’ve added the address or addresses for your alert recipients, select the Save button to save the alert definition.

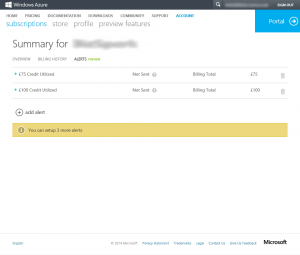
I took the liberty of creating my second alert offline but here is how the console looks with the two alerts added.

Billing Alert Two Alerts Configured

With alerts created, you will receive a welcome email confirming that the alert was setup which allows you to verify the email or distribution list address you used. There is a delete button on the right of the interface allowing you drop and delete alerts as you wish at a later stage.

I hope that this has been helpful for you who want to try and keep tabs on your Microsoft Azure spend.

New Service Tiers for Azure SQL Databases

Last night I received an email from the Microsoft Azure team with an announcement for a change to the functionality of Azure SQL Databases. At present, there are two service tiers available for Azure SQL Databases, being Web and Business with limits on size relative to each. As anyone who has read my guide on TechNet Gallery entitled Configuring a SQL Azure Sync Group will know, I’m quite into these DBaaS offerings in Azure. Yesterday, they announced in preview the release of three new service tiers for the Azure SQL Databases service.

What’s in the Announcement

The three new tiers announced are named Basic, Standard and Premium. In twelve months time, Microsoft will be ceasing the current Web and Business tiers in favour of these new tiers currently in preview.

  • Basic: Designed for applications with a light transactional workload. Performance objectives for Basic provide a predictable, hourly transaction rate.
  • Standard: Standard is the go-to option for getting started with cloud-designed business applications. It offers mid-level performance and business continuity features. Performance objectives for Standard deliver predictable, per-minute transaction rates.
  • Premium: Designed for mission-critical databases, Premium offers the highest performance levels and access to advanced business continuity features. Performance objectives for Premium deliver predictable, per-second transaction rates. In addition to this, there are going to be revisited scaling limits for the tiers, uptime SLA, backup and recovery options and disaster recovery options.

Basic will have a 2GB limit, an increase from the 1GB limit in the current Web tier. Standard will have a 250GB limit whilst Premium will have a 500GB limit. Restore points for recovering the databases will be available for 24 hours on Basic, 7 days on Standard and 35 days on Premium. All the tiers come with a 99.95% uptime SLA.

New Tiers Pricing

The good news is that if you jump on the band-wagon early, you get reduced pricing during the preview. In an example scenario, using the North Europe Dublin datacentre and billing in Pounds (GBP) on a Pay as You Go tariff, Web and Business edition for a 100MB database is £3.179 per month. A Basic database of the same size is £1.60 per month, Standard is up to £64 per month according to usage and Premium varies wildly between £296 and £2,368 according to usage. It’s interesting to note the high end pricing on Premium which dependant on use can actually work out more expensive than running a SQL Server IaaS virtual machine in Microsoft Azure but that’s the price you pay for design simplicity of DBaaS over SQL Server IaaS.

If we use my blog here at richardjgreen.net as an example where I currently use Web databases, if I moved from Web to Basic under the new tiers, I would see a monthly decrease in cost of about 50%.

What Will Happen to Web and Business

All we know at the moment is that these two legacy tiers will be phased out in twelve months time. There doesn’t seem to be any indication as to how databases would be transitioned from the existing Web and Business tiers over to the new tiers but I would hazard a guess that Web databases will become Basic and Business databases will become Standard.

This above statement is assuming of course that there is compatibility between the current tiers and the new and that the databases will be transitioned seamlessly. I think it would be a bad PR exercise for Microsoft if existing databases were dropped instead of transitioned over to the new tiers as that’s going to put extra work down for customers already consuming these services.

Accessing the Preview Tiers

In order to access the preview tiers, login to your Microsoft Azure Account Portal, the production portal and not the new Preview Portal. You can access this part of the Azure portal at https://account.windowsazure.com if you haven’t accessed it before.

From here, click the Preview Features link in the top navigation.

Azure Portal Preview Features

From the Preview Features page, scroll down until you can see the New Service Tiers for SQL Databases option.

SQL New Tiers Try Now

Click the Try It Now button alongside the preview feature entry.

SQL New Tiers Add Feature

You will be presented with a dialog to select which subscription you wish to enable that feature for. I only have one subscription so I only have a single selection in the drop down. Click the tick button in the bottom right once you have the correct subscription selected. You will be taken back to the previous page once it’s done and you will be sent a welcome email for the preview.

SQL New Tiers Active

The preview features page in the portal will update to also show a caption under the New Service Tiers for SQL Databases button You Are Active to show that you are participating in this preview service.

With this enabled, we can head over to the Management Portal using either the Portal link in the upper right or by navigating to https://manage.windowsazure.com to try out the feature.

SQL New Database Custom Create

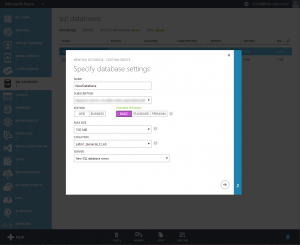
From the Management Portal in Microsoft Azure, I have clicked into SQL Databases and selected the New Custom Create option. As you can see in the new database wizard, in addition to the current tiers for Web and Business, we can now select from our three preview tiers, Basic, Standard and Premium also.

SQL Database Features Support

The current crop of SQL Databases support the Automatic Backup and Sync features. I haven’t had a chance to explore the support for these with the new tiers yet but I’ll be back soon with just that information. I will be interested to find this out for myself as transitioning from Web to Basic would save me on my monthly Azure bills but if Sync isn’t available in this tier then I’m probably going to be paying more to use Standard.

Configuring a Microsoft Azure CDN TechNet Guide

Last month, I published the first of a two part guide published on TechNet entitled Configuring a SQL Azure Sync Group which demonstrated the steps for configuring two SQL Azure databases to replicate using SQL Azure Sync. I’m still working away on the second part of the guide which I promised however to keep you all as excited about Microsoft Azure as I am in the mean time, I’ve just published a guide entitled Configuring a Microsoft Azure CDN on the TechNet Gallery.

This guide walks through the steps to prepare a BLOB Storage Account for distribution to a CDN and how to activate and use the CDN feature in Microsoft Azure.

The guide is available at http://gallery.technet.microsoft.com/Configuring-a-Azure-CDN-05c1f68a for download right now.

I hope you enjoy this latest release and if you have any questions or comments then please feel free to get in touch.

Microsoft Azure Portal Preview

Sometimes life can be too busy for it’s own good. The night that Microsoft unveiled the Microsoft Azure Portal Preview at Build on Day 2, I grabbed a load of screenshots and took myself on a tour of the portal to share with you all but I got side tracked with Project Home Lab so haven’t been able to write it up and post them for you until now so here it is.

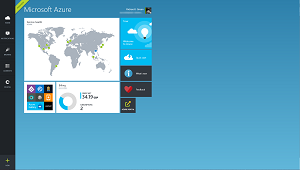
Azure Preview Portal Home

First impression when you login to the portal at the new address of https://portal.azure.com (which by the way, is loads easier to remember than https://manage.windowsazure.com) is that it takes a while to get going. You are initially shown an animation which looks like a slowed down version of a craft in Star Wars going to hyperdrive. Once this is done, the portal is very nice and responsive. I think we’re probably seeing some upfront caching or the like going on here to improve performance in the portal as a whole.

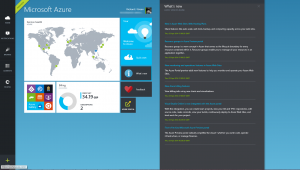
The home screen for the portal is really nice. You don’t initially see a list of all of your services in Azure as you do with the current version of the portal but that’s only two clicks away. What I do really like is the service status dashboard and the billing information against a spending limit visible directly on the home screen. How much you’re spending and whether the service is up or not are probably the two most important things to consider with cloud services so this is really great to see front and centre here.

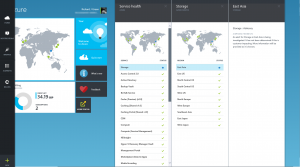
Clicking the service status map brings up a list of all of the Microsoft Azure services and then drilling into one of them shows you information about current issues, outages and future planned maintenance.

Azure Preview Portal Service Alerts

To get back to the home screen from here, you can either click the Home button in the left navigation or you can close the individual panes which have been opened. It’s interesting that the portal is a sideways scrolling site, a break from the normal up and down scrolling. Microsoft refers to these side scrolling panes as journeys where you take a journey into a feature or Azure service.

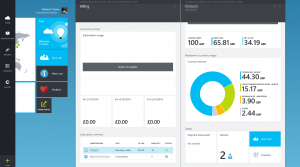
From the home page once more, we can click the billing information tile to get more detailed information. From here, we can see the current status of your bill, the remaining balance on any spending limits that you may have in place and also a cost breakdown on where you are spending all of your money. For me, the major expense is Azure Backup service which I use to backup my home Windows Server 2012 R2 Essentials server using the Microsoft Azure Backup Agent but you can also see my costs for SQL, Storage and Web Sites associated with running this site.

Azure Preview Portal Billing

On the home page we also have a What’s New tile. This is really nice as it provides a central and authorative source as to what is new in Microsoft Azure. There are constantly new features and services being introduced and for enterprises especially it’s good to know when these transition from Preview to fully supported and you can get all of this information from the What’s New journey.

Azure Preview Portal Whats New

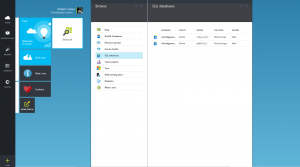
With the journeys on the home page explored, it’s time to actually look at our services running in Microsoft Azure. Clicking the Browse link on the left navigation gives us the option what we want to Browse and click the Everything link shows us the lot which we can then use to drill into a particular area. Below for example, I’ve drilled into my SQL databases service to view the two databases I have in SQL Azure running.

Azure Preview Portal Browse SQL

As the whole portal is preview right now, there isn’t access to everything that you can get from the existing and current Microsoft Azure portal so expect some bits of data or controls to be missing while they bring this portal up to full functionality and then presumably, deprecate the old portal in favour of this one.

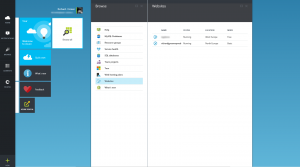
Exploring the Web Sites journey is interesting as you can see some of the work Microsoft have been doing on Web Sites really visibly in this new portal and you can see that it is clear that Microsoft are trying to take Web Sites down an avenue which attracts conventional web hosters who would have historically gone to companies like GoDaddy or Namecheap to name but two of the suppliers out there.

Azure Preview Portal Browse Web Sites

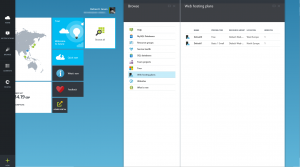
Web Sites looks as we would envision, a list of sites we have running and available in Microsoft Azure right now, but drilling into the Web Hosting Plans area shows us this new view which hints at the hoster targeted approach.

Azure Preview Portal Browse Web Hosting Plans

First up, we see a list of available Web Hosting Plans. The plans which are shown will be those for which you have Web Sites operational right now so for me, I have one site in Free mode which is a development project and the blog which is running in Basic with a Small instance. Drilling into one of these Web Hosting Plans shows us more information about that tier.

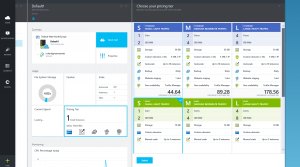
Initially, we see summary data for the tier such as the names of the sites running on that tier, an overview of features available but clicking the Pricing Tier tile shows us a complete breakdown of all of the features and compares it against all of the other tiers making it really easy to decide what features you need access to and how that correlates to a tier.

Azure Preview Portal Browse Web Hosting Plans Tier

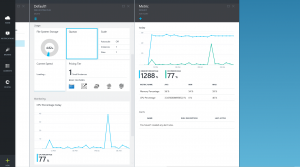
Similarly, clicking the Quotas tile shows us a detailed view on how we are consuming resource in that tier however this looks a little bit buggy to me right now as for my Basic Small instance, it is showing 1288% memory usage percentage yet in the table view below the chart, I’m showing a maximum of 59% and an average of 56%.

Azure Preview Portal Browse Web Hosting Plans Metrics

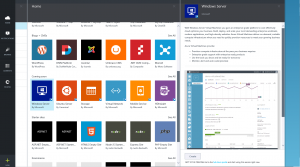
That’s covered exploring our existing services for now but what about creating new services? There is a green new button in the bottom left which launches the Microsoft Azure gallery where we can provision new services. Unlike the current Microsoft Azure portal whereby Microsoft core Azure services are available from the new link and then third-party solutions such as pre-packages WordPress sites or registration for Bing Maps API was under the Azure Gallery, everything is now under one roof.

Azure Preview Portal Gallery

An awful lot of things in this gallery right now have a little blue arrow in the corner which indicates that access to this feature or service is coming soon and as in the screenshot above, you will see that even existing Microsoft Azure services such as a Windows Server virtual machine are coming soon. This is obviously there to allow Microsoft to get some more of the under the covers functionality in the new portal online and I’d expect this gallery to change very frequently with the existing Microsoft Azure services becoming available for creation in the new preview portal.

If you want to create something which is marked as coming soon, you will need to flip back over to the existing portal however there is good chance that you will still be able to manage that service element in the new portal should you chose.

Overall, I love the look of the new portal and I can’t wait for everything to come fully online so that we can use this portal for everything instead of having to move back and forth between new and old during the transition period. It’s a really like looking and feeling site and I think it adds a fresh new air to Microsoft Azure which will hopefully bring in some more customers for Microsoft and make the platform even more successful than it already is.

Microsoft Azure Web Sites Hosting Plan Modes

Normally in Microsoft Azure (nee Windows Azure), I run my blog in Shared compute mode, however I occasionally have to scale up to Standard if I hit the compute limits for Shared in a given time period. It’s a bit naughty perhaps but I’m not built of money so I need to look after the pounds where possible.

Today, I noticed that the site popped offline whilst I was working on something, the issue being what I was doing in the back-end of WordPress generated a big load which then tripped the Shared instance resources counter. I logged into the Microsoft Azure Management Portal, ready to increase the site level to Standard to notice that the Scale options for a Web Site have now changed, a new feature in Microsoft Azure Web Sites.

Microsoft Azure Web Sites Hosting Mode

Previously, we had three options for the Scale of a website in Azure, Free, Shared and Standard. Free was a great way to develop and test a site which didn’t need a custom domain name attached, didn’t need to be able to use HTTPS or where you generally weren’t worried about the performance. Shared stepped it up a level giving you support for Custom Domain Names however HTTPS support and some of the high end features such as Endpoint Monitoring where still out of reach and reserved for Standard.

After some poking around, I haven’t yet been able to find out exactly what the pitch for Basic vs. Standard is but looking through the settings in the Web Site settings panels in Microsoft Azure, I can see that SSL is available for Basic but Web Site Backups and Endpoint Monitoring are still reserved for Standard. I’ll see what else I can find out about this update and what exactly is in and out between Basic and Standard and update the post.

It’s also interesting to note that the Microsoft Azure Pricing Calculator hasn’t yet been updated to reflect the addition of the new tier with the calculator still only offering up Free, Shared or Standard as the tier options.

Microsoft Azure Pricing Calculator Web Site Tiers

There are other new features in Microsoft Azure Web Sites that I want to talk about but I’ll save that for another post later.

Configuring a SQL Azure Sync Group TechNet Guide

Back in January, I drafted a blog post on how to configure a SQL Azure Sync Group to provide database high availability and geo distribution. I decided that actually there was so much content there, it would have been too long for a blog post so I have published it instead as a .pdf document on TechNet Gallery instead.

The great news is that the guide is now published and you download it for yourself at http://gallery.technet.microsoft.com/Configuring-a-Windows-73847ad3.

Please let me know what you think of it as this is my first publication of this format. If you have any questions, comments or have a topic request for another guide then please get in touch and we’ll see what I can do.

WordPress Database Index with SQL Azure

As part of a moving my online services between two Windows Azure subscriptions last week, I did some upgrades to the blog including moving the database to Windows Azure SQL (SQL Azure). To facilitate this, I’m using the WP DB Abstraction plugin for WordPress available from http://wordpress.org/plugins/wordpress-database-abstraction/. Using this plugin does take a bit of guts I hasten to add as it hasn’t been updated in over two years and it will prevent some plugins from functioning but for core WordPress it’s great.

After migrating the site to the new subscription I was doing some validation checking in the SQL Azure Management portal. I was querying the database for various things and I noticed that there were no indexes on any of the tables, a byproduct of the WP DB Abstraction plugin translating the native WordPress MySQL syntax into MSSQL I suspect. Luckily for me, WordPress have a great in-depth article on their Codex for the database schema, mappings for all of the primary and foreign keys and most importantly, all of the indexes.

Using the SQL Azure Management Designer, I was able to create the indexes in SQL Azure to match the WordPress MySQL specification. If you are using WP DB Abstraction for your Widows Azure Web Sites WordPress installation with SQL Azure, I strongly recommend you take a look at your own indexes to see if any exist and if not, look at all of the details on the WordPress Codex article at http://codex.wordpress.org/Database_Description for what indexes should exist.

If I get a chance in the coming days, I’ll update this post with a T-SQL snippet which you can dump into SQL Server Management Studio to create the indexes for you.

Windows Azure Website DIPR Dynamic IP Restrictions

Last week, I posted about Windows Azure Websites Always On as a means to keep your website hot and ready for guest access. Today, I’m going to cover how to make your website more secure in the fight against Denial of Service (DoS) and Distributed Denial of Service (DDoS) attacks.

DoS and DDoS attacks are becoming more and more commonplace on the internet and as a site grows more successful and out there in the public eye, the greater your chances of being attacked. If you are running your web site on Windows Azure then the good news is that you are largely already covered as Microsoft employ various security products and technologies to protect the Windows Azure environment. You can find out more about what Microsoft do to protect Azure at the Windows Azure Trust Center at http://www.windowsazure.com/en-us/support/trust-center/security/.

What is Dynamic IP Restrictions

With the above in mind regarding in-built protection in Windows Azure, you can still do more to help yourself with the help of an IIS extension called Dynamic IP Restrictions or DIPR for short. DIPR is available on the Windows Azure Web Sites platform without any plugin or module installationon your part. All you need to do as a site owner or administrator is enable it for use on your site and configure some thresholds. All of this is done through the web.config file for your site.

Configure Dynamic IP Restrictions

To access the Windows Azure Web Site web.config file, use FTP or FTPS to access your wwwroot web site path using your deployment credentials and your favourite FTP client. If you don’t know or remember these then you can view the username in use and reset the password from the Windows Azure Management Portal at https://manage.windowsazure.com.

To enable Dynamic IP Restrictions for your site, add the following lines to your web.config file.

<system.webServer>
   <security>
      <dynamicIpSecurity>
         <denyByRequestRate enabled="true" maxRequests="500" requestIntervalInMilliseconds="5000"/>
      </dynamicIpSecurity>
   </security>
</system.webServer>

The system.webServer node will already exist in your web.config file and there is a chance that the security node may exist already too so check for these and add appropriate lines in the correct place otherwise you risk bringing your site crashing down due to a bad configuration file.

With the lines installed in the file, you need to configure the denyByRequestRate node of dynamicIpSecurity with an appropriate rate limit. maxRequests determines the number of requests a given client IP address may send to the site and requestIntervalInMilliseconds determines the timeframe over which the DIPR extension for IIS will count the number of requests.

Change the Restriction Response Code

When a client breaches the threshold given, the default posture of DIPR is to present the client with a HTTP 403 Forbidden code however you can customise this with any of the following codes:

  • AbortRequest 0
  • Unauthorized 401
  • Forbidden 403
  • NotFound 404

To customise the response, amend the dyanmicIpSecurity node with the denyAction parameter as follows. Just exchange the option inside the denyAction quotation marks with the response you want to use.

<dynamicIpSecurity denyAction="AbortRequest">

Setting the rate for the maxRequests and requestIntervalInMilliseconds is the hardest part here as you need to balance security over functionality. If your site was particularly popular with one company who uses a proxy appliance to route their internet traffic then you could see a high volume of connections coming from a single public IP address which means you may need to raise your limits. Having the limit too high though means that you will be allowing potential attackers the freedom of a head-start against the site before DIPR cuts in to fend them off.

Protect an On-Premise IIS Web Server

My closing remark on this is that although I’ve spoken about DIPR with respect to Windows Azure Web Sites, you can also install this extension for IIS on Windows Server and use it to protect internal corporate sites against disgruntled employees or to protect IIS on Windows Server running in a DMZ segment to protect your on-premise hosted publicly accessible websites. You can download and install DIPR by using the Web Platform Installer (Web PI) from Microsoft at http://www.microsoft.com/web/downloads/platform.aspx.

Windows Azure Web Sites Always On

Continuing with my line of Windows Azure posts of late, I wanted to unearth a feature called Windows Azure Web Sites Always On.

Windows Azure Websites Always On

This feature is tucked away in the Configure options for a Windows Azure Web Site. The feature is only available to Standard mode web sites so you will not get this option if you are using the Free or Shared service tiers (sorry). When enabled, Windows Azure will regularly generate a simple HTTP request to the website which means for sites that are based on ASP.NET or other server-side compiling technologies, the website stays warm so that when your first visitor after a period of inactivity hits the site, they aren’t left waiting for it to compile, render and present itself.

Details of the feature are a bit scarce so I haven’t been able to determine yet exactly what the Always On request consists of. The lack of information or configuration options would suggest that it’s as simple as a HTTP GET request to the URL configured in the Site URL field for the web site. There doesn’t either seem to be any indication as to how often this request is issued. If you are already using the Monitoring Endpoints feature or if you are monitoring your web sites with System Center Operations Manager 2012 (SCOM), Global Service Monitor (GSM) for SCOM or another monitoring product then are you are essentially performing this Always On keep-alive activity.