Posts from 2015

Skype for Desktop Installation Switches

Some time ago, I was working to perform a silent installation of Skype for Desktop via a task sequence with Configuration Manager. Skype for Desktop is provided as an executable and the installation switches are pretty hidden for the most part which makes using SCCM to install it difficult.

A post on the Skype Blog at http://community.skype.com/t5/Windows-archive/Unattended-install/td-p/184628 details all of the installation switches that we can use to help with installing the client in a managed environment where we don’t want the user to be prompted to interact with the installer or we want to configure certain options such as to disable one of the browser plugins for example.

I hope this helps someone out there trying to deploy Skype for Desktop.

Azure Updates Arrive En Masse

It seems that the folks in the various Azure teams at Microsoft have been really busy since the Build conference earlier this year getting products to various states of ship and it appears that this month is the mountain when it comes to releases and announcements. I got my usual Microsoft Azure new features and pricing announcements email last night and the number of new features here and features entering GA this month is astonishing.

Azure AD Connect

First and foremost, we have Azure AD Connect entering general availability. This is the replacement to all existing versions of DirSync and the Azure AD Sync tools. Whilst the directory synchronisation feature in itself isn’t anything special to talk about, for anyone still using DirSync, this is certainly a lot nicer to interact with and operate. Additionally, we have a number of the optional features available (a number of which are still classed as preview) to make synchronising your users between on-premise and Azure Active Directory that bit more rich. Sadly, there is still no Yammer integration with this version of Azure AD Connect so you still need to run the Yammer Directory Sync tool.

Azure Key Vault

This is a new service for Azure as opposed to an update to an existing service. Key Vault provides FIP 140-2 certified HSMs in the cloud. A HSM is a Hardware Security Module, a device used to manage security keys in encryption and it commonly found in Certificate Authorities and SQL Servers. I’ve worked with a number of PKI and SQL projects and none of them have ever had technical requirements for HSMs to be in-place. I suspect this has been added to Azure as a service by the request of one or more major companies sitting on the fence over public cloud right now because they need HSMs in order to meet some kind of regulatory or certification.

Azure Application Gateway

This is another new service and one which is really quite amazing in both it’s simplicity and the features that it brings. Azure Application Gateway is essentially an application request routing engine or reverse proxy as an Azure service. It allows you to publish Azure hosted, non-Azure publicly hosted or even on-premise applications to the world. It supports SSL offload to take the key processing workload away from your servers and it can be integrated with Azure Traffic Manager to provide geographic awareness for your applications.

Where I see this being especially useful is for companies currently hosting applications on-premise that are either publicly accessible or published to allow employees or partners access to a service. By publishing applications via Azure Application Gateway instead, companies can have their applications published but without the need to break holes in their own firewalls for those incoming connections.

The pricing on Azure Application Gateway seems very reasonable to me also which is going to make it extremely popular I think.

Azure SQL Data Warehouse

While all the previous service offerings have been general availability, this one is just a limited public preview however Azure SQL Data Warehouse was one of the brand new services announced earlier this year at Build so it’s great to see it moving along. I tend not to get involved so much with large SQL data warehousing work being more of an infrastructure specialist than a data specialist however I can see how if priced suitably, this is going to be a major service of interest for some businesses who want to leverage the cost benefits of the public cloud due to the fact that Data Warehousing can be extremely expensive to properly implement on-premise. This coupled with the fact that Azure SQL Data Warehouse is going to be tightly integrated with Power BI from Office 365 as well as Azure services like Machine Learning is going to make it very easy for customers to do more with their data.

Automatically Label the OS Drive on New VMs

In my quest for private cloud (and public) nirvana, I’m always looking for ways to automate parts of the first run user experience so that as IT Pros, we can build and deliver services to users which fit the bill right out of the gate. In a previous post from earlier this year, in a post entitled Automatically Assign DVD Drive Letter VMM Private Cloud, I walked you through the process of using a PowerShell script that would run as a GUI Run Once script as part of a VMM initiated virtual machine deployment to set the DVD Drive letter.

Since I posted this article, I’ve made a couple of improvements to the environment that I wanted to share with you all and in this first post, I will cover off how to automatically label and name the OS drive on our newly deployed virtual machines. This process involves applies registry keys. As with my first post, you could achieve the same results with Group Policy, however I like all of my modifications to be applied to the local machine so that if the machine is deployed as a non-domain joined server into a DMZ or if there is an issue with the first time Group Policy gets processed, these settings still get applied but I will cover both methods here. This would also work in a multi-tenant or hosting environment where VMs may not being landing in your own domain or environment.

Add the Script to the VM Template

If you followed my previous post, you will be familiar with mounting the .vhd file for the VM Template on another server to modify the local file system. If you are unsure of this, please refer back to my original article Automatically Assign DVD Drive Letter VMM Private Cloud for guidance.

With the .vhd file mounted, we are going to add a new PowerShell script to the FirstRun folder named Set-OSDriveLabel.ps1 and it will contain the following.

# Set-OSDriveLabel.ps1
# v1.0 2nd June 2015 by Richard J Green

# Sets the OS Install Volume Label to the Value in the DriveLabel Variable
$DriveLabel = "OS"
$OSDrive = $env:SystemDrive
$OSDrive = $OSDrive.Substring(0,$OSDrive.Length-1)

New-Item -Path HKLM:\SOFTWARE\Wow6432Node\Microsoft\Windows\CurrentVersion\Explorer\DriveIcons -Name $OSDrive -Force
New-Item -Path HKLM:\SOFTWARE\Wow6432Node\Microsoft\Windows\CurrentVersion\Explorer\DriveIcons\$OSDrive -Name DefaultLabel -Force
Set-Item -Path HKLM:\SOFTWARE\Wow6432Node\Microsoft\Windows\CurrentVersion\Explorer\DriveIcons\$OSDrive\DefaultLabel -Value $DriveLabel -Force

Short and sweet, this script will detect the Windows installation drive from the PowerShell SystemDrive environment variable and set this drive letter to use the label OS as defined in the DriveLabel variable.

One important note here is that this setting is applied to the Wow6432Node on a 64-bit server. If you were applying this to a client OS that was 32-bit then you would need to remove the Wow6432Node portion of the registry key location. I find this a peculiar one given that this change effects Windows Explorer which is a 64-bit process.

With the PowerShell script saved in the FirstRun folder, we need to update the FirstRun.cmd wrapper script that invokes the containerised PowerShell scripts in the appropriate escalated manner. Simply add the following lines to the script before the clean-up section at the end.

:: Launch PowerShell and Label the OS Drive to OS
echo Set OS Drive Label to OS
PowerShell.exe -NoLogo -Sta -NoProfile -ExecutionPolicy Unrestricted -File %SystemDrive%\FirstRun\Set-OSDriveLabl.ps1

I hope this takes away another manual step from your VM build processes and brings you one step closer to nirvana. In another post coming soon, I will have instructions on how to hide some of the folders from the This PC or “My Computer” folder which don’t really belong on a server and another post to clarify the steps on creating Network Locations for the This PC folder.

Yammer Enterprise for Office 365

If you have an Office 365 subscription on any plan Small Business Essentials or above, you will be entitled to Yammer Enterprise. Yammer, if you are unaware is an enterprise social networking product that Microsoft acquired a while back and is billed to replace the social features in SharePoint Online over time. Enterprise social networking I think is like marmite and some companies promote the idea whilst others shy away from it which I think has held back adoption and therefore, Yammer isn’t as widely used as you would think, especially for a free service as part of your existing Office 365 license.

Regardless of this, in this post, I will walk you through the very simply steps to activate your Yammer Enterprise network for your Office 365 Tenant and explain some of the next steps you can take to make Yammer more integrated into your business functions and make it more functional for end-users.

Activate Your Yammer Enterprise Network

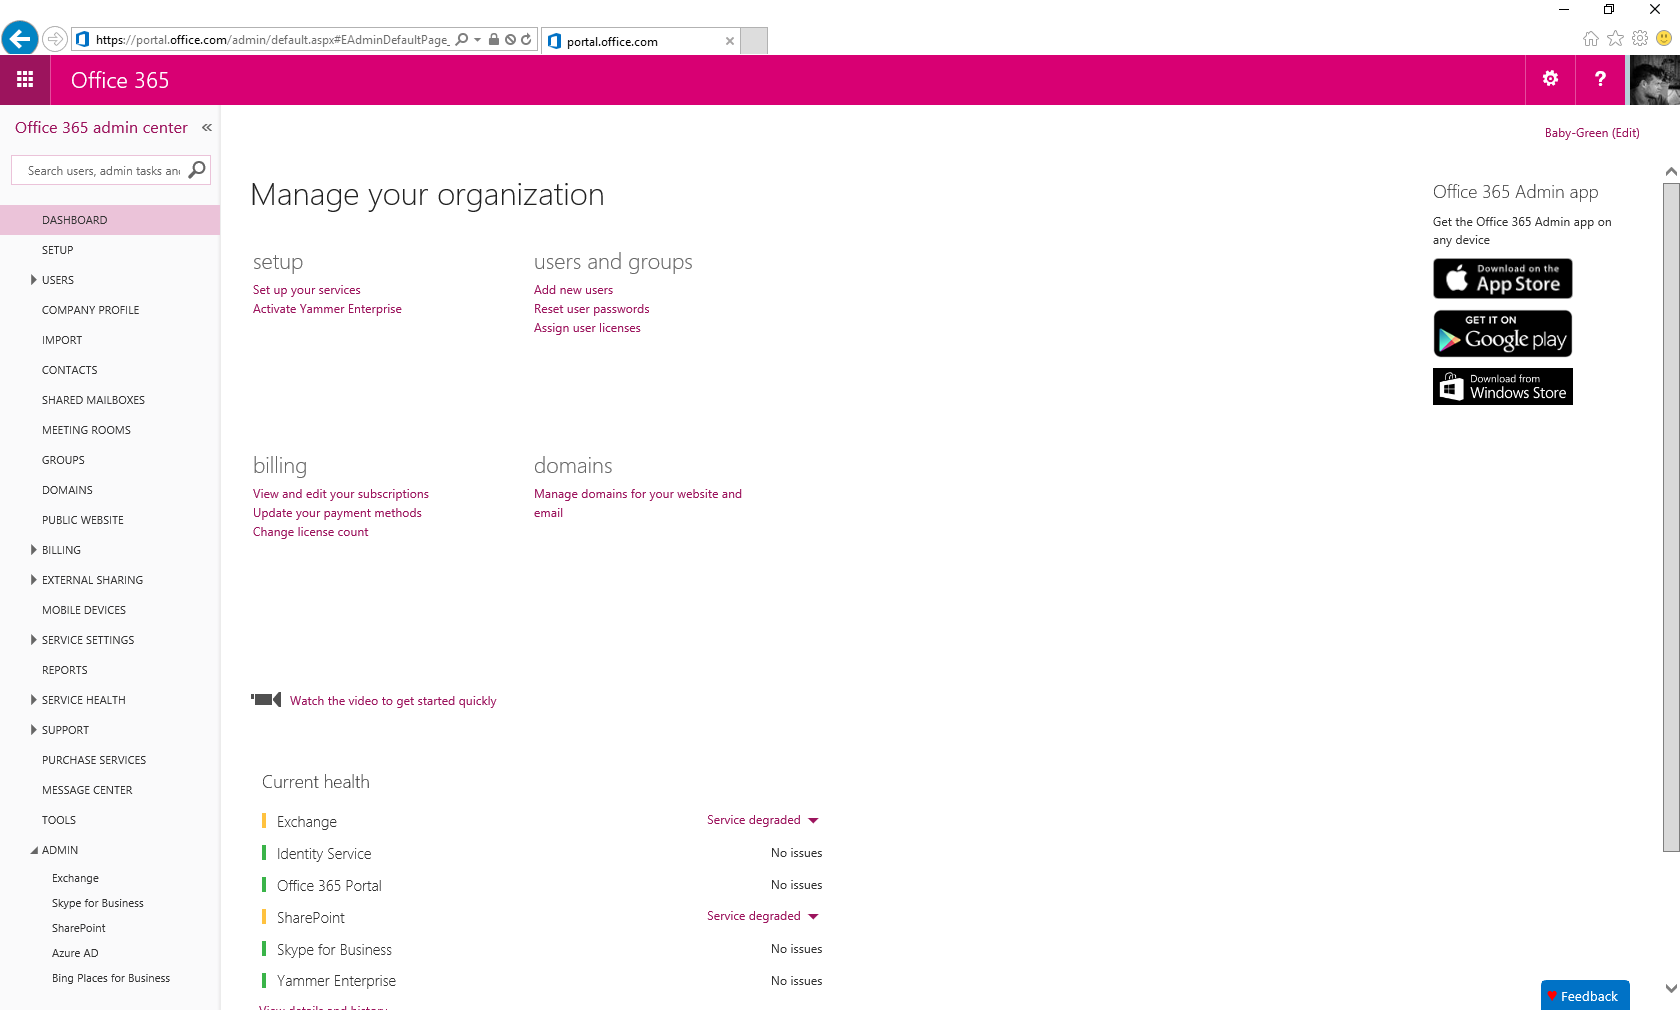
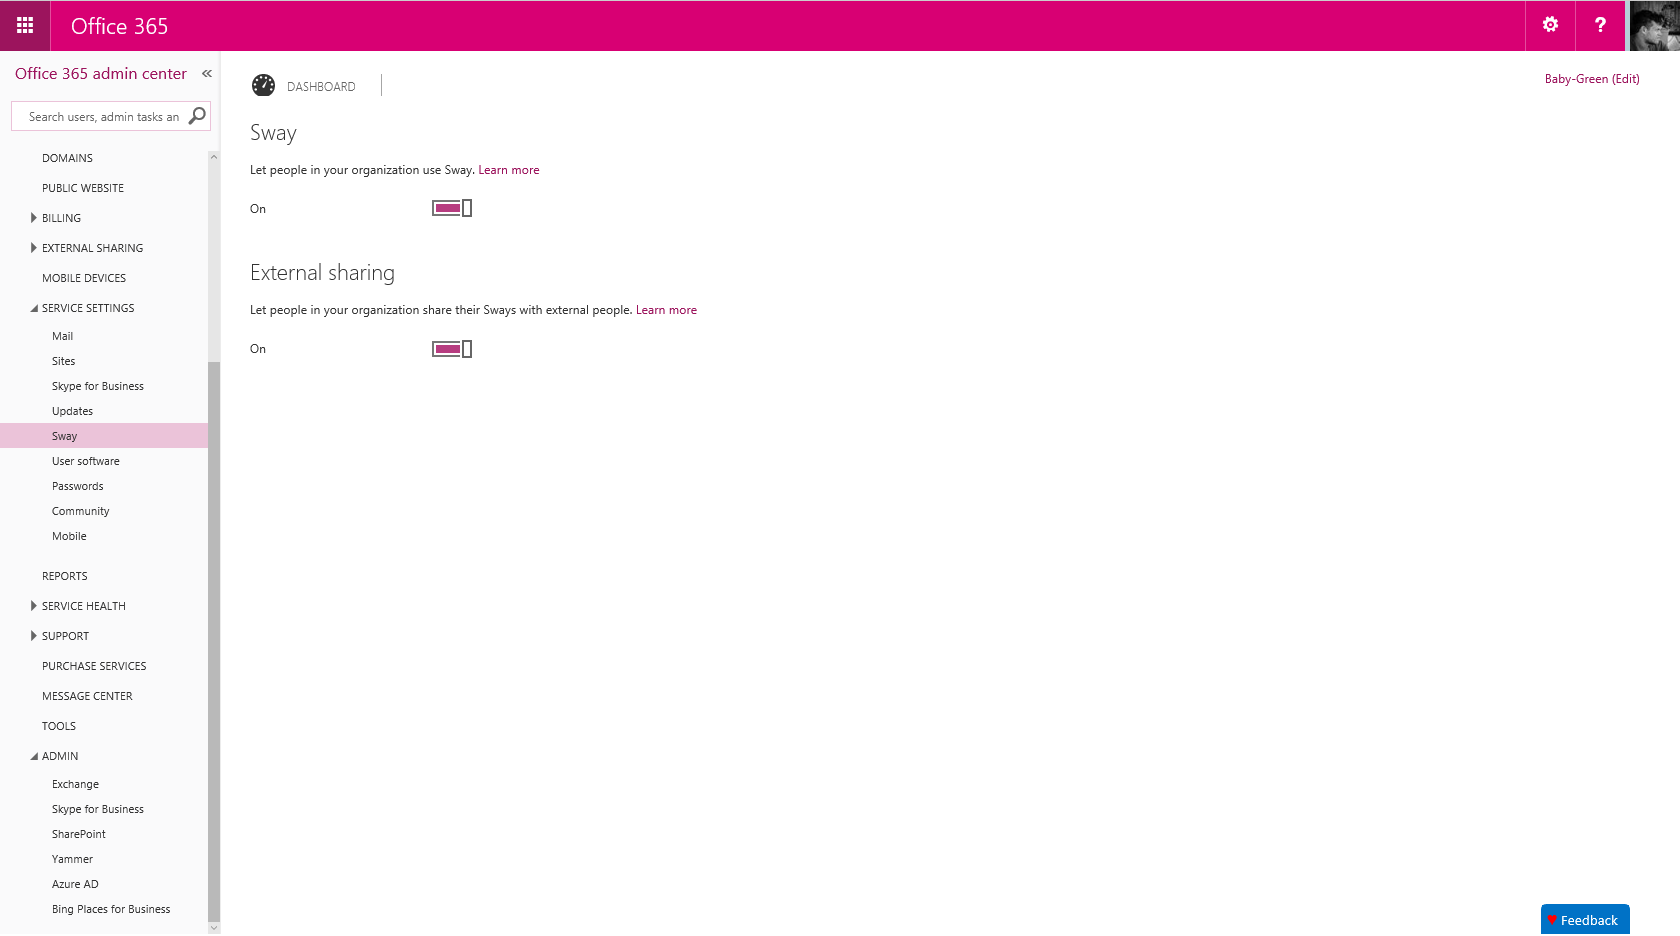
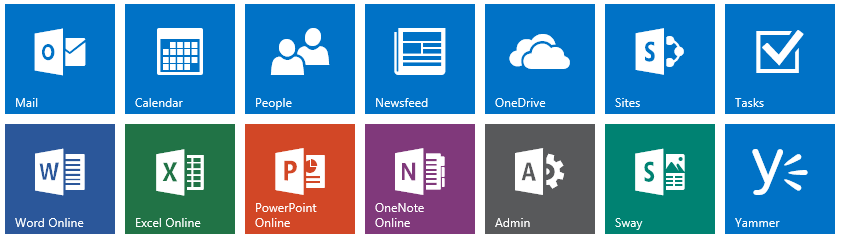
Activating the Yammer Enterprise Network is actually very simple. First, login to your Office 365 Admin Center as a Global Admin.

Office 365 Dashboard Activate Yammer

From the Dashboard presented when you login, you will have an option for Activate Yammer Enterprise under the Manage Your Organisation heading. Once you have selected this, you will be taken to the domain selection page.

Yammer Enterprise Domain Selection

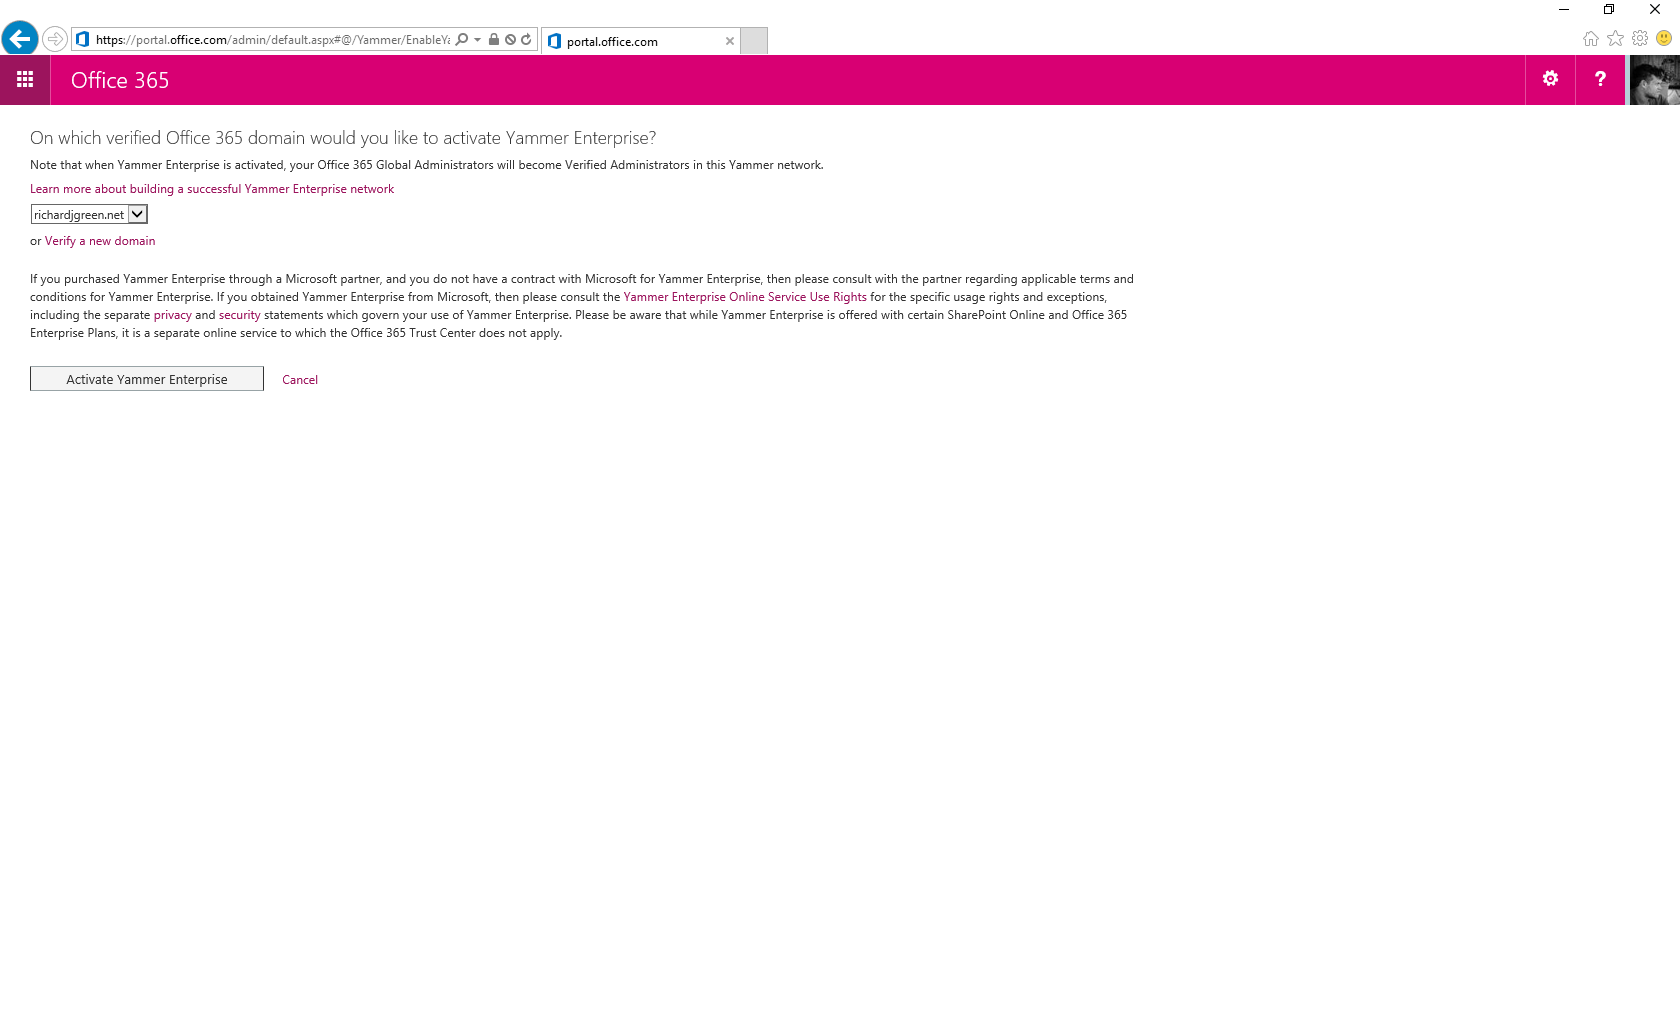
On this page, you must select which of your verified Office 365 domains you want to activate Yammer for.

Yammer is designed primarily for single domain use so if you work at an organisation which has multiple domain names such as regional domains for each country or territory that you operate in then you will need to activate your Yammer Enterprise network for one domain initially. Once you have your network setup with a single domain, you can follow the instructions on the TechNet article Combine Multiple Yammer Networks (https://technet.microsoft.com/en-us/library/dn804812(v=office.15).aspx) to contact Yammer Technical Support to add the secondary domains.

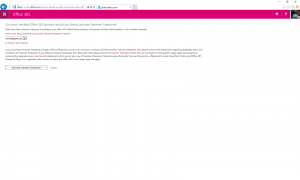
Once you have selected your domain and you select the Activate Yammer Enterprise button, after a few minutes your new Yammer network will be created.

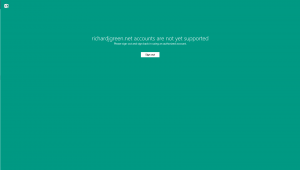
By design, Office 365 Global Admins will automatically be provisioned as Network Admins in Yammer to administer your network however I found this didn’t work as it should and I had to follow a fix I found on the Office 365 Community by adding a new Global Admin afer the network creation which did get added to Yammer and then I logged in as that user and re-added my other Global Admins manually.

Syncing Domain Users to Yammer with DSync

Whilst Yammer Enterprise is made available via your Office 365 Tenant and allows your users to use their Office 365 credentials for logging in to Yammer Enterprise (be it as a cloud user, an on-premise AD user via DirSync or AADSync or whether you have ADFS setup and configured), the user on-boarding and off-boarding processes for Yammer are distinct. What this means for your end-users is that whilst they can visit yammer.com and try and login using their Office 365 credentials, they actually need to be registered in your network first.

Microsoft provides a tool called Yammer Directory Sync or DSync which functions in a similar fashion to the DirSync or AADSync tools for Azure Active Directory. The DSync tool doesn’t sync any passwords because those are provided via Office 365 and Azure Active Directory however DSync will sync the Name, Job Title, Office, Telephone and Mobile fields of an AD object to Yammer and will provision an account for the user. Setting up Yammer DSync is outside of the scope of this post but you can find out more from the TechNet article Install Yammer Directory Sync (https://technet.microsoft.com/en-gb/library/dn799032).

Yammer Directory Sync will automatically create Yammer users in your network as new AD users are created and it will also remove users when they are deleted from AD covering off the provision and deprovision processes. As you would expect, the tool updates user attributes as they are changed in AD.

If you don’t setup Yammer Directory Sync then each of your users will need to manually register for Yammer the first time they visit the site and accounts will not be automatically deprovisioned when you remove an AD user account.

Replacing the SharePoint Newsfeed with Yammer

SharePoint Online as with all versions of SharePoint 2010 and 2013 provides the Newsfeed functionality which is designed to be your timeline of information for your companies collaboration world. The Newsfeed in SharePoint is part of a users’ My Site area however Yammer being an enterprise social network provides a better capability for newsfeed and maintaining two systems for one function is redundant. Luckily, there is an option we can change that will replace the native SharePoint Newsfeed with the Yammer service.

As a Global Admin, login to the Office 365 Admin Center and browse to your SharePoint Admin Center. From the SharePoint Admin Center, among the options, you will find a setting titled Enterprise Social Collaboration. Under this heading, change the setting from Use SharePoint Newsfeed (Default) to Use Yammer.com Service. As per the description for this setting, it can take up to 30 minutes for the setting to propagate all of the Office 365 servers so for a short period of time, some users may still be directed to their Newsfeed after this is changed.

Embedding Yammer Feeds into SharePoint

SharePoint is where your company stores its documents and data so it makes sense to have related comments and social interaction from staff in the same place. On the Yammer site, you can find out how to use Yammer Embed to incorporate Yammer Feeds and Pages into your SharePoint sites or even any HTML web site your company may have. You can find out more about Yammer Embed at https://developer.yammer.com/v1.0/docs/embed.

It’s worth noting here that there is currently, a Yammer Web App for SharePoint however this is being discontinued later this year therefore there is no point building a system using the Web App now as you will have to re-create it before not too long and it makes better sense to develop using the long-term solution now.

I hope this post sheds a bit more light on what Yammer is, how to get it and how to start using it.

Pin a File or VHD to a Storage Space Tier

In Windows Server 2012 R2, Microsoft added the ability to tier Storage Spaces such that hard disks and solid state drives where in separate tiers allowing the Storage Pool and the Storage Spaces in the pool to operate like a SAN that offers up hot block technology, automatically moving frequently accessed data up to the faster disks and less frequently accessed data down to the slower tiers.

In some circumstances, you may find that you want to pin a particular file or in the case of Hyper-V a VHD file accessed over an SMB file share to a particular tier. For example, you may want to pin the VHD file that hosts your virtual SQL Server TempDB files onto the SSD tier of your Storage Pool so that they are nice and fast. Inversely, you may want to pin data to the slow tier so that even if the Storage Pool detects the data as frequently accessed, it will never take up valuable space in your SSD tier.

In my lab, I am using Data Protection Manager (DPM) to backup my SQL databases among other things. The DPM server is a Hyper-V VM with the VHDs for the DPM server stored on a Windows Server 2012 R2 Storage Space which is accessed over SMB 3.0. As my Storage Pool consists of two tiers using SSD and spinning HDD disk, I don’t want the backup volumes to be able to ever exist on the SSD tier and storing backup data on fast disk is a waste of time (there is one caveat and that is that you may want to force the backup data onto the SSD tier in the event of a major failure in the datacentre and you are going to be doing a lot of restores over a short period of time).

To achieve pinning of files to a particular tier in the Storage Pool, we need to use the PowerShell Cmdlets for managing Storage Spaces either via PowerShell Remoting or directly on the SMB File Server hosting the files.

Setting the Desired Storage Tier

First, we need to get the name of the Storage Space, otherwise referred to as the Virtual Disk.

Get-VirtualDisk

Once we execute the Get-VirtualDisk Cmdlet, we will see a list of all of the Storage Spaces. You may have multiple in which case you need to determine which you are interested in however in my lab, there is only one. Next, we need to declare the name of our Virtual Disk in a variable.

$VD = Get-VirtualDisk -FriendlyName "VMs"

Using the Cmdlet above, we repeat Get-VirtualDisk however this time, we are setting the output for a specific Virtual Disk named VMs to the $VD variable so that we can re-use it later on.

Set-FileStorageTier -FilePath "V:\VMs\RJGDPM1\RJGDPM1 DPM Pool 1.vhdx" -DesiredStorageTier ($VD | Get-StorageTier -MediaType HDD)

With our Virtual Disk in a variable, we can now set the desired storage tier for a file. Use the Set-FileStorageTier Cmdlet above to achieve this. In my example, I am setting the DPM Pool disk VHDX file such that it will exist only on the hard disk slow disk tier. If you wanted to achieve the opposite and bind a file to the SSD tier then you would simply change the HDD value of the -MediaType parameter to SSD.

Optimize Files to the Desired Tier

Once you have run the Cmdlets above, your Storage Space is now ready and set to pin the file to the tier that you specified however this does not automatically move the files. The files are not moved until the next time a Tier Optimize job runs however we can force this if you want to move the file in a hurry or if you want to move the file to the appropriate tier before you start loading it with data (such as a new blank VHD file).

Optimize-Volume -DriveLetter V -TierOptimize

With the above, we use the Optimize-Volume Cmdlet against the drive letter on which the Storage Space and the files exist. This will start the process of evaluating file tier placement against the heat of a file and move files up and down through the tiers as required. This will also execute any placement rules which have been hard set as we did above. If you happened to be physically looking at your server at this point, you would likely see a flurry of disk activity as files get moved up and down through the drive tiers.

Once the optimization has finished, we can verify that the files are in the appropriate places using the following Cmdlet.

Get-FileStorageTier -VolumeDriveLetter V | FL

This Cmdlet will report any files which have been manually pinned to a particular Storage Space disk tier and will report their placement status. In my example, I have only the one DPM Storage Pool disk pinned to the HDD tier and this file is reporting as “Completely on tier” after the successful completion of the Tier Optimize job.

Azure Web App SSL Cipher Suite Changes

Earlier this week, I got an email form the Azure Team to announce that as part of security improvements to the Azure App Service Web Apps (formerly known as Azure Websites) they will be making changes to the supported SSL cipher suites with the changes taking effect as of July 18th 2015. Additionally, Microsoft have provided a test site that is running the new suite of ciphers at https://testsslclient.trafficmanager.net.

I decided to take the test site for a drive over on the Qualys SSL Labs tool the SSL Server Tester. I’ve been using this site for a long time now as a means to test SSL enabled websites as it allows you to verify the whole configuration in one place including the certificate, protocols and cipher suites. I ran the test site through Qualys SSL Server Tester as well as this blog which is running on a current generation Azure Web App site to compare the results.

It’s important to understand the difference between a Web App and a Cloud Service before we get much further into this too. Some people will be looking at this post and thinking why don’t I just enable or disable the relevant protocols or ciphers within my application however herein lies the difference between the Web App and a Cloud Service. The Web App in web hosting terms is a website running on a multi-instance web server. A Cloud Service is a dedicated instance that you are responsible for so allow you more control but at the expense of additional complexity. With a Cloud Service, we can configure the ciphers and protocols as part of the service definition which runs in the form of a start-up script. With a Web App, we don’t have any of these levels of deep system level access so have to accept what we are given.

richardjgreen.net SSL Test Result

Running the test on this site, richardjgreen.net I get the same result I have achieved for some time, a overall score of Grade B. The grade in this instance is limited to B because the server is allowing weak RC4 ciphers as well as a Triple DES (3DES) cipher. Additionally, the current site does not support Forward Secrecy, sometimes seen at Perfect Forward Secrecy or PFS for short. The final message stating that the site only works with browsers supporting Server Name Indication or SNI for short is not a security failure. This is due to the fact that I have opted to only support SSL for SNI browsers on my Azure Web App instance.

testsslclient SSL Test Result

Running the test again against the test site, we can see that the result has improved to an overall score of Grade A. This is achieved because support for the weak RC4 ciphers has been dropped along with the Tripe DES (3DES) cipher. Additionally, the cipher suites have been re-ordered slightly and a new SHA384 3072 RSA key cipher has been added at the top of the cipher suite order meaning that this cipher should be the most preferable to use.

Looking at some of the details for the test, I also appears that the Web App instances are being built now on Windows Server 2012 R2 although how long this has may have been the case, I do not know? In the HTTP Server Signature for the SSL Server Tester results, richardjgreen.net shows Microsoft-IIS/8.0 whereas the Microsoft test site shows Microsoft-IIS/8.5.

I look forward to re-running the SSL Server Tester after the 18th July and seeing if the test result for my own site is as good as the test site shown.

Hiding Users from the Essentials Dashboard

I use Windows Server 2012 R2 Essentials at home as my server and one problem that I have lived with for a long time is that I have a number of service accounts created to run some applications that I run centrally on the server itself. A problem with this is that these users will appear on the Essentials Dashboard which looks a bit unsightly. This isn’t something which has particularly bothered me but I accidently stumbled this morning on a blog post by Robert Pearman. His original post is at http://titlerequired.com/2014/09/18/quick-fix-hide-users-from-essentials-2012-r2-dashboard/ in which he provides the PowerShell Cmdlets for hiding users from the Dashboard.

In his example, he is using it to hide Exchange service accounts but the same principle applies. The first example below will hide the account for the service account SRV_SomeApplication.

Set-WssUserDashboardVisibility SRV_SomeApplication -Hidden

Replacing the -Hidden parameter with -Visible will unhide the account and allow it to be shown on the Dashboard once again.

As I have a number of service accounts and we all love PowerShell scripts for the sake of them, I decided to hide all my accounts in one go as I use a standard naming syntax for my service accounts. Sadly, the Wss Cmdlets don’t seem to support data received via the pipeline so whilst we would normally complete this as a one-liner by piping the get command into the related set command, this doesn’t work so we have to use a quick ForEach loop to achieve the same result.

$Users = Get-WssUser | Where-Object {$_.UserName -Like 'SRV_*'}
ForEach ($User in $Users)
{
   Set-WssUserDashboardVisibility $User.UserName -Hidden
}


Administering Sway in the Office 365 Admin Center

With the release of Sway as I discussed in my earlier post today, Sway for Office 365 and What It Means for PowerPoint there is another application in Office 365 than now can be managed by tenant administrators.

For some organisations, they may want to stop users from using Sway or they may be happy for people to use Sway but don’t want anything authored in it to be shared outside of their organisation. To this end, we have some new administrative controls in the Office 365 Admin Center for managing Sway.

After logging in to the Office 365 Admin Center as a Global Administrator, expand the Service Settings node in the menu and then select the Sway option.

Office 365 Sway Admin

As you can see in the screenshot above, we don’t have many options right now but remember that Sway is a preview product and with more features destined for the product there I suspect will be more options for management over time also.

As of today, we have two management options. Firstly, we can completely disable Sway if we don’t want users to be able to access it. Changing this setting does not remove the Sway icon from the Office 365 App Launcher.

As you can see from the first screenshot below, when the Let people in your organisation use Sway option is disabled, users can still log in to Sway however if they try to access the My Sways menu or do anything, they will be shown the accounts are not yet supported error message.

The second option we have is to disable sharing outside of the organisation. When this option is selected, users will still be able to login to Sway and they will still be able to select the share with public option on their Sways however trying to access a Sway link as a user outside of the organisation, you will be shown an unauthorised access page as shown in the second image below.

Office 365 Sway Disabled  Office 365 Sway Unauthorised

Sway for Office 365 and What It Means for PowerPoint

This week, the newest product for Office 365, Sway has been made public and is rolling its way out to Office 365 Tenants around the world.

I first noticed Sway had appeared in my tenant last night although it could have been earlier. Users can access Sway from their Office 365 Apps with the green Sway icon as shown below and they can login using their normal Office 365 credentials.

Office 365 Apps with Sway

In addition to the web interface for Sway, there are currently Sway apps available for iOS and Android and in typical Microsoft fashion of late, not for Windows Phone, something that continues to frustrate me that Microsoft leave their own platform to last to get access to apps and features.

So What is Sway?

Well that is a good question and in reality, it is a bit of whatever you really want it to be. I think of Sway as a modern cross-over between OneNote and PowerPoint, allowing you to record and collate information from various sources such as images and text, social links to Twitter, Facebook or YouTube like you can use OneNote for casual note taking and collation of text and images however with Sway, it presents it in a beautiful reflowing format that makes your content look great across a multitude of devices and form factors including the ability to automatically reflow the content for the screen resolution and orientation for you. This is where I liken it to PowerPoint in the sense that it is designed to present and portray your content in a way that people will be drawn to it and want to read it or at least that is the intention with slide decks right?

Sway has been designed for a mobile and cloud first world such that you can not only view but also author a Sway using just your web browser making it ubiquitous across platforms. The mobile apps are there in order to enhance the experience and make it easier to author Sways from portable devices.

I haven’t really played with it myself much right now but I’ve watched a few videos on it over on Channel 9 and it certainly does produce nice aesthetically pleasing output but I think that the usual rule of garbage in, garbage out will still apply. Yes, if you provide Sway with garbage input it will make that garbage look nice but it will still be garbage. I think that Sways will be best suited to those who can make the most of a host of information be it text, images or multimedia from a range of sources because Sways consisting of just plain text won’t be very engaging.

The PowerPoint Replacement

What interests me with Sway is how it could potentially be used? We’ve all seen far too many dull PowerPoint decks that make us want to either play Candy Crush on our phones instead or simply roll over and sleep so I would be interested to see how in the real world, with real information to convey, Sway could be used as a replacement to PowerPoint to deliver an engaging presentation.

I tested this theory earlier today using my Logitech R400 slide clicker that I bought for driving PowerPoint decks hands-off and to my surprise, it works really well with Sway, advancing through the Sway as you would expect it to so Microsoft have done a great job of linking Sway controls to the mouse click events that the clickers commonly use for advancing and rewinding PowerPoint slides. If we could just bring some of the multi-authoring capabilities from Office to Sway so that multiple people in an organisation could work on a Sway together that for me would seal the deal.

What I would like to see though, to make this truly possible for a mass market is two things. Firstly, I think that there needs to be some kind of offline mode for Sway so that I can download a Sway that I have created into a single file package or a HTML5 local cache so that I can launch from my laptop without connectivity because we all know that when delivering customer or board room presentations, you can’t always be sure that there will be internet connectivity to access Sway online.

Secondly, there needs to be some kind of presentation mode in Sway.

Right now, we have an option in the toolbar at the top for Preview which puts the Sway into a chromeless view port and I can hit F11 in Internet Explorer to make that full screen which gives the impression of a presentation however there are a few problems I see with Preview mode like this today. For one, the Sway logo is shown in the upper left corner when you are at the start of the Sway which I don’t want to see on my slide decks along with the fact that the forward and back controls are permanently visible in the lower right corner. The biggest problem though is that most users won’t know that F11 is the full-screen view shortcut for Internet Explorer and Project Spartan or Microsoft Edge as we should call it doesn’t even have a proper full-screen mode right now and I definitely don’t want to see a presentation within the Internet Explorer or Microsoft Edge window.

I genuinely think that with the right introduction of multi-authoring tools and a fully fledged presentation mode, Sway could be the death of PowerPoint as we know it. I think Sway has a lot of potential and I really look forward to seeing what Microsoft do with it once it’s an official product and out of preview.

Windows 10 Build 10122

As we know, I’ve been running the Windows 10 Technical Previews on my daily driver laptop, a Dell Latitude E7440 provided by work since the first builds and there have been moments of greatness as well as moments of sadness.

The defining moment of sadness came with Build 10049 when the Cisco AnyConnect VPN client ceased to work due to stack changes Microsoft were making to the networking. It’s understandable that changes like this would occur but it was an inconvenience too. I resorted to enabling the Hyper-V role on my laptop and running a Windows 8.1 virtual machine so that I could get to my corporate resources.

I reached out to Cisco on Twitter at the time and they responded that they were aware of the issue and they were working with Microsoft on it. Fast forward to present time and I installed the update to move to Build 10122 last night at home after Windows Update prompted me that the update was available for download whilst in the office yesterday.

Cisco got back in touch with me last night with the following response.

The fact that Build 10122 allows VPN clients to function against is obviously positive news but I wasn’t going to build a-fresh with an unofficial .iso built from the .esd file download in part because I don’t want to have to reinstall and re-configure all my applications but also because there are threads circulating online that Windows 10 will fail to activate if it was built using an unofficial media.

You can probably therefore imagine my surprise when after doing the upgrade, I found that the Cisco AnyConnect client in fact was actually working and I responded to Cisco accordingly.

Given that their initial statement was that this would require a fresh install to work, I have no doubt that I could be in an edge case and that some people may still find this to be now working however I want to point out that I hacked or modified nothing to make this work. I didn’t previously have AnyConnect installed due to it not working so this was a clean install of the AnyConnect 3.1.05182 client package.

Although this post largely centres on my relief that VPN is now working, I am having an issue with Cortana right now where she doesn’t want to acknowledge the UK as a functioning region even though I have all the relevant language and speech packs for en-GB installed. Working from home today, when I connected my laptop to my Lenovo USB 3.0 Dock, I also found that ports on the dock weren’t detected the first time around. I had to connect and disconnect a couple of times before the Ethernet and DisplayPort connections for my screens were detected but it is all working okay now.

All in all, I’m pretty happy with Build 10122 thus far and it seems like we are slowly working towards a solid build for RTM. If only the same could be said for the current crop of Windows 10 Phone builds.