System Center

All posts concerning the System Center suite including but not limited to Configuration Manager, Operations Manager, Virtual Machine Manager, Service Manager, Data Protection Manager and Orchestrator. Quite often, posts relating to Hyper-V will crop up here due to the link with Virtual Machine Manager.

SCCM OSD Failed Setup Could Not Configure One or More Components

Last week I got asked to look at an issue where a new model of laptop was failing to deploy using a Configuration Manager Operating System Deployment Task Sequence. We knew that the environment was good as other machines were able to complete the task sequence without any issues and the first thought was that it could be a driver issue.

Initially I was sceptical of it being a driver issue as when we see problems with machines completing operating system deployment, problems with drivers normally fall into the category of silent fail whereby the driver is missing all together and we end up with the yellow exclamation mark in Device Manager or the task sequence fails because the driver missing or problematic is related to network or storage and blocks the task sequence from completing.

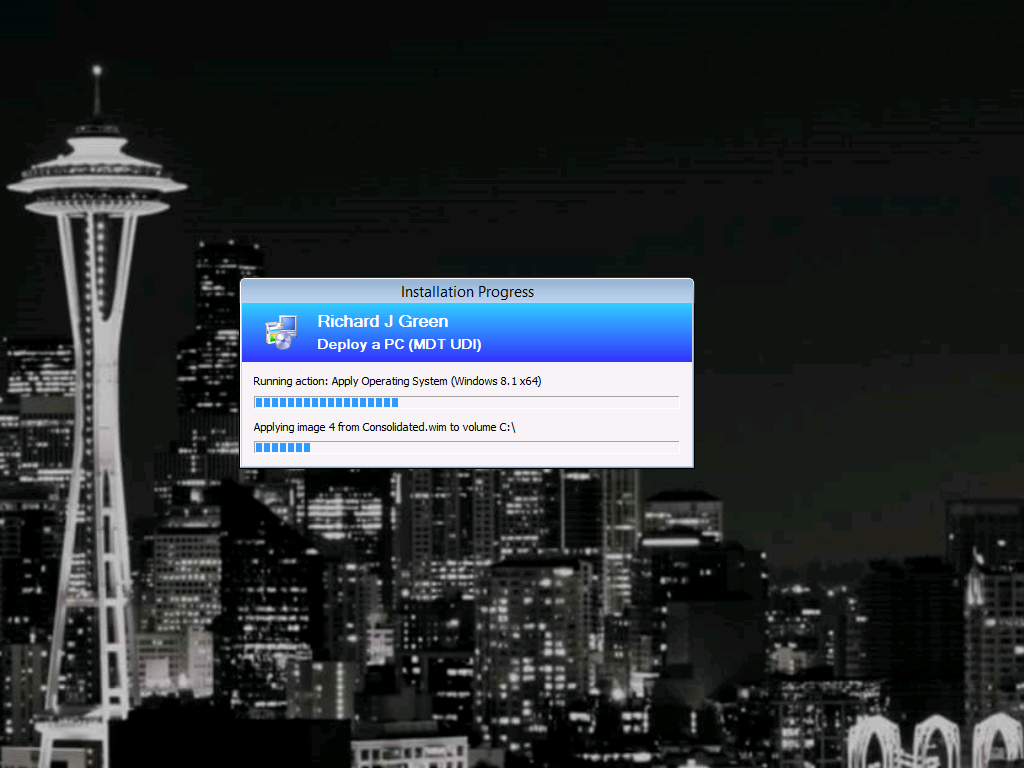
In this instance however, we knew that the problem was specific to this model. Given that we are failing in the Windows Setup portion of the task sequence, the usual smsts.log file is of no help because the Configuration task sequence has not yet been re-initialized after the reboot at the Setup Windows and ConfigMgr step. in this instance, we need to refer to the setuperr.log and the setupact.log in the Panther directory which you will find in the Windows installation directory. This is where errors and actions relating to Windows Setup live as opposed to the normal smsts.log file.

We rebooted the machine back into WinPE to allow us to open the log file with visual Notepad and began reading the file. Sure enough, we hit an error and the code given was 0x80004005. Looking at the activity either side of this, we can see that the machine is busy at work with the CBS (Component Based Servicing) engine and is initializing and terminating driver operations so we know that something has happened to a driver to cause this problem.

At this point, we had nothing more to go on. Two weeks’ ago, I had a similar issue with another customer whereby the issue was clearly logged to the setuperr.log file and the problem in that instance was an update we had added to the image with Offline Servicing required .NET Framework 4.5 to be present on the machine however Dism didn’t know to check that so we simply removed the update but here, we have no such helpful fault information.

Given that this was a new machine and given that we are deploying Windows 7, I had a thought? What if these drivers being applied require the User or Kernel Mode Driver Framework 1.11 updates that were released for Windows 7 some time ago?

This theory was easy to check. I mounted the Windows 7 .wim file on our SCCM server and then used the Get-Packages switch for Dism to list the installed updated in the image. Sure enough, User-Mode Driver Framework 1.11 (KB2685813) and Kernel-Mode Driver Framework 1.11 (KB2685811) were both absent from the list. I downloaded the updates from the Microsoft Download Center and Offline Serviced the Windows 7 image with the updates and commited the changed back into the .wim file.

After reloading the image in the Configuration Manager Administration Console and updating the .wim file package on the Distribution Points we re-ran the task sequence and by-jove, the machine completed the task sequence with no dramas.

For background reading, the User-Mode and Kernel-Mode Driver Framework 1.11 update is required to install any driver file which was written using the Windows 8 or Windows 8.1 Driver Kit. What I have yet to be able to determine is if there is a way of checking a driver .inf file to determine the version of the Driver Framework required. If there had been a way to determine this, Configuration Manager administrators around the world may rejoice a little so if you do know of a way to check this, please let me know as I would be interested to hear. This would have not been an issue had the reference images been patched with the latest (or at least some) Windows Updates however in this case, I was not so lucky.

Setting Up System Center Update Publisher

In my earlier post Preparing Certificates and GPOs for System Center Update Publisher, I showed you how you can prepare your environment with the appropriate certificate and Group Policy Object to support a System Center Update Publisher installation. With all of this installed and configured, the time is upon us to now install and configure System Center Update Publisher.

I am not going to go through the installation process for SCUP here because it is literally a Next, Next, Finish installation. What I will tell you though is that the latest version of SCUP is 2011 and you can download it from http://www.microsoft.com/en-gb/download/details.aspx?id=11940. The steps in this post can be applied to Configuration Manager 2007 or Configuration Manager 2012 and 2012 R2 but all of my screenshots for the Configuration Manager side of things will be in SCCM 2012 R2.

Configure SCUP Options

Once you have got SCUP installed, you want to open the console, ensuring that you use the Run As Administrator option. If you don’t elevate the console when you launch it, a number of the options and settings will prevent you from changing them. Once open, click the blue icon in the first position on the Ribbon and select Options to get to the settings.

SCUP Configure WSUS Server

First, we want to configure the WSUS Server settings tab. On this tab, you can either specify the hostname for a remote WSUS server or if you are running the SCUP console locally on your WSUS server you can select the option for Connect to a Local Update Server. An important note here is that if you are connecting to a remote WSUS server, the connection must be over SSL on either Port 443 or Port 8531 in order to be able to configure the Signing Certificate settings.

Once you have specified the server, select the Browse button in the Signing Certificate area and locate the .pfx file that has the exported Code Signing certificate including the private key that was exported in the Preparing Certificates and GPOs for System Center Update Publisher post. Once you have located the file and the path is shown in the field, select the Create button and this will publish the certificate into WSUS. You will be prompted to enter the password for the .pfx file at this point.

SCUP Configure SCCM Server

With the WSUS settings configured, we now need to head to the ConfigMgr Server tab. Here, specify whether to connect to a local Configuration Manager server if you are running the SCUP console on your Primary Site Server, otherwise enter the remote server name.

In the fields in the lower part of the screen, you can specify the behaviour of SCUP for transitioning updates between Metadata only and Full Content publishing status according to the required client count. In a nutshell, you can have SCUP publish only the metadata for an update into SCCM to allow you to determine if clients require the update. Once a defined number of clients report the update as required, SCUP will change the status of the update to Full Content and will download the files such as .msp or .exe files for the update.

Adding Catalogs to SCUP

SCUP works by using catalogs which are lists of updates published by manufacturers and included in these catalogs are the update definitions which are called detectoids, working to determine if a client meets the requirements for an update as well as defining the URL where SCUP can download the update from.

In the SCUP console, select the Catalogs button from the left navigation and then hit the Add Catalogs button from the Ribbon.

SCUP Add Catalogs

After clicking the Add Catalogs button, you will be presented with the list of partner catalogs supported by SCUP. These are out of the box and are at no cost to use. To my mind, the Adobe Reader and Adobe Flash Player are the most important. As you can see from the screenshot, I have added these two catalogs from the list of partner catalogs to include in my SCUP catalogs to be used.

Once you have added catalogs to SCUP, we aren’t quite finished as that only adds them to the list of catalogs that can be used however it does not automatically start getting update information. Now, we need to Import the Catalogs. Select the Import button from the Ribbon to access the Import Software Updates Catalog Wizard and here, select one, some or all of the catalogs you just added. Doing this may take a few moments and you might receive a security warning asking you to accept some certificates in the process so go ahead and allow this.

Publishing Updates from SCUP

With the update catalogs added to SCUP and the updates in those catalogs imported, now it is time to look at some actual updates. Head over to the Updates view in the console with the button in the lower-left corner. and expand one of the folders to view a subset of the updates.

SCUP Updates List

Here we can see the name of the updates, if there are any relevant article IDs or CVEs that they address as well as the date the update was released and whether or not it is expired. As you can see for Adobe Flash Player, many of the updates are expired because they have been superseded by later updates. Highlight an update that has not been superseded and select the Publish button in the Ribbon. Click through the wizard to download the update files if required and the update will be published into WSUS ready for SCCM to use.

Configuring SCCM Software Update Point Products

With the updates now published into WSUS for Configuration Manager use, we need to make sure that Configuration Manager will be able to detect the updates. As part of installing and configuring Configuration Manager you will have setup the products and classifications for which you want to download updates and we need to add to this the products that we just published with SCUP.

In the Configuration Manager Administration Console, navigate to the Administration page and then expand the Site Configuration followed by the Sites view. Right-click on your site and then select the Configure Site Components menu item followed by Software Update Point.

SCCM SUP Products

As you can see in the screenshot above, after publishing the Adobe updates into WSUS, there is now some additional products listed for Adobe Systems Inc including Flash Player and Reader. There is also a new product called Local Publisher which is the product SCUP updates for any updates you create manually. Check all of the new products you want to be able to deploy to clients and then save the changes to the Software Update Point role.

Viewing the SCUP Updates in SCCM

SCCM Adobe Updates Available

With the updates now published to WSUS for Configuration Manager and with Configuration Manager’s SUP role configured to accept updates for these products we’re all set. You can either wait for the WSUS server to perform a scheduled synchronisation or you can force it from the Software Updates area of the Software Library page in the console. Once a synchronisation has occurred Configuration Manager will be able to list the new updates for the new products.

As you can see in the screenshot above, I used a criteria to filter the search results for Bulletin ID contains APSB which is the prefix Adobe uses for all of their security updates much like Microsoft use KB to prefix their updates. I can now follow the normal process of downloading the updates into Deployment Packages and approving the updates for distribution to collections.


Preparing Certificates and GPOs for System Center Update Publisher

If you are using Configuration Manager to manage and patch your client estate then you already know that it’s great to have your Software Updates in the same console as your Application Delivery and the way in which Configuration Manager 2012 R2 manages Software Updates is a big leap on usability over Configuration Manager 2007 however the missing piece of the puzzle for many is managing non-Microsoft updates and for that, we need to enlist the help of a free product from Microsoft called System Center Update Publisher.

Before we start anything with Configuration Manager, WSUS or SCUP however, we do have the small matter of prerequisites to cover off and in this case it requires a certificate and a Group Policy setting or two. The certificate we are interested in is a Code Signing certificate which unless you are familiar with signing PowerShell scripts that you author, you may not have come across previously and your internal CA may not be setup to issue. You can buy these certificates for Code Signing from an external third-party CA if you wish but it is easiest and best done internally as after all, the code you are going to be signing is for updates to your internal clients.

Creating the Code Signing Certificate Template

On your Certificate Authority, we need to configure it to issue a Code Signing certificate. You can either use the native Code Signing template or you can create a custom template just for SCUP so that you can limit the scope of the certificate template to selected users or a group of users accordingly. If you want to create a new template then duplicate the existing Code Signing certificate for the purpose.

Once you have decided on the template to use, configure the CA to issue the certificate. In my lab, my template is called SCUP Code Signing and the security on the template limits users in an Active Directory Group called SCUP Code Signing Users to being able to Enroll the certificate which prevents users, malicious or otherwise from requesting the certificate.

SCUP Code Signing CA Template

Request the Code Signing Certificate

Once you have configured everything on the CA, you need to request a certificate based on this template. Using the Certificates MMC snap-in for your user account, you can request to enrol the certificate from your Active Directory Enrollment Policy.

SCUP Code Signing Certificate Request

If you based your new Certificate Template on the Code Signing template or you used the Code Signing template, you don’t need to enter additional information and the request will be built from Active Directory user attributes. Once you have created the certificate, you need to export it twice. For the first export, export the certificate only in .cer format and do not export the private key. This portion of the certificate will be used in the Group Policy Object shortly. The second export is required to be in .pfx format and include the private key and is used in SCUP for configuring it once installed.

Configure the Trusted Publishers Group Policy Setting

Once you have issued the certificate and you have exported it twice; once as a .cer file and once as a .pfx file, we need to configure the Group Policy for the Trusted Publishers. Put simply, in order for your client PCs to install updates that are not signed by Microsoft, the clients need to trust the updates. In order for the updates to be trusted, they need to be signed with a certificate that the clients trust. Having a certificate from your internal CA isn’t enough for this though. Once you have a certificate, a client will trust it as it is from a Trusted Root Certification Authority but it will not be trusted for code signing unless added to the appropriate certificate store.

Using ether a new Group Policy Object or an existing object which contains your other Certificate Services related settings, we need to add the .cer certificate exported earlier to the policy.

Trusted Publishers GPO Setting

Within the Group Policy Object, expand the Computer Configuration folder and then drill into Security Settings followed by Public Key Policies. Within the Public Key Policies folder, open the Trusted Publishers folder. In here, you need to import the Code Signing certificate .cer file that was previously exported. Doing this allows your clients to trust updates signed with this certificate for the publishing of software and applications.

Make sure you use the .cer export and not the .pfx export here as we only want the clients to have and trust the public key portion of the certificate. Distributing the .pfx would give these clients the private key also and that would be bad to have sent throughout the entire environment on every machine linked with the GPO.

Next, we need to change one setting in relation to the Windows Update Agent on the clients. In the same GPO or in another GPO if you have one dedicated to Windows Update related settings, navigate to Computer Configuration, Administrative Templates, Windows Components, Windows Update. Here, you need to change the status of the Allow signed updates from an intranet Microsoft update service location setting from Not Configured to Enabled. This second setting allows the Windows Update Agent to actually detect and download updates from your WSUS and SCCM environment if they are not signed by Microsoft and this setting is paired with the Trusted Publisher certificate above to make non-Microsoft updates trusted on the client.

With these all the above completed, you are now set and ready to deploy System Center Update Publisher and a follow-up post I will be publishing soon will cover the SCUP installation and setup.

Automatically Select a Configuration Manager Task Sequence

With Configuration Manager, we have a great amount of power and control over how we deploy computers using Task Sequences. Many people go to great lengths to make their operating system deployment experience a great one be it for end-users with User Driven Installation or for their support technicians driving the builds instead. One way which we can streamline the process is to use a consolidated task sequence which handles all of our various operating systems, languages, drivers and applications in a single task sequence with intelligence.

If you have gone to the great lengths to make this happen in your environment, you may be left with a sinking feeling that everytime you PXE Boot or USB Media Boot a client to deploy, you still have to select a task sequence to run even though you only have one as shown in the sample below.

Select TS Task Sequence Wizard

Luckily, we have a solution to this and a way to allow us to skip the Task Sequence Selection wizard and automatically enter our one task sequence to rule them all and it is done using Prestart Commands on our Boot Images in Configuration Manager. You don’t need MDT or any other fancy software integration with Configuration Manager to do this as it is done using the default boot images.

To start, we need to know the Deployment ID for the Task Sequence. This is not to be confused with the Package ID. The Deployment ID is the unique ID assigned to a single instance of the task sequence deployed to a collection.

We can get the Deployment ID for the Task Sequence by navigating to the Software Library portion of the Configuration Manager Administration Console and then expanding Operating Systems followed by Task Sequences and then locate your sequence from any folder structure you may have created. With the Task Sequence selected, the lower half of the screen will show the summary properties for it. Click the Deployments tab at the bottom here to see where your Task Sequence is deployed, in my example, to the All Systems collection.

In this area, right-click on the column titles and add the Deployment ID column to the view. This is the value we need.

Task Sequence Deployment ID

With this value in hand, we now need to create a very simple VBScript file. I store this file in a directory called OSD Prestart Files on my Primary Site Server but where you store it is up to you. Create a VBScript with the following contents.

Set DefaultOSDTS = CreateObject("Microsoft.SMS.TSEnvironment")
DefaultOSDTS("SMSPreferredAdvertID") = "RJG20008"

In your case, you will need to change the value of DefaultOSDTS to the Deployment ID shown in your console. My Deployment ID was RJG20008 as set.

Once you have created and saved this file, head over to the Boot Images section of the Operating System portion in the Software Library and view the Properties for your boot image.

Boot Image Prestart Command Setting

As you can see from the image above, we need to check the box for the option Enable Prestart Command on the Customisation tab of the properties. Once this is checked, we can add the command to call our VBScript file which in my case will be cscript AutoStartOSD.vbs. Once you have entered this, check the box for Include files for the prestart command and specify the path to the script file you created so that this file is integrated into the Boot Image file.

When you save the changes, you will be prompted to update your Boot Image files and the file will be rebuilt and updated on your Distribution Points. Once complete, if you are using PXE to boot your clients you need to do nothing more and you can start enjoying your automatically starting task sequence. If you are using USB or ISO Boot Media to start your task sequence process, you will need to update your image as the Boot Image that the media is based on has been updated.

Configuration Manager OSD Fails with Error 80070002

When working in my lab environment to build a deadly Operating System Deployment Task Sequence, I did the usual thing of creating reference image task sequences and building reference images. After doing this I fired off the real deployment task sequence to test some PC deployments and I was running CMTrace within Windows PE to monitor the logs and the progress.

I noticed in the testing that the Windows 7 images I had created worked just fine but my Windows 8.1 images kept failing at the Apply Operating System step. The package would be downloaded okay from the Distribution Point but would hang for quite some time after downloading it and fail to start applying the image to the disk. The error code in the smsts.log was 80070002 and the message for the code was The system cannot find the file specified. (Error: 80070002; Source: Windows).

Given that the build and capture task sequences had completed without problems, I knew that it must have been something added or changed between the original source media and the reference image task sequence and the most likely culprit is the Install Software Updates steps in the build and capture task sequence.

I started searching online to see if anyone had produced a list of known bad updates as having to identify manually which of the 92 updates being applied during the reference image creation process would be a pain. Luckily, Microsoft have a support article for just this at https://support.microsoft.com/en-us/kb/2894518. After reviewing the articles referenced on this page, it turned out that one of these updates was approved in one of my Software Update Groups and downloaded to one of my Deployment Packages. I unapproved and deleted the update and refreshed the package on the Distribution Points to flush it out.

My Windows 8.1 build and capture task sequences are running again as I type, fingers crossed this time working in the main deployment after capture.

UPDATE: Confirmed that removing the KBs referenced in the support article resolved the issue and here’s a screenshot just for proof. I will have loads of posts coming soon how this task sequence is built including sample files.

Windows 8.1 OSD Deployment

Updating Configuration Manager 2012 R2 Client Package to UR4

When you install UR4 for Configuration Manager 2012 R2 one of the things it doesn’t do is update your base client install package. As a result of this, newly installed agents will still install the out-of-the-box version 5.00.7958.1000 of the agent not the UR4 version 5.00.7958.1501. It goes without saying that we don’t want newly deployed agents to have to install and them straight away afterwards, update to UR4 because it makes sense to incorporate this update at install time.

One of the most common ways to apply an update rollup is using the PATCH MSI parameter in both your Client Push Client Installation Settings and also in your Setup ConfigMgr step in any Operating System Deployment Task Sequences. Not only does this mean updating it in two places at minimum but if you have a number of task sequences, it could be even more.

In this post, I’m covering to explain a great method of getting UR4 installed with a new agent that was posted by a blogger named Matt at http://www.m4ttmcg.com/2013/05/sccm-2012-client-push-including.html. This process is deemed to be not officially supported however using the PATCH parameter isn’t exactly filled with support and joy and with this method being easier, it makes it all the more promising.

The Configuration Manager Client Agent installation by default looks to a sub-folder of the Client directory called ClientPatch and installs any .msp files it finds as part of the installation, installing multiple patches alphabetically in order.

To do this, on your Primary Site Server, navigate to the local file system path where the update patch .msp file is stored. On my server this is located at D:\Program Files\Microsoft Configuration Manager\hotfix. In the hotfix directory will be a folder for any updates that you have installed which in my case is UR4 or KB3026739 and then there are subsequent subfolders for AdminConsole, Client, SCUP and Server.

Open the Client folder and then you will see more folders for x86 and x64 for the two client architectures.

SCCM Client Hotfix Folder

In another Windows Explorer window, open the folder for the Client Agent in the site which is used by both the Client Package and the path for the Client share on the site server. On my server, the share is located at D:\Program Files\Microsoft Configuration Manager\Client.

In the Client folder are two subfolders for x86 and x64 for the two architectures of the client agent. In each architecture folder (the screenshots herein are all for the x64 architecture but simply repeat for x86) create a folder called ClientPatch.

SCCM Client ClientPatch Folder

In the ClientPatch folder you just created, copy the .msp file for the KB (UR4 in my case) and then repeat this for the other architecture so that both x86 and x64 client folders have a ClientPatch subfolder and the appropriate .msp file to match the architecture.

Once you have updated both of the client folders, head over to your Configuration Manager Admin Console and the Software Library and then navigate your library to locate the Configuration Manager Client Package. Right-click on the software package and select the Update Distribution Points option.

SCCM Client Update Distribution Points

Once your package has been updated on all of your distribution points, you’re set. Your client package now includes the UR4 update .msp file and any new client installations such as Client Push or via an Operating System Deployment Task Sequence will be installed with the UR4 update automatically with no need to update your Installation Parameters with the PATCH option.

Upgrading Configuration Manager 2012 R2 Agents to UR4

In this post I’m going to assume that you’ve already installed UR4 in your Configuration Manager environment as that’s covered by many a post and article online already. I’m also going to assume that your UR4 Software Packages have been distributed to your Distribution Points.

After you’ve installed Update Rollup 4 for Configuration Manager on your Primary Site Server and updated your site database, it’s time to update the rest of the servers in your Configuration Manager hierarchy and then move on to your agents and administration consoles. The first thing to do is we want to create some device collections to help us. I have created the following collections using the included WQL statements for the query based membership.

Creating the Query Based Collections

SCCM UR4 Collections

Configuration Manager 2012 R2 Agent (x64)

SELECT
SMS_R_SYSTEM.ResourceID,SMS_R_SYSTEM.ResourceType,SMS_R_SYSTEM.Name,SMS_R_SYSTEM.SMSUniqueIdentifier,SMS_R_SYSTEM.ResourceDomainORWorkgroup,SMS_R_SYSTEM.Client from SMS_R_System INNER JOIN SMS_G_SYSTEM_COMPUTER_SYSTEM on SMS_G_System_COMPUTER_SYSTEM.ResourceId = SMS_R_System.ResourceId WHERE SMS_R_System.ClientVersion = "5.00.7958.1000" AND SMS_G_System_COMPUTER_SYSTEM.SystemType = "x64-based PC"

Configuration Manager 2012 R2 Agent (x86)

SELECT
SMS_R_SYSTEM.ResourceID,SMS_R_SYSTEM.ResourceType,SMS_R_SYSTEM.Name,SMS_R_SYSTEM.SMSUniqueIdentifier,SMS_R_SYSTEM.ResourceDomainORWorkgroup,SMS_R_SYSTEM.Client from SMS_R_System INNER JOIN SMS_G_SYSTEM_COMPUTER_SYSTEM on SMS_G_System_COMPUTER_SYSTEM.ResourceId = SMS_R_System.ResourceId WHERE SMS_R_System.ClientVersion = "5.00.7958.1000" AND SMS_G_System_COMPUTER_SYSTEM.SystemType = "x86-based PC"

Configuration Manager 2012 R2 Console

SELECT
SMS_R_SYSTEM.ResourceID,SMS_R_SYSTEM.ResourceType,SMS_R_SYSTEM.Name,SMS_R_SYSTEM.SMSUniqueIdentifier,SMS_R_SYSTEM.ResourceDomainORWorkgroup,SMS_R_SYSTEM.Client FROM SMS_R_System INNER JOIN SMS_G_System_ADD_REMOVE_PROGRAMS on SMS_G_System_ADD_REMOVE_PROGRAMS.ResourceID = SMS_R_System.ResourceId WHERE SMS_G_System_ADD_REMOVE_PROGRAMS.DisplayName = "System Center 2012 R2 Configuration Manager Console" AND SMS_G_System_ADD_REMOVE_PROGRAMS.Version = "5.00.7958.1000"

Configuration Manager 2012 R2 UR4 Agent (x64)

SELECT
SMS_R_SYSTEM.ResourceID,SMS_R_SYSTEM.ResourceType,SMS_R_SYSTEM.Name,SMS_R_SYSTEM.SMSUniqueIdentifier,SMS_R_SYSTEM.ResourceDomainORWorkgroup,SMS_R_SYSTEM.Client from SMS_R_System INNER JOIN SMS_G_SYSTEM_COMPUTER_SYSTEM on SMS_G_System_COMPUTER_SYSTEM.ResourceId = SMS_R_System.ResourceId WHERE SMS_R_System.ClientVersion = "5.00.7958.1501" AND SMS_G_System_COMPUTER_SYSTEM.SystemType = "x64-based PC"

Configuration Manager 2012 R2 UR4 Agent (x86)

SELECT
SMS_R_SYSTEM.ResourceID,SMS_R_SYSTEM.ResourceType,SMS_R_SYSTEM.Name,SMS_R_SYSTEM.SMSUniqueIdentifier,SMS_R_SYSTEM.ResourceDomainORWorkgroup,SMS_R_SYSTEM.Client from SMS_R_System INNER JOIN SMS_G_SYSTEM_COMPUTER_SYSTEM on SMS_G_System_COMPUTER_SYSTEM.ResourceId = SMS_R_System.ResourceId WHERE SMS_R_System.ClientVersion = "5.00.7958.1501" AND SMS_G_System_COMPUTER_SYSTEM.SystemType = "x86-based PC"

Deploying the Software Packages for Agents

With the collections now created, head over to the Software Library node of the console. As part of installing UR4, the installer will have automatically created four software packages for you, two for the client architectures, one for the console and one for servers.

Clicking one of the Software Packages in the upper half of the view reveals the details of the package in the lower half. Select the Programs tab in the lower half and you will see the Program associated with the Software Package. Right-click the Program and select the Deploy option from the context menu as shown below.

SCCM UR4 Deploy Program

After clicking this, the Deploy Software Wizard will be shown. The Software field will be automatically populated by the wizard; we just need to enter the collection to target the deployment. For example, we want to deploy the UR4 update to all clients which have the out-of-the-box version installed so we need to target the Configuration Manager Client RU4 Update (x64) software program to the Configuration Manager 2012 R2 Agent (x64) collection.

SCCM UR4 Agent Deploy Software Wizard 1

On the next tab, we need to change the default Purpose from Available to Required. This purpose will force the installation to occur according to a schedule which we set on the following panel.

SCCM UR4 Agent Deploy Software Wizard 2

On the scheduling panel next up, we want to configure the schedule in accordance with any change control we may have to comply with. In my lab environment, I simply want to push all of the agent updates out to the servers and clients as soon as possible so the As Soon as Possible option is ideal for me.

SCCM UR4 Agent Deploy Software Wizard 3

If you aren’t using Maintenance Windows on any of your collections in Configuration Manager you can click next through to finish on the wizard now and have your agent deployment begin. If you are using Maintenance Windows then you will want to pay attention to a setting on the following panel.

SCCM UR4 Agent Deploy Software Wizard 4

If you are using Maintenance Windows then you may want to select the Software Installation checkbox to allow the agent installation to occur outside of any windows. The agent installation does not require a restart and in most cases, should be updated in a couple of minutes with no fuss so there is really isn’t a reason to not allow this to happen. Ticking the Software Installation checkbox allows the agent upgrade to take place outside of any maintenance windows so it will take place as soon as possible.

SCCM UR4 Agent Deploy Software Wizard 4

Once you have completed the wizard, you can confirm that your Deployment was successfully stored by viewing the Deployments tab in the lower half of the Software Library Packages view. As shown below, you can see that the deployment I just created to deploy the 64-bit agent has been stored. With this completed, you will want to repeat the process for the x86 (32-bit) agent so that both types of client get the UR4 agent update.

Deploying the Software Package for Admin Consoles

I’m not going to walk through the process for this as it is the same as above for the agent update however there is one important difference I will cover.

When you get to the Deployment Settings panel, you need to select the Available deployment option and not the Required option. The reason for this is that when you deploy the UR4 agent updates, the agent version gets updated from 5.00.7958.1000 to 5.00.7958.1501 however installing UR4 for the Admin Console does not update the version number reported for the console in Programs and Features in Control Panel.

With the Admin Console, because the version number does not change, if the deployment was set to Required, clients would install the update package and would continue to re-evaluate it because it would still be detected as the old version not the UR4 version. What we need to do instead is advertise it to computers with the Admin Console installed and make it available for those users to initiate themselves.

If anyone knows of a different way to target the Admin Console UR4 update, perhaps using the installed Software Update detection I would really like to hear how you have been able to have it automatically installed as Required as that would save a tonne of headache and effort. In the meantime, enjoy your UR4 client rollout. In another post, I will be covering how to update your base client package with UR4 so that newly deployed clients get this updated version hassle free.

Error Configuring the Service Manager Exchange Connector

Here’s a quick one to answer a problem that I had recently and one that you may bump into if you are trying to setup System Center Service Manager 2012 R2 with the Exchange Connector 3.0.

From the installation instructions for the Exchange Connector 3.0, you must copy the Microsoft.SystemCenter.ExchangeConnector.Resources.dll and the Microsoft.SystemCenter.ExchangeConnector.dll files from the extracted file location into your Service Manager installation location.

Once you have copied these two files, you import the ServiceManager.ExchangeConnector.mpb Management Pack Bundle into Service Manager. Once this is done, you need to copy the Microsoft.Exchange.WebServices.dll file into the Service Manager installation directory. The instructions provided with the management pack aren’t very clear on this but you can obtain this file from an installation of the Microsoft Exchange Web Services Managed API.

Once you have done all of this, you can then finally you create your Exchange Connector. When testing the connection to Exchange to create the connector, you may receive the following error message:

SCSM Exchange Connector Error

“The connection to the server was unsuccessful. Please check the server name and/or credentials entered.
Additional Information: The source was not found, but some or all event logs could not be searched. Inaccessible logs: Security.”

If you receive this error, you need to read the Exchange Connector 3.0 documentation a little more carefully before heading to the Microsoft Download Center to download the Microsoft Exchange Web Service Managed API. You must be using version 1.2 of the API .dll file for Service Manager to work correctly. If you downloaded and used the later 2.0 version of the API, you will receive this error. This applies to all versions of Exchange including Office 365 or Exchange Online.

Simply install the correct version of the API and replace the Microsoft.Exchange.WebServices.dll file in your Service Manager installation directory. You will need to have all instances of the Service Manager console closed in order to replace this file as the console being open will put a lock on the file.

If you are unsure which version of the file you have, look in your Service Manager installation directory for the Microsoft.Exchange.WebServices.dll file. The API version 1.2 file has a file version of 14.3.32.0 and the API version 2.0 file has a file version of 15.0.516.14.

Making SCSM Custom Lists Visible in the Console

This week, I have been working on a custom management pack for System Center Service Manager to add new classes for Mobile Phone and SIM Card Configuration Items. Once of the requirements for this was to include some lists which can be updated via the console and used to store values abut these two CIs.

Creating the properties in each of the new CIs was no problem and setting their Enumeration Type to a list was no problem either but getting the lists to actually display in the Service Manager Console I found rather challenging. I was able to do it using Service Manager Authoring Tool okay but the Authoring Tool seems to make a horrible mess of generating IDs for objects and it uses Aliases for no reason everywhere. I made the switch from the Authoring Tool to Visual Studio Authoring Extensions for System Center 2012 but Visual Studio doesn’t automatically create the code required to make the lists visible.

To fuel the frustration, I was only able to find a helpful solution after many failed online searches, clearly using the wrong keywords. I was only able to find the answer in the end by creating a list in Service Manager in an unsealed management pack, exporting the Management Pack and viewing the XML to reverse engineer it. From the XML I was able to find the name of the proper name for the code value which then turned up a helpful article on TechNet Blogs.

Using Service Manager Authoring Console

If you are attempting to complete this using the Service Manager Authoring Console then you’re on easy street and you don’t need to do anything in the following sections. Simply create your Enumeration List in the custom Configuration Item Class and the list will automagically be made visible for you. If you saw what I saw which is that the Authoring Console makes a right old mess of your management pack and you decide to use Visual Studio with the Authoring Extensions to create your management packs then read on.

Adding the References

In Visual Studio with the Authoring Extensions (VSAE) add two new references to your solution. The references we need to add are  Microsoft.EnterpriseManagement.SerivceManager.UI.Authoring and Microsoft.EnterpriseManagement.ServiceManager.UI.Console. You can find the SCSM 2012 R2 RTM versions of these system management packs in the Service Manager Authoring Console installation directory at C:\Program Files (x86)\Microsoft System Center 2012\Service Manager Authoring\Library. By default these references have Aliases of !MUSEA and !MUSEC respectively but in my project I have changed these to !Authoring and !Console to make them more intuitive for anyone reading the code.

Making the Lists Visible

With our references added, we need to add the code to make the lists visible in the console. You can either add these lines to the Management Pack Fragment which contains your list definitions (which I have done) or you may wish to have a separate Management Pack Fragment for elements which you are publishing into the UI. Either way, they will be included in the compiled project it’s just your choice about how you structure your project and the code for development.

<Categories>
   <Category ID="Class.List" Target="Class.EnumerationTarget" Value="Authoring!Microsoft.EnterpriseManagement.ServiceManager.UI.Authoring.EnumerationViewTasks" />
   <Category ID="Class.List.Visible" Target="Class.EnumerationTarget" Value="System!VisibleToUser" />
</Categories>

As you can see from the code sample above, we add the Categories section to the fragment and inside that section, we add two Category elements each with unique IDs. The first of the code lines will make the Enumeration List that was declared in the custom Configuration Item class accessible and the second line as you can probably guess from the code makes this visible in the console to end-users.

Unlike most things in Service Manager management pack development, these two Category IDs appear not to require Language Pack Display Strings to be declared so we’re done here. Save your changes, build the project and import the management pack.

Adding List Items to Sealed Management Packs

If you are developing this management pack for a production system then you should be sealing your management pack for import. If you are providing the end-users with an empty list to which they can add their own custom list items then when the first list item is added, you will need to define an unsealed management pack for the list entries to be stored in. Alternatively, if you want to provide a set of default options, you can include these in the sealed management pack as default options using EnumerationValue as part of your EnumerationTypes. These default options will then be included in the sealed management pack and any new entries added will be stored in the unsealed management pack.

Monitoring SQL Server Agent Jobs with SCOM Guide

Late last night, I published a TechNet Guide that I have been working on recently entitled “Monitoring SQL Server Agent Jobs with SCOM”. Here’s the introduction from the document.

All good database administrators (DBAs) create jobs, plans and tasks to keep their SQL servers in tip top shape but a lot of the time, insight as to the status of these jobs is left either unturned like an age old stone or is done by configuring SQL Database Mail on your SQL servers so that email alerts are generated which means you have additional configuration being done on every server to configure this and it’s yet another thing to manage.

In this guide, I am going to walk you through configuring a System Center Operations Manager 2012 R2 environment to extend the monitoring of your SQL Servers to include the health state of your SQL Server Agent Jobs, allowing you to keep an eye on not just the SQL Server platform but also on the jobs that run to make the platform healthy.

You can download the guide from the TechNet Gallery at https://gallery.technet.microsoft.com/SQL-Server-Agent-Jobs-with-f2b7d5ce. Please rate the guide to let me know whether you liked it or not using the star system on TechNet. I welcome your feedback in the Q&A.