Windows Server 2012

Project Home Lab: Open Server Surgery

So with my recent bought of activity on the home lab project front, evident from my previous posts Project Home Lab: Server Build and Project Home Lab: Servers Built, I’ve forged ahead and got some of the really challenging an blocking bits of the project done over Christmas. I eluded to what I needed to do next in the post Project Home Lab: Servers Built. All of this work paves the way for me to get the project completed in good order, hopefully all during January, at long last.

In this post I’m just going to gloss over some of the details about the home server move that I completed over the weekend. Lots more hours of thinking, note taking and planning were involved in this and most likely more than should have gone into it but I don’t like failure so I like to make sure I have all the bases covered and all the boxes ticked. Most critically, I had to arrange an outage window and downtime with the wife for this to happen.

Out with the Old

The now previous incarnation of my Windows Server 2012 R2 Essentials home server lived in a 4U rack mount chassis. As it was the only server I possessed at the time, I never bothered with rack mount rails so problem one was in the fact that the server was just resting atop of my UPS in the bottom of the rack.

Problem two and luckily, something which has never bitten me previously but has long bothered me is that the server ran on desktop parts inside a server chassis. As a result, it had no IPMI interface for out of band management so that if something should go wrong with the Windows install or some warning in the BIOS, I can remotely access the keyboard, video and mouse (a KVM no less). It had an Intel Core i5 3740T processor with an ASUS ATX motherboard and unregistered unbuffered memory with a desktop power supply albeit it a high quality Corsair one. All good quality hardware but not optimal for a server build.

The biggest problem however was with the fact that the 4U chassis, a previous purchase from X-Case a couple of years ago sat at 4U tall but only had capacity for ten external disks. I had two 2.5″ SSDs for the operating system mounted internally in one of the 5.25″ bays in a dual 2.5″ drive adapter in addition to the external drives. It all worked nicely but it wasn’t ideal as my storage needs are growing and I only had two free slots. Although not a problem, the hot swap drive bays were added to the chassis with an aftermarket upgrade from X-Case didn’t use SAS Multilane SFF-8087 cables but instead used SATA connections which meant from my LSI 9280-16i4e RAID Controller, I had to use SAS to SATA Reverse Fanout cables which made the whole affair a bit untidy.

None of this is X-Case’s fault let us remember. The case did it’s job very well but my evolving and increasingly demanding needs no longer met the capabilities of the case.

Planning for the New

Because I like their to be order in the force, per my shopping list at Project Home Lab: Shopping List, I bought a new 3U X-Case chassis for my home server at the same time as buying up the lab components and getting the home server set straight is priority one because the 4U chassis is a blocker to me getting any further work done as the 3U and 2U lab servers need to fit in above it. In addition to moving chassis, I’ve given it an overhaul with a new motherboard and CPU to match the hardware in the lab environment. A smaller catalogue of parts means less knowledge required to maintain the environments and means I have an easy way of upgrading or retro-fitting in the future with the single design ethos.

As anyone knows, changing the motherboard, processor and all of the underlying system components in a Windows server is a nightmare potentially in the making so I had to plan well for this.

I had meticulously noted all of the drive configurations from the RAID Controller down to the last detail, I had noted which drives connected to which SATA port on which controller port and I had a full backup of the system state to perform a bare metal recovery if I needed. All of our user data is backed up to Azure so that I can restore it if needed although I didn’t expect any problems with the data drives in honesty, it was the operating system drives I was most concerned about.

In with the New

After getting approval for the service outage from the wife and shutting down the old home server, I got it all disconnected and removed from the rack. I began the painful process of unscrewing all of my eight drives from the old chassis drive caddy’s and the two internal drives and reinstalling them into the new caddy’s using the 2.5″ to 3.5″ adapters from the shopping list. I think I probably spent about 45 minutes carefully screwing and unscrewing drives and at the same time, noting which slot I removed them from and which slot I installed them into.

With all the drives moved over, I moved over the RAID Controller and connected up the SAS Multilane SFF-8087 cables to the connector with the tail end already connected to the storage backplanes in the chassis.

Once finished, I connected up the power and the IPMI network port on the home server which I had already configured with a static IP as the home server is my DHCP Server so it wouldn’t be able to get an automatic lease address. I got connected to the IPMI interface okay and powered the server on using it and quickly flipped over to the Remote Control mode which I have to say, works really nicely even when you consider that it’s Java based.

Up with the New

While I was building the chassis for the home server, I had already done some of the pre-work to minimize the downtime. The BIOS was already upgraded to the latest version along with the on-board SAS2008 controller and the IPMI firmware. I had also already configured all of the BIOS options for AHCI and a few other bits (I’ll give out all of the technicalities of this in another post later).

First things first, the Drive Roaming feature on the LSI controller which I blogged about previously, Moving Drives on an LSI MegaRAID Controller worked perfectly. All 9 of the virtual drives on the controller were detected correctly, the RAID1 Mirror for the OS drives stayed in-tact and I knew that the first major hurdle was a behind me. A problem here would have been the most significant to timely progress.

The boot drive was hit okay from the LSI RAID Controller BIOS and the Windows Server 2012 R2 logo appeared at least showing me that it was starting to do something. It hung here for a couple of minutes and then the words “Getting Devices Ready” appeared. The server hung here for at least another 10 minutes at which point I was starting to get worried. Just when I was thinking about powering it off and moving all the drives back and reverting my changes, a percentage appeared after the words “Getting Devices Ready”, starting at 35% and it quickly soared up to 100% and the server rebooted.

After this reboot, the server booted normally into Windows. It took me about another hour after this to clean-up the server. First I had to reconfigure my network adapter team to include the two on-board Gigabit Ethernet adapters on the Supermicro motherboard as I am no longer using the Intel PCIe adapter from the old chassis. Then, using the set devmgr_show_nonpresent_devices=1 trick, I removed all of the references to and uninstalled the drivers for the old server hardware.

After another reboot or two to make sure everything was working properly and a thorough check of the event logs for any Active Directory, DNS or DHCP errors and a test from my 3G smartphone to make sure that my published website was running okay on the new server, I called it a success. One thing I noted of interested here was that Windows appeared to not require re-activation as I had suspected it would. A motherboard and CPU family change would be considered a major hardware update which normally requires re-activation of the license key but even checking now, it reports activated.

Here’s some Mr. Blurrycam shots of the old 4U chassis after I removed it and the new 3U chassis in the rack.

WP_20141230_009

WP_20141230_006

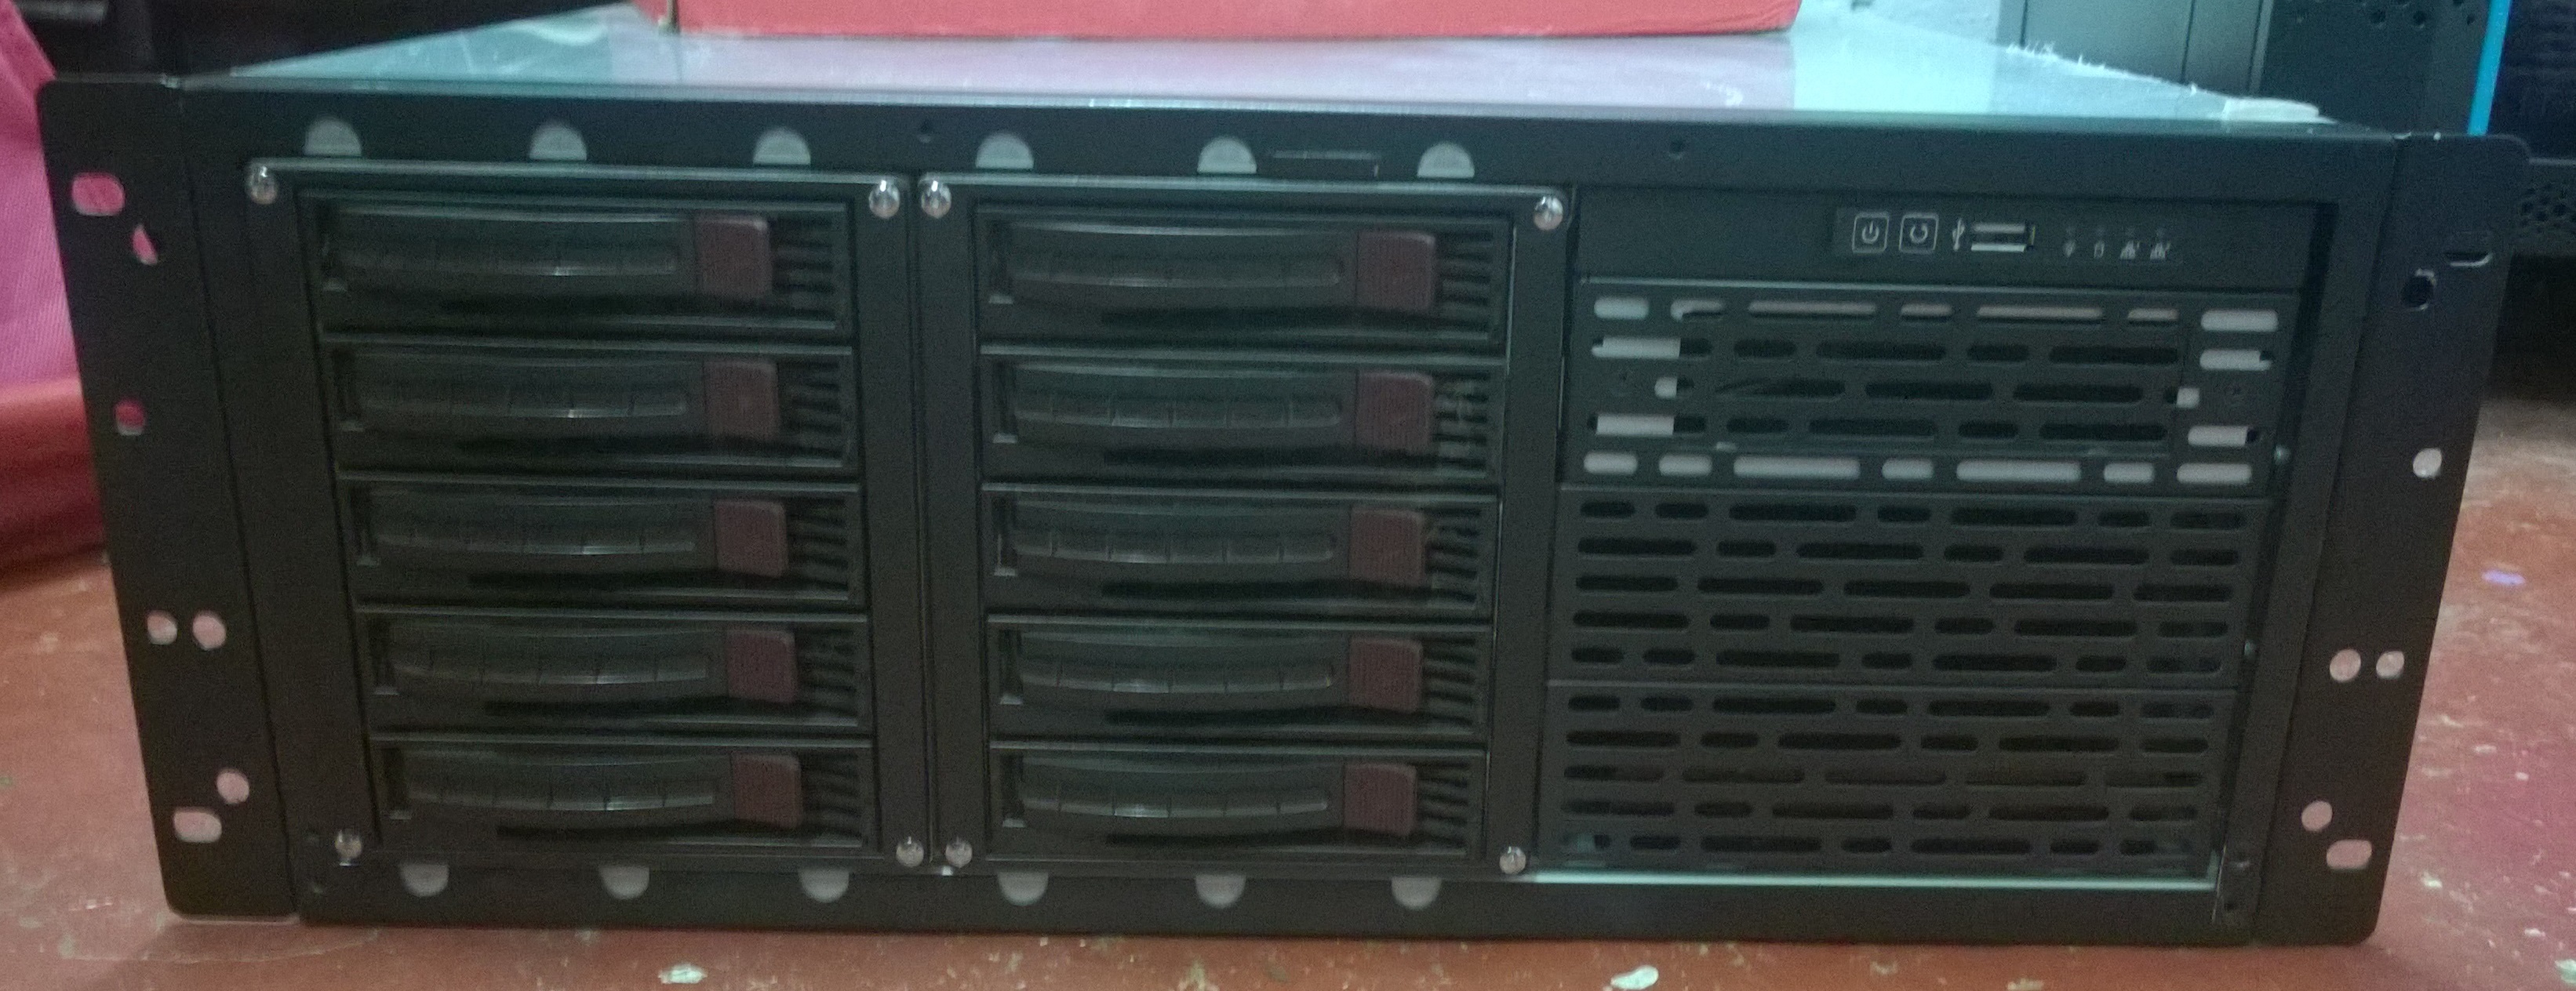
As you can see from the second picture, the bottom 3U chassis is powered up and this is the home server. In disk slots 1 and 5 I have the two Intel 520 Series SSDs which make up the operating system RAID1 Mirror and in the remaining eight populated slots are all 3TB Western Digital Red drives.

Above the home server is the other 3U chassis which will be the Lab Storage Server once all is said and done and at the very bottom I have the APC 1500VA UPS which is quite happy at 20% load running the home server along with my switches, firewall and access points via PoE. I’ll post some proper pictures of the rack once everything is finished.

Behind the scenes, I had to do some cabling in the back of the rack to add a new cable for the home server IPMI interface which I didn’t have before and the existing cables for the home server NIC Team were a bit too tight for my liking caused by the 3U Lab Storage Server above being quite deep and pulling on them slightly. To fix this, I’ve patched up two new cables of longer length and routed them properly in the rack. I’ve got a lot of cables to make soon for the lab (14 no less) and I will be doing some better cable management at the same time as that job. One of the nice touches on the new X-Case RM316 Pro chassis is the front indicators for the network ports, both of which light up and work with the Supermicro on-board Intel Gigabit Ethernet ports. The fanatic in me wishes they were blue LEDs for the network lights to match the power and drive lights but that’s not really important now is it.

More Home Server Changes

The home server has now been running for two days without so much as a hiccup or a cough. I’m keeping an eye on the event logs in Windows and the IPMI alarms and sensor readings in the bedding in period and it all looks really happy.

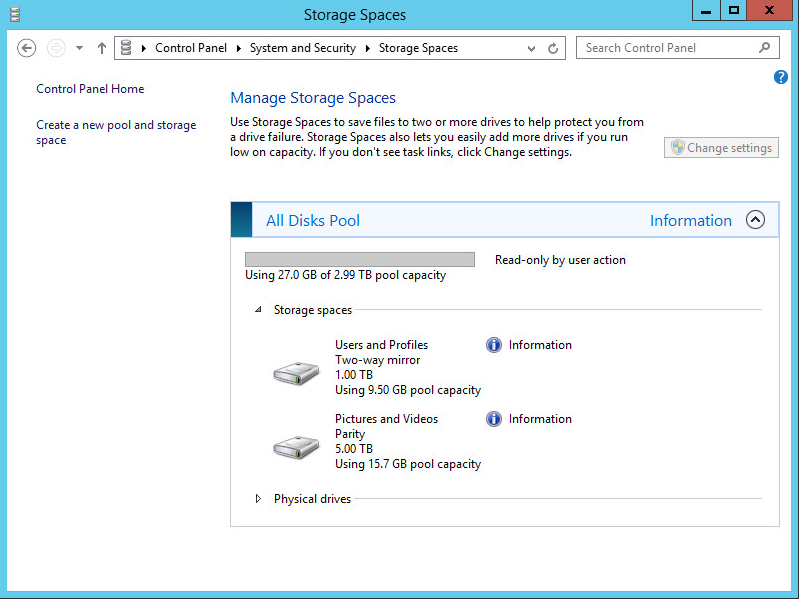
To say thank you to the home server for playing so nicely during it’s open server surgery, I’ve got three new Western Digital 5TB drives to feed it some extra storage. Two of the existing 3TB drives will be coming out to make up the bulk storage portion of the Lab Storage Server Storage Space and one drive will be an expansion giving me a gross uplift of 9TB capacity in the pool. I would be exchanging the 3TB drives in the home server with larger capacity drives one day in the future anyway so I figured I may as well do two of them early and make good use of the old drives for the lab.

I’m also exploring the options of following the TechNet documentation for transitioning from Windows Server 2012 R2 Essentials to Windows Server 2012 R2 Standard. You still get all of the Essentials features but on a mainline SKU which means less potential issues with software (like System Center Endpoint Protection for example which won’t install on Essentials). On this point I’m waiting for some confirmation of the transition behaviour in a TechNet Forum question I raised at https://social.technet.microsoft.com/Forums/en-US/d888f37a-e9e9-4553-b24c-ebf0b845aaf1/office-365-features-after-windows-server-standard-transition?forum=winserveressentials&prof=required as the TechNet article at http://technet.microsoft.com/en-us/library/jj247582 leaves a little to be desired in terms of information.

I’m debating buying up some Lindy USB Port Blockers (http://www.lindy.co.uk/accessories-c9/security-c388/usb-rj-45-port-blockers-locks-c390/usb-port-blocker-pack-of-4-colour-code-blue-p2324) for the front access USB ports on all the servers so that it won’t be possible for anyone to insert anything in the ports without the unlocking tool to open up the port first. See if you can guess which colour I might buy?

Up Next

Next on my to do list is the re-addressing of the network, breaking out my hacksaw and cabling.

The re-addressing of the network is make room for the new VLANs and associated addressing which I will be adding for the lab and my new addressing schema makes it much easier for me longer term to manage. This is going to be a difficult job much like the job I’ve just finished. I’ve got a bit of planning to finish for this before I can do it so this probably won’t happen now until after new year.

The hacksaw, as drastic as that sounds is for the 2U Hyper-V server which you may notice is not racked in the picture above. For some reason, the sliding rails for the 2U chassis are too long for my rack and with the server installed on the rails and pushed back, it sits about an inch and half proud of the posts which no only means I can’t screw it down in place but I can’t close the rack door. I’m going to be hacking about two inches off the end of the rails so that I can get the server to sit flush in the rack. It’s only a small job but I need to measure twice and cut once as my Dad taught me.

As I mentioned before, I’ve got some 14 cables I need to make and test for the lab and this is something I can be working on in parallel to the other activities so I’m going to be trying to make a start on these soon so that once I have the 2U rails cut to size correctly, I can cable up at the same time.

Storage Spaces Inaccessible After Windows Server 2012 R2 Upgrade

Windows Server 2012 R2 has some nice new features and improvements on existing features for users of Storage Spaces so there is a definite appeal for users of Windows Server 2012 to want to upgrade to Windows Server 2012 R2.  If you opt to do an in-place upgrade to preserve your existing Storage Spaces so that you can get your service up and running with the hope of being able to use them straight off the bat in Windows Server 2012 R2, you may encounter an error Read-only by user action and you need to perform some corrective steps to use them again.

Storage Space Read-Only User Action

This is what your Storage Spaces may look like if you open the Storage Spaces control panel item after the upgrade. As you can see, the spaces are in-tact and will report all of the space names and capacity from prior to the upgrade but instead of being online as you are used to seeing, you instead have this information icon and a message alongside the pool capacity indicator Read-only by user action. This is a built in protection feature of Windows Server 2012 R2 which takes your Storage Spaces offline by default after an upgrade. We just simply need to bring them online to use them. This is very similar to how in Windows Server 2003, a disk connected from an external system from a software RAID set could be marked as Foreign and the configuration of the disk needs to be imported first.

Changing the Storage Pool Status to Read/Write

To do this, open an administrative PowerShell prompt. At PowerShell, enter the two Cmdlets as follows:

Get-StoragePool | Where-Object {$_.IsReadOnly -eq $True} | Set-StoragePool -IsReadOnly $False
Get-VirtualDisk | Where-Object {$_.IsManualAttach -eq $True} | Set-VirtualDisk -IsManualAttach $False

If you forget to elevate the PowerShell prompt by running it as an administrator you will get access denied responses to the two Cmdlets as you aren’t running the Cmdlets with your administrative rights. Simply close PowerShell and re-open it by right-clicking and using the Run as Administrator option.

Bring the Storage Spaces Online

Once you’ve entered the Cmdlets above, returning to the Storage Spaces control panel applet now, you will see the information shown has updated.

Storage Space Offline by Policy

As you can see, the Storage Spaces are now reporting their status as OK but they are marked as Offline by Policy. To change this and to bring the Storage Spaces online, simply click the Bring Online option next to each Storage Space and it will be brought online and granted a drive letter.

Check, Verify and Reminder

It’s important to note here that the drive letter assigned will be the next free letter and not perhaps, the drive letter that you used on the previous installation of Windows Server 2012. If you have a requirement for the Storage Space to be on a particular letter then you will need to go into the Properties of the individual spaces after it has been brought online and change the letter.

It’s also good to remember that any file shares you had on these Storage Spaces may be un-shared through the upgrade process so you should check the existence of your shares either by using the Properties on the drive or folder which you needed to be shared or by using the Share and Storage Management administrative console.

Once you’ve got your Storage Spaces all brought online after the actions above, you should be looking like normality again as shown below.

Storage Space Online Normal

Hopefully someone out there finds this useful and it saves at least a few hair extractions from taking place after a Windows Server 2012 to Windows Server 2012 R2 in-place upgrade. Now it’s time to go and enjoy those new features.

Windows Server 2012 Essentials Folder Redirection on Windows 8.1

As all good IT Pros have done, I’ve upgraded my home client computers from Windows 8 to Windows 8.1. You have upgraded your machines to Windows 8.1 right?

As I frequently proclaim and preach on here, I run Windows Server 2012 Essentials on my home network, acting as my DNS Server, DHCP Server in addition to the out of the box features that you can get from Windows Server 2012 Essentials like roaming profiles, folder redirection, automated computer backups and network file sharing (all of which I use).

When I was building out a test environment this week to practice how I might migrate from Windows Server 2012 Essentials to Windows Server 2012 R2 Essentials without the benefit of a second server with 19TB of available storage to hand (how many homes do have 19TB of storage let alone a spare 19TB) I was experiencing an issue.

As part of my testing, I built a Windows 8.1 Pro virtual machine to simulate a desktop or laptop client computer. I built a Windows Server 2012 Essentials server as a second virtual machine on which I recreated my group policy settings and a mock up of my Storage Pool and Storage Spaces on my production server. After installing the Windows Server 2012 Essentials Connector on the Windows 8.1 client and logging in for the first time as a user configured to use roaming profile and folder redirection, I noticed that the roaming profile was working but the folder redirection was not.

I spent a while pouring through event logs on the client wondering why folder redirection wasn’t working, looking at GPMC (Group Policy Management Console) wondering if I’d done something silly like moved a link on a GPO preventing it from working until the penny dropped. Windows Server 2012 Essentials applies a WMI Filter named SBS Group Policy WMI Filter to the SBS Group Policy Folder Redirection GPO which is created when you implement Group Policy via the Server Dashboard.

Windows Server 2012 Essentials Original WMI Filter

This WMI Filter is setup as SELECT * FROM Win32_OperatingSystem WHERE (Version LIKE “6.1%” or Version LIKE “6.2%”) AND ProductType = “1”. For those who are now also dropping the penny or those who can’t make head nor tail of a WMI Filter, Windows 8.1 increments the operating system version number from 6.2 (Windows 8) to 6.3 (Windows 8.1), therefore the GPO isn’t applying to any of the Windows 8.1 machines on my network because this filter limits the scope of the Group Policy Object to explicitly Windows 7 and Windows 8 operating systems.

The solution to making this work is pretty simple in that we just need to update the WMI Filter so that it includes Windows 8.1 as we know that basic features like roaming profiles and folder redirection are going to work so I’m not worried about something breaking here.

I’ve decided to change my WMI Filter to include operating systems greater than or equal to Windows 7 rather than add another or statement to include Windows 8.1 For me, the WMI Filter now reads SELECT * FROM Win32_OperatingSystem WHERE (Version >= “6.1%”) AND ProductType = “1”.

Windows Server 2012 Essentials New WMI Filter


After making the changes and running a gpupdate command on a Windows 8.1 client computer, the group policy magically springs back into life and things start working. Firstly, I’m amazed that I haven’t noticed this being a problem on my home clients which I guess is a testament to my gigabit throughout home network pushing the files directly back to the server rather than caching them locally with Offline Folders first. Secondly, I’m surprised that this hasn’t been updated with a patch or update to Windows Server 2012 Essentials but perhaps this is a cattle prod for customers to upgrade to Windows Server 2012 R2 Essentials?

Storage Spaces You’re My Favourite

I got asked today what my favourite feature of Windows Server 2012 was. For me, that’s a really tough question because there are loads of new features in Windows Server 2012. There are many existing features which have been improved and don’t even get me started on Windows Server 2012 R2, due for official release very soon although already available via MSDN, TechNet and VLSC.

I thought about it for a minute or so but it was obvious to me that Storage Spaces is the coolest and favourite feature of mine in Windows Server 2012 because for Windows Server, it’s a huge reboot on what we can do with storage natively, super easy to setup and operate and it has no additional costs to use as it’s included in Standard edition.

What are Storage Spaces?

Storage Spaces can be boiled down to a simple idea. Imagine that you have a server and with that server, you’re given a ‘pick and mix’ bag of disks and these disks that you have are all of varying capacities and even types (SAS, SATA and even USB) and you want to use these disks in the cheapest and most efficient fashion. Storage Spaces is made for you.

With conventional RAID setups, the above example just isn’t viable because RAID needs you to have matching disk types, capacities, firmware and various other parameters. Imagine then, that you could install these assorted drives into your server, configure them into one or more pools of storage resource and carve out chunks of that storage however you liked? A simple drive (a la JBOD), data that you want to protect and need fast write speeds (like RAID1) and data that you want to protect and need fast read speeds (think RAID5).

You can do all of this through an interface that’s common to you, the Windows Server GUI or PowerShell if you prefer? What’s more, you don’t have the capital expense of expensive storage solutions for your server like DAS (Direct Attached Storage) cages or SAN (Storage Area Network) arrays.

Surely That’s Not All It Does?

Of course not, Storage Spaces aren’t just as simple as my example above because it offers much more.

Think how you have a RAID set configured on a conventional RAID controller: Your server has six bays and you configure two as a mirror to the Windows Server 2012 installation and you decide to put the remaining four into a RAID5 stripe to store and protect your user and application data. Everything works fine but then, two months’ from now, you decide that you need another application or service on that server that would really benefit from a RAID1 Mirror and its higher write speeds. Your options are limited to put it on the sub-optimal RAID5 Stripe or extend the server with an expensive DAS cage because you are out of free disk slots on the server.

With conventional RAID, an entire physical disk and its capacity is assigned to the logical drive. In Storage Spaces, you create drives within one or more Storage Pools, the logical grouping of all of your physical drives and you then create Storage Spaces from those Storage Pools.

Storage Spaces Real-World

The screenshot above shows what a real-world Storage Pool with several configured Storage Spaces could look like, taken from my Windows Server 2012 Essentials machine, and as you can see, I’ve each one configured differently.

When you create a Storage Space inside a Pool, you get a set of options which allow you to configure all of the attributes of that Storage Space such as protection type, drive letter and capacity. You can even allocate more capacity to a storage space than you physically have. Because of these capacity and protection type options, you really can maximize the value you get from your set of disks and use then exactly how you need them.

Storage Space Create

This is one of the really cool things about Storage Spaces. The idea is so simple but yet really effective. In my image above, you can see my Windows Server 2012 Essentials server has a pool capacity of 19.0 TB (yes, I spent a lot of money on disks) and the available capacity right now is 7.82 TB, yet I’ve told Windows that I want the new Storage Space to be 25 TB.

Welcome to Thin Provisioning

It goes without saying that you can’t actually use more than you have as the data would have nowhere to be stored, but the principal is that you plan and configure your storage space sizes in advance to meet your long-term need and not what you currently have. You use capacity up to what you have currently and add more disk over time to give you additional physical capacity, spreading your capital expenditure over time. Best of all, adding more disk to a Storage Pool is simply a couple of clicks.

Storage Spaces doesn’t need to be limited to just one server like my simplistic example either. Windows Server 2012 likes to share so lets you use Storage Spaces in any way that you might want to use a normal disk. You can use a Storage Space to store a Hyper-V virtual machine .vhd file or an iSCSI target presented out to another server.

How to Find Out More

Hopefully this post has got you really interested and thinking about some of the possibilities with Storage Spaces. We saw a number of new features in recently for Storage Spaces too. Hopefully I’ll get to replace my home solution with R2 before too long, pending wife approval of course so I look forward to being able to share what I experience with that.

As there is more to Storage Spaces than I could force anyone to read in a single post, I’d highly recommend heading over to TechNet for a read of more of the features such as Failover Clustered Storage Spaces, Hot Spares, ReFS File System support and more and not forgetting, the Storage Spaces Overview page.

Office 365 Setup and Windows Server 2012 Essentials

Something which I’ve never really talked about here is email. Me and my family currently consume Outlook.com via Windows Live Domains on both my blog domain richardjgreen.net and our personal domain name. Windows Live Domains really feels like something out of a Land Before Time movie these days. It hasn’t seen an update in years and frankly, I wonder what the shelf life of it is going forwards, leaving me to think that the options will be Outlook.com, Office 365 or bust. Not wanting to be stuck on a potentially end of the road email platform, left trying to move the mail service for my family on day zero, I started looking at options a few months back.

With Windows Live Domains being free, if I was going to pay for email, I needed it to not cost the earth, as low as possible really. At the same time, I didn’t really want anything more from a feature set than I get with Outlook.com via Windows Live Domains.  All I want is a flat service to match that of Windows Live Domains and Outlook.com. With me being such a softie, the option was really only going to be Office 365, it was just a question of what tier and flavour of it.

Windows Server 2012 Essentials which I use to run our home environment has native integration for Office 365 which means it would be super easy for me to manage which for me is great as the less time I spend managing our home solution, the more time I can spend blogging, working on other things and spend more time with the family themselves.

Exchange Online vs Office 365

This really confused me when I started looking into Office 365 and using the Windows Server 2012 Essentials integration features for Office 365 sometime ago. For me and my family, I am only interested in email. I’m not after Lync or SharePoint services as we just wouldn’t use them. I was concerned that if I signed up for Exchange Online Plan 1 which was my target option that the integration wouldn’t work. As it turns out, you just need to think of everything as Office 365. Exchange Online, Exchange Online Protection, Lync Online, Enterprise Plans; all of them fall under the banner of Office 365 so I now knew that Windows Server 2012 Essentials wasn’t going to care if I was on Exchange Online Plan 1 or if I was on an Enterprise 4 agreement.

Extending the Windows Azure Tenant into Office 365

Because I use Windows Azure Backup to backup our data from Windows Server 2012 Essentials already and because this blog is hosted on Azure, I already had a tenant setup on an onmicrosoft.com domain which I wanted to reuse so I needed to extend my tenant so the one tenant would work across Windows Azure and Office 365 services. To do this, I logged into office365.com using the account which I setup as the tenant global administrator when I configured Azure Backup on Server 2012 Essentials. I was greeted with a message that I didn’t have any licenses or any domains setup, but the login worked most importantly.

Buy a Service Plan

Before you can credibly do anything, you need a plan. I wrote this post after I set it all up and lucky I did really. When I first went through the motions, I added a domain richardjgreen.net and was wondering why I couldn’t do anything with it, not even validate it. It looks like you can’t even validate a domain to start configuring users until you have at least one license available to use.

As it’s just me on my blogs domain right now, I paid up for a single license of Exchange Online Plan 1. This gives me a 50GB mailbox, all of the Exchange features I want like OWA and Exchange ActiveSync and at £2.60 a month per user excluding VAT, the price is sweet enough for me also.

To buy a license or more, all you need to od is to hit the Purchase Services link on the left navigation. This presents a whole host of options for Office 365, Exchange Online services to buy and some add-on services also such as Exchange Online Protection and Exchange Online Archiving. Add a credit card detail on file, click buy and it’s as simple as that.

Adding Custom Domains

Adding a new domain is a simple matter of clicking Domains from the left navigation and then clicking the Add a Domain button then follow the instructions which follow into setting up DNS. I had both of my domains added within a matter of a couple of mouse clicks and keystrokes.

Configuring the DNS Settings

As part of the process of adding the domain, you need to do two things:

  • Verify you own the domain for starters
  • Add DNS records for your services

The first step is verification which in my case, I completed by adding an MS= TXT record in my providers DNS management console. I tried to do this but I received an error “richardjgreen.net has already been verified for your account, or for another Microsoft Online Services account.”. I new I was going to see this but not quite at which stage.

This is caused by the fact that my richardjgreen.net domain was currently configured to use Windows Live Domains for email service. I logged into domains.live.com, deleted all of the mailboxes in Outlook.com for the domain and then deactivated the service. This was the most nerve racking part of the process as I’ve read that other users doing the same thing have had issues rattling on for months to get this to clear out of the system properly.

In my usual style, I kept trying the Office 365 portal to verify the domain and 15 minutes after deactivating Windows Live Domains, Office 365 pinged into life, allowing me to verify the domain.

With the first step now done, I needed to configure the service records as directed. I needed three records for my Exchange Online service: An MX record for mail delivery, a TXT record for the SPF (Sender Policy Framework, required to allow receiving servers to trust the Sender ID of outlook.com and Office 365 to deliver email on my domains behalf) and a CNAME record for Autodiscover to allow devices to be configured automatically for my mailboxes in Office 365.

If you use a DNS management agency which Microsoft have steps with then you can get direct instruction for doing this if you are little uncomfortable with DNS or if you are with GoDaddy then there is the option for an automated setup through some kind of API channel with Microsoft.

After adding the records to my DNS, it took about 10 minutes for Office 365 to pickup the new records and complete the domain setup.

Enable Office 365 Integration in Server 2012 Essentials

From my Windows Server 2012 Essentials machine, this part should have been really easy but it turned out to be a nightmare.

From the Essentials Dashboard, click Email from the home screen and then select Integrate with Microsoft Office 365. The dashboard will open a wizard for you to enter your Office 365 Tenant Global Administrator account if you already have an account as I do otherwise you have the option to initiate a free trial using an E3 subscription.

The Office 365 integration with Server 2012 Essentials is neither DirSync nor is it ADFS. If you elect to use Office 365 with Lync and SharePoint you will not get the AD FS Single Sign-On (SSO) experience as you would with a full deployment. The integration here I would describe as light. When you provision users on-premise, make changes to Office 365 licenses or mailboxes through the Dashboard, the changes are pushed up to Office 365 via a web channel which you can see from the logs (explained later).

Password synchronisation does occur so that your on-premise password and Office 365 password are in alignment however. I found this happened really quickly and my Windows Phone would report a password change required on the Office 365 email account on the phone within about a minute or so of the password change on-premise.

When you enable the integration, one of the things that occurs is that it forces you to enable Strong password mode on-premise which results in passwords at least eight characters in length and passwords using symbols and all the tricks in the book. Whilst I agree this is something you should be doing, if you are a small business or a home user availing of the services of Office 365 like myself, this isn’t perhaps going to be ideal. Luckily, the password policy in Office 365 is actually less strict than this. I have gone under the covers using Group Policy Management Console (GPMC) in my setup and slightly amend the Default Domain Policy GPO and all my passwords sync okay still.

The Office 365 Integration Service Gone Bad

After I ran the initial setup integration for the first time, I stopped getting any data in the dashboard. I thought it may have been a result of some pending Windows Updates so I installed those and restarted but it was still broken. I found that the problem was that the Office 365 Integration service was stopped. I started in manually and it stopped immediately with a stack trace error in the Application event log which wasn’t particularly cool.

I tried to disable the integration so that I could then re-enable it, but it appears that any operation regarding the integration requires the service to be functional. I tried to re-run the configuration but I was informed that it was already configured and I would need to disable it first which didn’t help me.

The way I got around this was to force the service to be disabled via the registry. Open Registry editor and navigate to HKLMSOFTWAREMicrosoftWindows ServerProductivity. From here, delete the key MailService and then restart the dashboard application. Doing this makes it think that the Office 365 Integration is disabled even though the dashboard will show the green tick to indicate that it’s configured. Simply re-run the configuration wizard at this point and all appears to be working now.

The Office 365 Integration Service Gone Bad Mark II

After the above happened and it all looked like it was working, I wasn’t getting password sync up to Office 365 although the Dashboard was functional to a point of allowing me to configure mailboxes. I found that the Password Sync service generates a log file in C:ProgramDataMicrosoftWindows ServerLogsSharedServiceHost-PasswordSyncProviderServerConfig.log.

Upon reading this file, I was seeing WCF errors and unhandled exceptions every few seconds which hinted to me that even though I had been able to repair the integration as far as the service health and the Dashboard were concerned, something was still amiss. I opted to this time, use the Dashboard to disable the integration, restart the server and re-configure the integration as I was now able to do this with the service for the Office 365 Integration running okay.

After removing it all and adding it again, everything worked as intended.

Configure Users

You can either do this via the Windows Server 2012 Essentials Dashboard or directly in Office 365. I’d recommend doing it in the Dashboard if you are using Essentials otherwise you have a second step to link the cloud mailbox to the on-premise user account.

To setup a user, very simply, go to the Users tab in your Dashboard. Click the user you want to activate for Office 365 and select the Assign Office 365 Account option from the tasks on the right. Pick the email address for the user using either the onmicrosoft.com or the vanity custom domain you have configured and then click Next. If you have a license available to allocate to the user, it will be setup for you. If you don’t have a free license slot then you’ll need to buy one from the site office365.com.

One thing worthy of noting is that once you enable a user for Office 365 in this way, Windows Server 2012 Essentials will set the change password on next logon flag for the user to force them into a password change with a new password for the cloud which can then by synchronised up to Office 365 for that single password login experience.

ExRCA is Your Friend

Through all of this, testing everything is working is critical. Office 365 does a good job of telling you when you’ve got things configured properly, but ExRCA or the Exchange Remote Connectivity Analyzer is better as it’s a tool dedicated for the job. Visit http://exrca.com and click the Office 365 tab and run any of the tests you like to make sure things are working. Some tests need only your domain name to verify settings such as DNS records whereas others need a credential to simulate a synthetic transaction to a mailbox or account.

I found when testing my setup that everything is reported as working but Autodiscover fails every time. When you drill into more information this is caused because the certificate name presented by the CNAME redirect from autodiscover.richardjgreen.net to autodiscover.outlook.com means that the outlook.com certificate doesn’t have my domain name on it. My Outlook and Windows Phone clients still Autodiscover the service correctly so I think this is a by-product of the Office 365 configuration and not a problem as I’ve found literally hundreds of other people asking about failed Autodiscover tests on the TechNet forums.

Client Experience

One thing I discovered which isn’t hugely clear in the documentation is that I wasn’t able to configure Outlook 2013 or my Windows Phone for ActiveSync until after I had logged in for the first time at office365.com using the account I issued my license to and configured the mailbox. You are prompted with a couple of questions such as confirming your name and time zone logging in for the first time.

After doing this online piece, Windows Phone started to sync the mailbox using ActiveSync okay, and Outlook 2013.

What’s Next

Well first I have some mail service consumers to address. I’ve got quite a few family members using Windows Live Domains with Outlook.com on our personal family domain name which I don’t fancy paying for Office 365 for so I’m going to have those tough conversations over do they want to pay for their own Office 365 mailbox or do I help them move to Outlook.com natively using a non-vanity domain. Whichever way it happens, I’m going to be looking at manual mail migrations out of Outlook.com to Office 365 for these users as there isn’t a migration path for this right now.

One thing I will be doing once I move my personal family domain over to Office 365 is implementing the Outlook Group Policy .admx files to allow Outlook to auto-configure the email address from Active Directory on first-run so that my wife and, in the future, kids don’t have to manually enter those details. It’s something I have come to expect from enterprise environments so I feel I owe them that simplicity factor enterprise computing can bring.

The kids have mail addresses right now but they aren’t live, they are aliases on our mailboxes as parents so I’m going to be looking at shared mailboxes for these to make them one step closer to full service mailboxes and I’m also going to be looking into settings up some MRM policies in Office 365 to apply to our mailboxes to keep them trim and reduce the amount of overwork we have to do to maintain the storage of it although frankly, with a 50GB mailbox, do I care?

Longer term, I may look at the option to spend an extra 65 pence a month per user and sign up to Exchange Online Protection to stem the flow of nasty emails as not everyone is as savvy as someone in IT and that’s why these services exist. It’s another one of those things for me where 65 pence per month could potentially lead to hours and entire evenings saved, not having to repair a PC after a virus got installed via an email attachment.

In more posts to come, I’ll show how I’m configuring some of the features and settings in Office 365 and I’ll talk about how I plan to upgrade my estate to Windows Server 2012 E2 Essentials to get some of the new integration and management features for Office 365 in the dashboard along with other new features.


Windows Azure Backup Errors for Roaming Profiles

I was checking some of the logs of my Windows Server 2012 Essentials server last night and discovered that recently my Windows Azure Backup logs were reporting errors for the backups.

The errors weren’t serious but it was flagging that several files couldn’t be backed-up to the service. A normal person could accept this, but me having a little bit of offensiveness about things like that I needed to resolve it.

It transpires that the issue is temporary files generated by Facebook games and Flash video files in the roaming user profile. To resolve the warnings, modify the backup schedule on the server to the Exclusion Settings. Under Exclusion Settings in the Backup Wizard, define *.tmp *.swf and *.sol as exclusions for the root directory of your roaming profile share and set the Subfolders option to yes.

Tonight’s Windows Azure Backup completed without warnings.

Enjoy

Windows Server 2012 Essentials and the Failed Migration

Last week, I took a day out of the office as annual leave to migrate my home setup from Windows Home Server 2011 to Windows Server 2012 Essentials, taking in all of the blog posts I have written over the previous months’ about how I intend to use some of it’s new features.

Suffice to say, it wasn’t a success, but I have completed the lessons learnt and I am now preparing for a second attempt.

The main protagonist in the failure was the recently acquired 3ware 9590SE-12ML multilane SAS/SATA RAID controller. After installing the card about a month ago to verify it’s functionality, I saw the message “3ware BIOS not initialized” and the 3ware site left me comforted in the fact that this was due to the fact that I had no drives connected to it. When I connected my two new Intel 520 Series SSD drives to it to create a RAID1 mirror for my new OS drive, I saw the same message still even though the drives we detected okay. I installed the 3DM2 software in Windows Home Server 2011 and I was able to manage the card via the web interface (which is really nice by the way), however after creating the volume unit, the controller began to initialize the disks and the system froze instantly. I left a it a minute or two just in case, but no joy. A hard power off and restart then left the controller completely missing from the POST and startup with even the BIOS not showing it as connected. After trying a few different things, I was able to intermittently get the card to be detected, but not without causing major stability issues and it still wouldn’t properly initialize the BIOS during POST. A colleague leant me an Adaptec card for a day to test and this card was detected okay, allowed me to create a volume and the volume was detected within Windows okay, so I had it down to a compatibility issue between the motherboard and the 3ware card.

I decided that the issue with the motherboard compatibility could be related to the fact that it is a Micro ATX motherboard with the AMD Brazos chipset and the AMD E-350 ultra-low power processor and that the card could perhaps not be able to draw sufficient power from the PCI Express 16x (4x Mode) slot so I began looking at some other options. The processor has actually been one of the things I wish I had done differently of late. When the server was first built and put online it was great, but as I began to utilize the Home Server for more backend centric tasks, I began to notice the 1.4GHz Dual Core processor struggling and some tasks would timeout if they happened their timing happened to collide with other simultaneous tasks.

With the Ivy Bridge 3rd Generation Intel Core family CPUs, Intel released a line of CPU appended with the letterT. This family of CPUs are low power compared to their letter-less or K processors with the Core i5-3470T being the most efficient, pipping even the Core i3 T variant to the peak TDP and performance titles. Compared to the 18W peak TDP of my AMD E-350 chip, the Intel Core i5-3470T consumes a peak TDP of 35W, however it gives in exchange 2.9GHz Dual Core processing with Hyper-Threading allowing Windows to see two additional virtual cores, however because it is an i5 chip and not the lower specification i3 chip, it features TurboBoost which allows the CPU to boost up to 3.6GHz under high load. Using data from cpubenchmark.net, the AMD E-350 produces a score of 774, whilst the Intel Core i5-3470T produces a score of 4,640.

Investing in Ivy Bridge is more expensive then investing in the 2nd Generation Sandy Bridge which also offers some T branded chips for energy efficiency, however the CPU benchmark for the Sandy Bridge vs. the Ivy Bridge speaks for itself not to mention the fact that the Ivy Bridge reduces the TDP by 7W, the extra few pounds between the chips is worth the money.

To support the Ivy Bridge Socket 1155 Core i5 processor, I was going to need a new motherboard. I like ASUS as their are the market leader in motherboards in my view, and I decided upon the ASUS P8Z77-V LX board for several reasons. It’s a step up from the Micro ATX board I have previously been using, up to a standard ATX board.

The benefits of this are it avails me 4 memory modules in a dual channel configuration whereas I only previously had two slots with a single channel. The slot count isn’t an issue as I upgraded about six months ago from my originally purchased Corsair Value Select 2x2GB DIMMs to 2x4GB Corsair XMS3 DIMMs. The new DIMMs allowed me to make use of the higher DDR3 PC3-12800 1600MHz speeds, doubled my memory ceiling as due to running SQL Express on the backend for the MyMovies database I was hitting very close to 4GB daily and gave me a theoretically more stable system as the XMS3 memory is designed for overclocking and high performance cooling with it’s head spreaders, so running them at a standard clock should make them super stable. The other benefit is the increased PCI Express slot count. The new board gives me 3x PCI, 2x PCIe x1 and 2x PCIe 16x, one of which is a true 16x PCIe 3.0 slot and the other a PCIe 2.0 slot with 4x bandwidth.

The other reason for selecting it was the Z77 chipset. The Z77 set affords me the widest range of slots, interfaces and is also the best bang for buck having the best power consumption for the chipset out of all of the full feature chipsets (ignoring the Q77 chipset as although this adds Intel vPro, you lose a lot of slots through it).

All told, with the pair of new SSD drives for the OS mirror, the new Core i5 processor and the new ASUS motherboard, my overall power consumption will increase by what equates to £10-15 a year. When you consider the performance uplift I am going to see from this (the hint is worlds’ apart), it’s £10-15 a year very well spent.

The T variant of the Ivy Bridge supports passive cooling which aligns with my previous mantra of keeping it quiet, but I have come to the conclusion over the last year that this is unnecessary when I have a Cisco 2950T switch and a Cisco PIX Firewall making way more noise than a server would and the fact that it is all racked in my garage, out of earshot of the rest of the house for the one to two hours a month I many spend in the garage, it’s just not worth the thermal though process trying to engineer it quiet and cool. I have also been getting concerned lately of the drive temperatures on the Western Digital Green drives, stacked up inside the 4U case, so I’m switching to active. I selected he Akasa AK-CCE-7101CP. It supports all nature of Intel chipsets including the Socket 1155 for Ivy Bridge and has variable fan speed and decibel output. It’s rated up to 95W TDP for the quad core i5 and the i7 family chips, so running it on the 35W T variant of the i5, I’m hoping it will run at the quiet end of it’s spectrum, putting it at 11.7dB which is silent to the passing ear as it happens anyway.

To assist with my drive cooling problem and also an on-going concern about what I would do to deal with a drive failure or upgrade in a hurry (currently, it’s shutdown the server, drag and keyboard, mouse and monitor to the rack from my study to access the console session, open the case and connect the new drive cables etc) I decided to invest in the X-Case 3-to-5 Hot Swap caddy’s. These caddy’s replace the internal cold swap drive bays which require manual cabling and drive screwing with an exterior access, hot swap caddy system. All the drives in a block of 5 are powered via two Molex connectors, reducing the number of power connectors I need from my modular PSU, and the five SATA data ports on the rear of the cage are to be pre-connected inside the case allowing me to hot add and remove disk without powering down the server or even having to open the case. Each caddy also features a drive status and a drive access indicator so that I can readily tell if a drive fails which drive is the one in question, making fault resolution much easier. This is all the more important and useful with Windows Server 2012 Essentials. The cage also incorporates an 80mm fan which draws air out of the drive cage to keep the disk temperatures down.

To summarize then, I’m doing the following:

  1. Upgrading the ASUS AMD Brazos Motherboard to an ASUS P8Z77-V LX Motherboard
  2. Upgrading the AMD E-350 Dual Core 1.4GHz CPU (774 Score) to an Intel Core i5-3470T 2.9GHz Dual Core CPU (4,640 Score)
  3. Gaining an Extra Memory Channel for my Corsair XMS3 2x4GB DIMMs
  4. Adding X-Case Hot Swap Drive Caddies
  5. Gaining a Bit of Active Cooling

I’m still waiting for a few of the parts to arrive but once they do, it’s going to feel like the Home Server is going to be getting it’s 18 month birthday present in the form of several serious performance and ease of use and management upgrades. I’m really looking forward to it and in a sad kind of way, I’m glad that the upgrade didn’t work out the first time, otherwise I wouldn’t have invested in these parts which I know I’m not going to regret buying.

Once I’ve got everything installed, I’ll run another post to show the images of it and I will hotlink to my old pictures to do a little before and after for comparison, then it’ll be hot trot into Windows Server 2012 Essentials I hope.


Storage Architecture for Windows Server 2012 Essentials

Two of the best features in my eyes in Windows Server 2012 Essentials over Windows Home Server 2011 are both related to disk.

RAID Support
Windows Server 2012 Essentials is a grown-up Windows Server unlike Windows Home Server 2011 which in an aim to simplify the server in the home idea for consumers, removed the ability to use hardware RAID the operating system volume. This was a horrible thing for Microsoft to do in my opinion.

Storage Spaces
In a nod to Driver Extender from Windows Home Server (v1) Windows 6.2 kernels running on Windows 8 and Windows Server 2012 both support Storage Pools and Storage Spaces. This allows you to pool disks together to produce simple, mirrored or parity volumes from a single pool of disks. It’s like RAID on steroids because it means you only waste the chunks on disk that you want to for volumes that you want to protect, not all of them.

So taking these two ideals into consideration, what am I going to do?

Step 1 is to get the operating system off of the pair of 2TB disks I have, where there is a 60GB partition for the OS and a 1.8TB partition on one disk, and a 1.8TB partition on the second mirrored from the first disk using Windows Disk Management mirroring.

Step 2 is to maximize the utilization of the capacity of my six 2TB disks.

To achieve step 1, I am investing in a pair of SSD disks. For Windows Server 2012 Essentials to accept them they have to be over 160GB, so I am looking at the Intel 520 Series 240GB disks which are currently on Amazon reduced from £300 to £180. These will be connected to my SATA RAID controller in a RAID1 mirror and will be installed in a Lian Li 5.25″ to dual 2.5″ adapter, allowing me to utilize one of the three 5.25″ bays in my case which I will not ever use otherwise, opening up two slots for 3.5″ high capacity disks for future expansion. Needless to say, a pair of Intel 520 Series 240GB disks will give the operating system volume unbelievable IOPS and will allow the server to boot, reboot and access the OS extremely quickly. I’m also going to leave it as one super-sized 240GB partition so that I never have to worry about Windows Updates or software I install on the server causing me to need to think about repartitioning in the future.

To achieve step 2, it’s simple. Connect the now completely free to breath six 2TB disks to any of the on-board or two remaining SATA RAID controller ports, and configure them in Windows Server 2012 Essentials as a single, six disk Storage Pool and carve my volumes out of this 12TB raw disk pool using the protection levels I see fit for my needs.

Thanks to the ability to over provisioning (or thin provisioning as Microsoft incorrectly refer to it in my opinion) on Storage Spaces, I can create spaces larger than my current capacity and add disk or replace existing 2TB disk with 3TB or 4TB disk as available to extend the live capacity.

Over time, as I require more disk there will be one ‘problem’ in that I will have depleted all of my SATA ports. Luckily, my SATA RAID controller supports Port Multipliers, and a cheap and potentially nasty Syba 5 to 1 SATA Port Multiplier for about £45 means I can extend my capability to an extra four ports which at that point reaches the capacity of the case chassis. Power also isn’t an issue as my Corsair AX750 power supply was selected at the time specifically because of it’s amazing ability to run at peak power efficiency at extremely low consumption levels and also to support up to 12 SATA disks with its modular cabling design.

So there we have it…my design for Windows Server 2012 Essentials Storage Architecture. It’s by no means conventional but then I don’t really think anything about my server build is, with it’s 4U rack mount configuration packing a build-out consuming less power than your average light fixture.

I only designed and stood up the Windows Home Server 2011 setup little over a year ago. I think we all secretly knew that Home Server as a product family was a dying breed and that Microsoft would either kill it off completely or encompass it into another product family sooner than later to drop the support overheads. Thankfully it happened sooner I feel: Yes, it means that I have to rebuild my setup not that long after it was actually first built, but thankful because it meant I haven’t invested too heavily in customisation or further expansion of my current setup leaving me playing the corner flag with a legacy product at work. Luckily now, with Windows Server 2012 Essentials being a core SKU in the Windows Server family, it will be three years until the next major release. Although a Windows Server 2012 R2 release may appear sometime in the middle of the three year release cadence for server operating systems, at least being on the RTM release for the same product should make that migration a hell of a lot easier.

Hardware Compatibility for Windows Server 2012 Essentials

Following on from my spate of posts relating to Windows Server 2012 Essentials, I am working hard to test my configurations in a Hyper-V 3.0 VM on my desktop to ensure that I can migrate to Windows Server 2012 Essentials successfully without any hiccups.

Migrating my data on the current Windows Home Server 2011 is the biggest task, but not the biggest challenge. For me, ensuring that my hardware will work as I need is the biggest challenge because of my extremely bespoke build.

The first item on the agenda is the CPU. The system requirements from TechNet state that a 1.4GHz single core or a 1.3GHz dual core is required. Lucky, as I have a 1.6GHz dual core AMD E-350 Hudson processor. I’m a long way from the recommended 3.1GHz multi-core processor, but my primary target is still energy efficiency, so the E-350 processor exactly achieves that with an 18W TDP. If I find over time that CPU is my bottleneck then I will need to consider using slightly more watts and upgrade to something like the 35W TDP Intel i5 Mobile chipset but that will need a new motherboard too, so would cost a load to upgrade.

Next up is the memory; I currently have 4GB of the stuff. The minimum is 2GB but the recommended is 8GB. I know based of my current usage that my Windows Home Server 2011 machine that I am using about 70% of the physical memory, and with Windows Server 2012 being of more modern gravy, it is designed around lower I/O and more memory (as memory is super cheap these days), so I’ve decided to upgrade to 8GB, replacing my 2 x 2GB 1066MHz Corsair Value Select with 2 x 4GB 1600MHz Corsair XMS3. This new memory is faster than my current as at build time, Corsair didn’t sell the Value Select memory in anything above 1066MHz, and because the XMS3 memory is designed for gamers and overclockers, features like variable voltage, improved CAS latency and builtin heat spreaders should all help improve overall system performance and stability.

Next up is the network. This one could be interesting. I wrote a post back in August 2011 when I first built the new home server around circumventing the fact that the Intel drivers wouldn’t install on Windows Home Server 2011 (based on Windows Server 2008 R2) because I am using one of the older generation PCI-X cards which were discontinued. The driver physically works in Windows Server 2008 R2, shows as WHQL in Device Manager and all of the ANS features work too, but the .msi blocks it. I’m betting on the fact that by using the updated version Intel driver, designed for Windows and Windows Server 2012 that the same hack will work. In Windows Server 2012, I won’t be using the Intel ANS teaming driver for creating my 2Gbps SLA team though, but I will be using the native features in Windows Server 2012 which is one of the amazing new features. If that fails, then I will be using the onboard Realtek 1Gbps NIC for the short term while I acquire a replacement, more modern PCI-E dual port Intel NIC to replace my PCI-X one which run for about £40-£60 on eBay these days.

The final and most pivotal part of the build, the one which could ruin it all is the Leaf Computer JMicron JMB36x based SATA RAID controller. In Windows Server 2012 Essentials, I am re-modelling my storage architecture. This is the primary reason for my move to Windows Server 2012 Essentials so that I can take advantage of Storage Pools and Storage Spaces. After some debate and discussion with @LupoLoopy at work surrounding SATA IOPS and protection levels for data, we both agree my current setup of RAID10 for the data volumes is seriously wasting two of my 2TB disks and I am arguably wasting another two of them on the OS volume. I will be posting in full later to discuss and expose my storage strategy.

Back to the controller though, using my Windows Server 2012 Essentials Hyper-V 3.0 VM, I installed the driver using the Install Legacy Hardware option in Device Manager, and the latest driver version from the JMicron site installed successfully, without warning and still bears the WHQL mark even though it is a Windows Server 2008 R2 driver.

Am I happy? Very. With the exception of possibly the Intel NIC if my hack for the .msi restrictions doesn’t work and I need to buy a new one (although secretly, I would like to replace it with a PCIe one at some stage anyway), all of my hardware looks set and happy for Windows Server 2012 Essentials. So much more to do before I can start any work, but progress is progress after all.

Partners on Exchange in Windows Server 2012 Essentials

Reading some of the comments and views on Windows Server 2012 Essentials this evening, it appears that quite a number of partners aren’t very happy with the lack of Exchange as was previously found in Small Business Server (SBS).

I think this is short-sighted of these partners making these comments. If you are a partner, what makes you more money? New deployments or supporting existing ones? I would hazard a guess that it is the new deployments. SBS made Exchange easy, really easy, which meant that the amount of work to configure Exchange to work was limited. The hardest part was migrating any existing mail systems into Exchange.

Windows Server 2012 Essentials is designed around feature integration with Office 365. This means that you can offer your customers not only Exchange, but also Lync and SharePoint (yes, I know SharePoint was in SBS too, but it wasn’t the greatest of configurations). What’s more, how available and accessible is a single SBS server verses Office 365? Yep, Office 365 is better. So by giving your customers Windows Server 2012 Essentials and Office 365, are they not getting a better product, giving them more functionality and most likely a better customer experience, translated into happier customers?

All this, leaves you as a partner more time to focus on upsell, selling the customer more, varied products or trying to break into new customers or verticals and spending less time answering to menial support incidents, and lest not forget that moving to Office 365 isn’t a walk in the park by itself. If a customer is currently using SBS then their existing messaging environment will likely need to be updated to support some kind of temporary co-existence while users are migrated, and all of this is professional services work, work that frequently carries a big price tag and has high margins on it.

The moral of this story is that cloud is happening and I think that those partners who embrace it will succeed. Those who oppose it will likely find themselves losing work to people who do embrace it and for me personally, what sounds better as a job title? Systems Implementation Engineer or Cloud Solutions Integrator or Cloud Solutions Architect?