Automatically Select a Configuration Manager Task Sequence
With Configuration Manager, we have a great amount of power and control over how we deploy computers using Task Sequences. Many people go to great lengths to make their operating system deployment experience a great one be it for end-users with User Driven Installation or for their support technicians driving the builds instead. One way which we can streamline the process is to use a consolidated task sequence which handles all of our various operating systems, languages, drivers and applications in a single task sequence with intelligence.
If you have gone to the great lengths to make this happen in your environment, you may be left with a sinking feeling that everytime you PXE Boot or USB Media Boot a client to deploy, you still have to select a task sequence to run even though you only have one as shown in the sample below.

Luckily, we have a solution to this and a way to allow us to skip the Task Sequence Selection wizard and automatically enter our one task sequence to rule them all and it is done using Prestart Commands on our Boot Images in Configuration Manager. You don’t need MDT or any other fancy software integration with Configuration Manager to do this as it is done using the default boot images.
To start, we need to know the Deployment ID for the Task Sequence. This is not to be confused with the Package ID. The Deployment ID is the unique ID assigned to a single instance of the task sequence deployed to a collection.
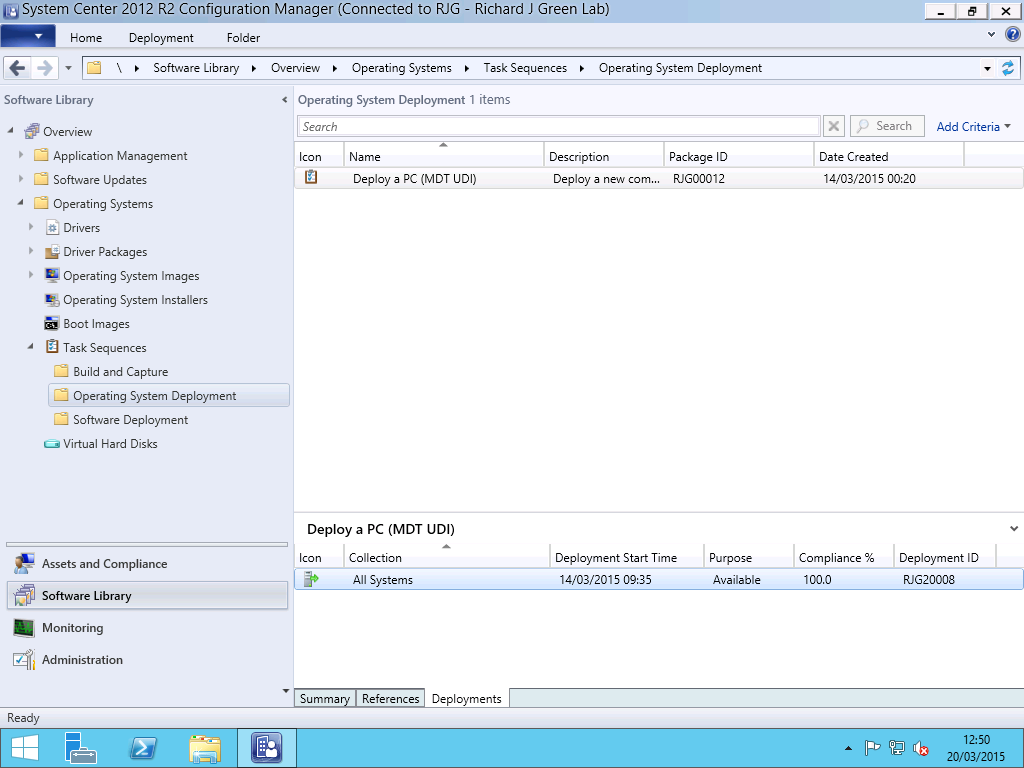
We can get the Deployment ID for the Task Sequence by navigating to the Software Library portion of the Configuration Manager Administration Console and then expanding Operating Systems followed by Task Sequences and then locate your sequence from any folder structure you may have created. With the Task Sequence selected, the lower half of the screen will show the summary properties for it. Click the Deployments tab at the bottom here to see where your Task Sequence is deployed, in my example, to the All Systems collection.
In this area, right-click on the column titles and add the Deployment ID column to the view. This is the value we need.
With this value in hand, we now need to create a very simple VBScript file. I store this file in a directory called OSD Prestart Files on my Primary Site Server but where you store it is up to you. Create a VBScript with the following contents.
Set DefaultOSDTS = CreateObject("Microsoft.SMS.TSEnvironment")
DefaultOSDTS("SMSPreferredAdvertID") = "RJG20008"
In your case, you will need to change the value of DefaultOSDTS to the Deployment ID shown in your console. My Deployment ID was RJG20008 as set.
Once you have created and saved this file, head over to the Boot Images section of the Operating System portion in the Software Library and view the Properties for your boot image.
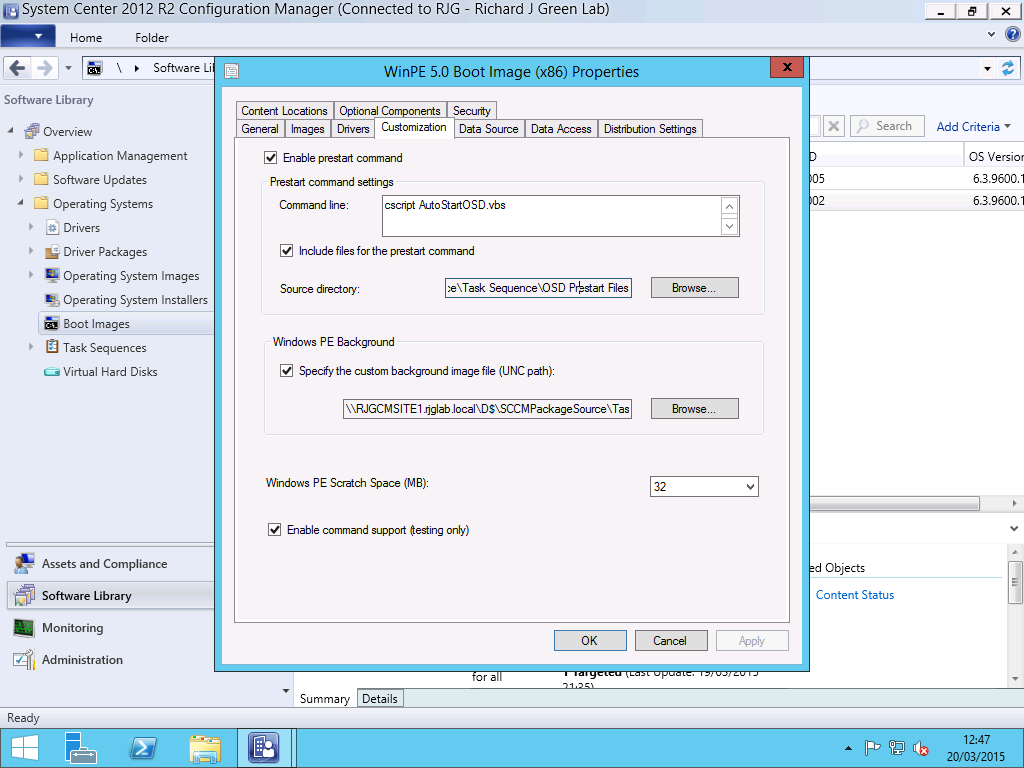
As you can see from the image above, we need to check the box for the option Enable Prestart Command on the Customisation tab of the properties. Once this is checked, we can add the command to call our VBScript file which in my case will be cscript AutoStartOSD.vbs. Once you have entered this, check the box for Include files for the prestart command and specify the path to the script file you created so that this file is integrated into the Boot Image file.
When you save the changes, you will be prompted to update your Boot Image files and the file will be rebuilt and updated on your Distribution Points. Once complete, if you are using PXE to boot your clients you need to do nothing more and you can start enjoying your automatically starting task sequence. If you are using USB or ISO Boot Media to start your task sequence process, you will need to update your image as the Boot Image that the media is based on has been updated.