Storage Spaces Inaccessible After Windows Server 2012 R2 Upgrade
Windows Server 2012 R2 has some nice new features and improvements on existing features for users of Storage Spaces so there is a definite appeal for users of Windows Server 2012 to want to upgrade to Windows Server 2012 R2. If you opt to do an in-place upgrade to preserve your existing Storage Spaces so that you can get your service up and running with the hope of being able to use them straight off the bat in Windows Server 2012 R2, you may encounter an error Read-only by user action and you need to perform some corrective steps to use them again.
This is what your Storage Spaces may look like if you open the Storage Spaces control panel item after the upgrade. As you can see, the spaces are in-tact and will report all of the space names and capacity from prior to the upgrade but instead of being online as you are used to seeing, you instead have this information icon and a message alongside the pool capacity indicator Read-only by user action. This is a built in protection feature of Windows Server 2012 R2 which takes your Storage Spaces offline by default after an upgrade. We just simply need to bring them online to use them. This is very similar to how in Windows Server 2003, a disk connected from an external system from a software RAID set could be marked as Foreign and the configuration of the disk needs to be imported first.
Changing the Storage Pool Status to Read/Write
To do this, open an administrative PowerShell prompt. At PowerShell, enter the two Cmdlets as follows:
Get-StoragePool | Where-Object {$_.IsReadOnly -eq $True} | Set-StoragePool -IsReadOnly $False
Get-VirtualDisk | Where-Object {$_.IsManualAttach -eq $True} | Set-VirtualDisk -IsManualAttach $False
If you forget to elevate the PowerShell prompt by running it as an administrator you will get access denied responses to the two Cmdlets as you aren’t running the Cmdlets with your administrative rights. Simply close PowerShell and re-open it by right-clicking and using the Run as Administrator option.
Bring the Storage Spaces Online
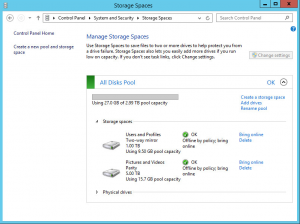
Once you’ve entered the Cmdlets above, returning to the Storage Spaces control panel applet now, you will see the information shown has updated.
As you can see, the Storage Spaces are now reporting their status as OK but they are marked as Offline by Policy. To change this and to bring the Storage Spaces online, simply click the Bring Online option next to each Storage Space and it will be brought online and granted a drive letter.
Check, Verify and Reminder
It’s important to note here that the drive letter assigned will be the next free letter and not perhaps, the drive letter that you used on the previous installation of Windows Server 2012. If you have a requirement for the Storage Space to be on a particular letter then you will need to go into the Properties of the individual spaces after it has been brought online and change the letter.
It’s also good to remember that any file shares you had on these Storage Spaces may be un-shared through the upgrade process so you should check the existence of your shares either by using the Properties on the drive or folder which you needed to be shared or by using the Share and Storage Management administrative console.
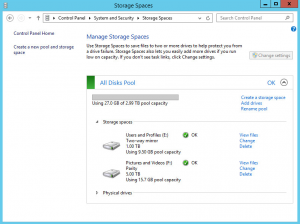
Once you’ve got your Storage Spaces all brought online after the actions above, you should be looking like normality again as shown below.
Hopefully someone out there finds this useful and it saves at least a few hair extractions from taking place after a Windows Server 2012 to Windows Server 2012 R2 in-place upgrade. Now it’s time to go and enjoy those new features.


