customize

Company Branding for Office 365 Apps

In the last two posts, I’ve explained and demonstrated the process for configuring customized branding for your Office 365 and Azure Active Directory login experience to give users a company branded experience when accessing Office 365 applications and extending that experience for international non-English users. Once the user is logged in, we want to ensure that, that company consistent branding identity resumes so in this post, I will be covering just that in how to brand your Office 365 Tenant Portal and Apps and just to reiterate, this is free for all Office 365 Tenants and you don’t need to be on a particular plan or SKU to access this.

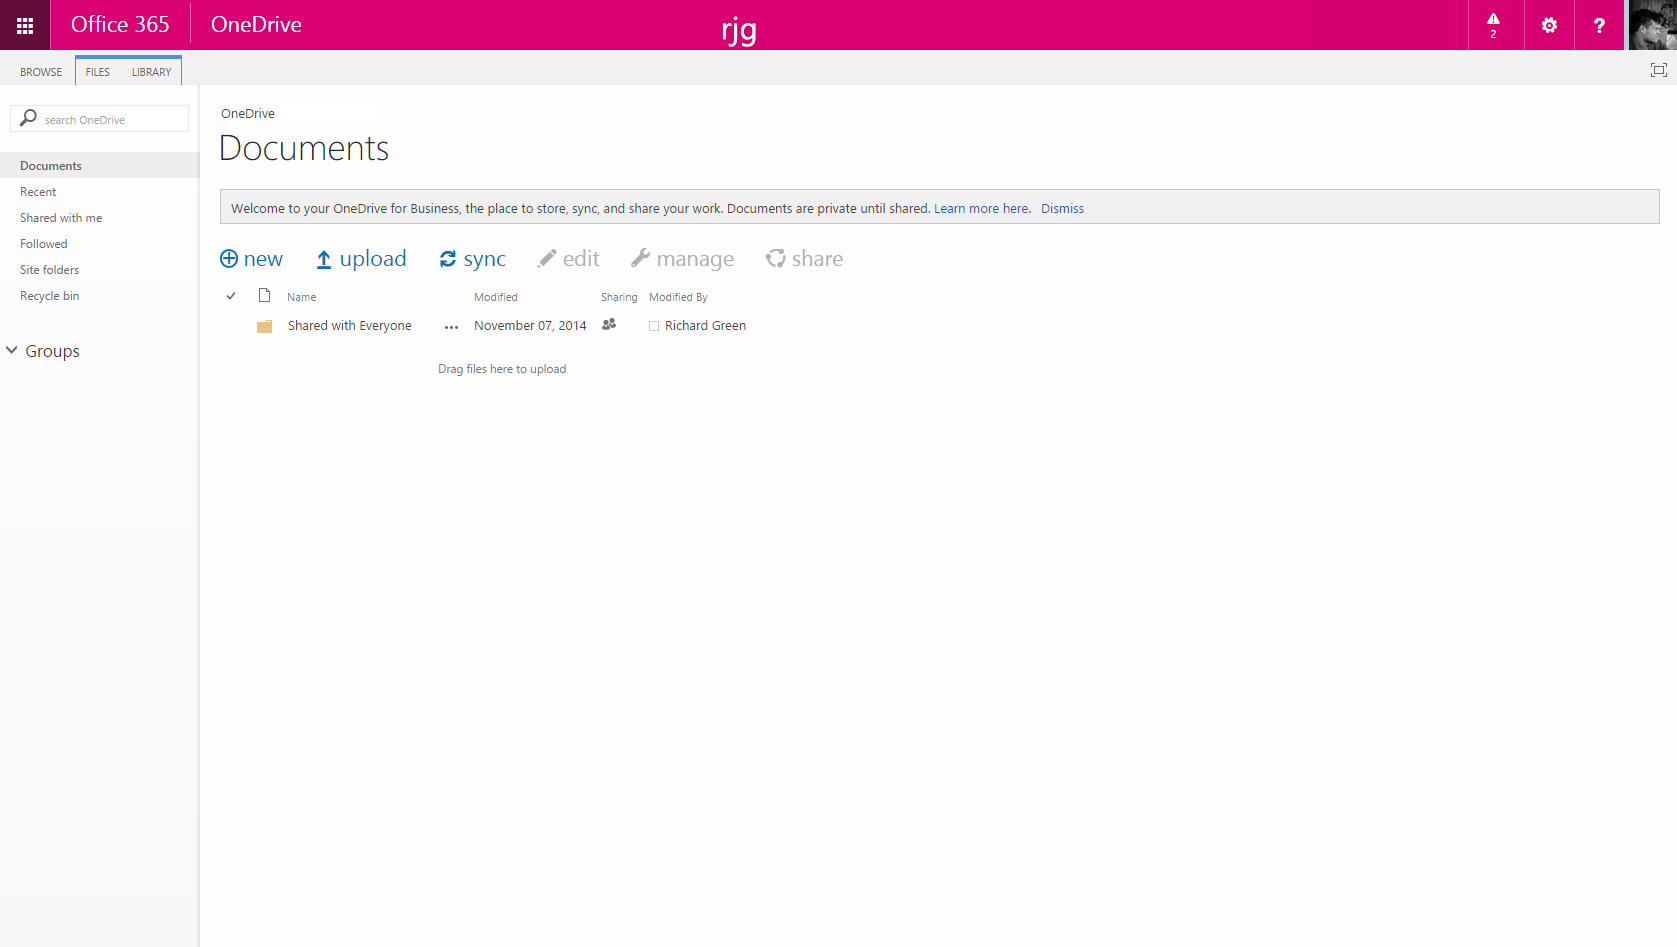
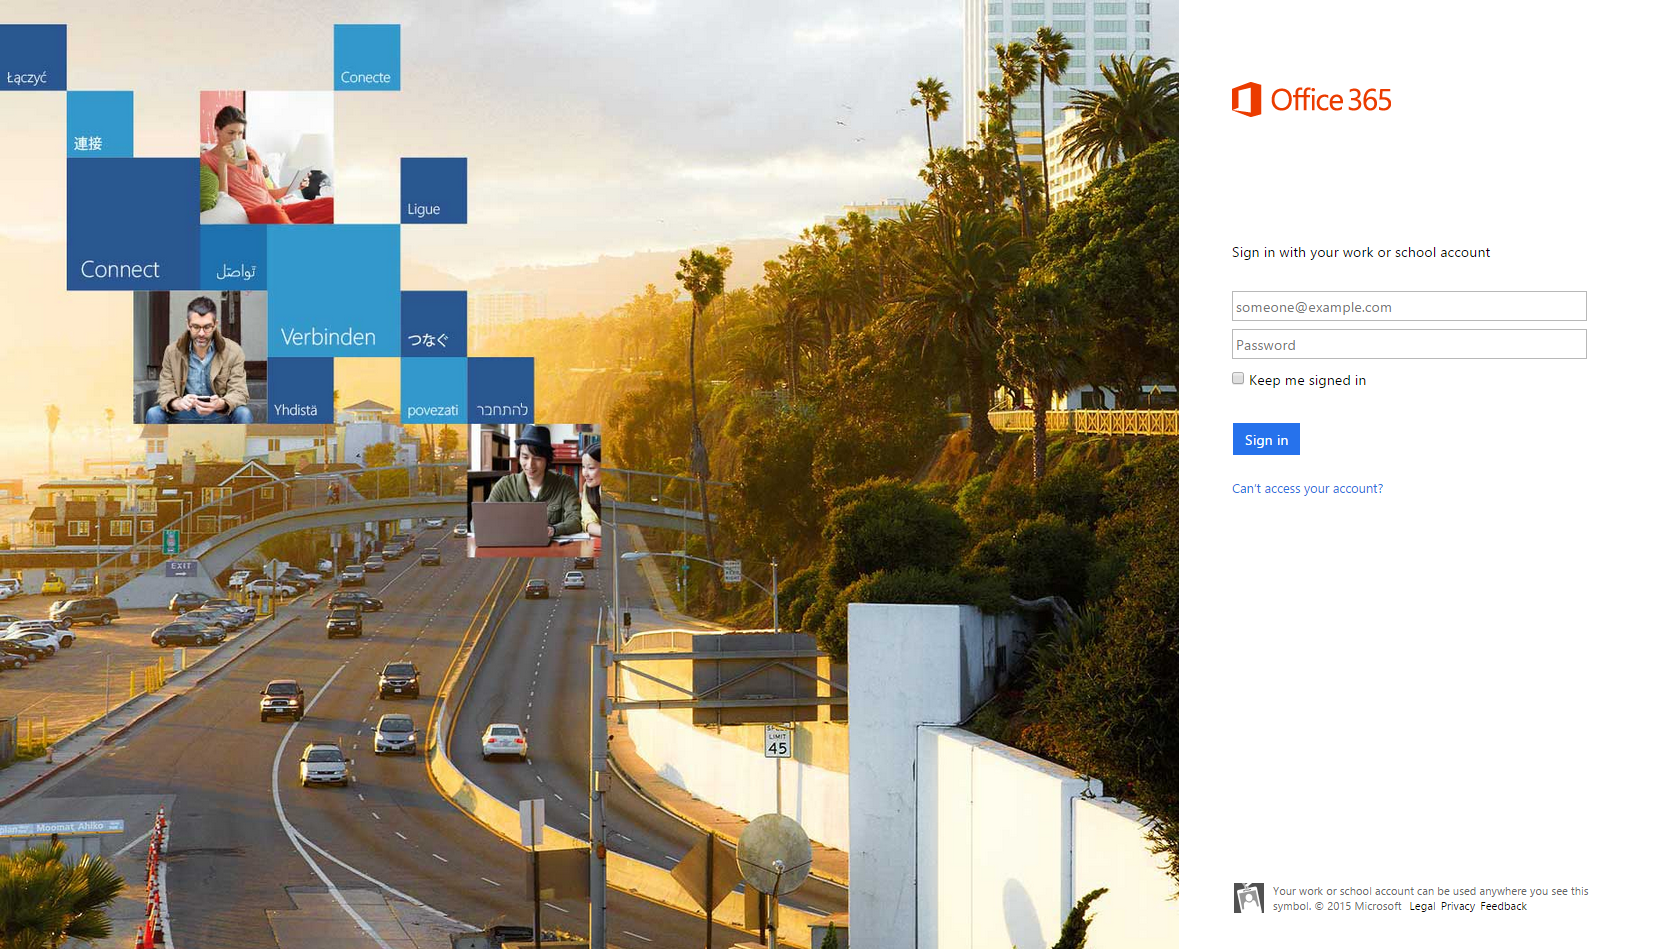
To start, we need to login to the Office 365 Admin Center as a Global Administrator. You can access the Admin Center at https://portal.office.com. If you haven’t ever applied any branding to your Office 365 Tenant, then it will probably look something like the following image.

Office 365 Admin Center Home

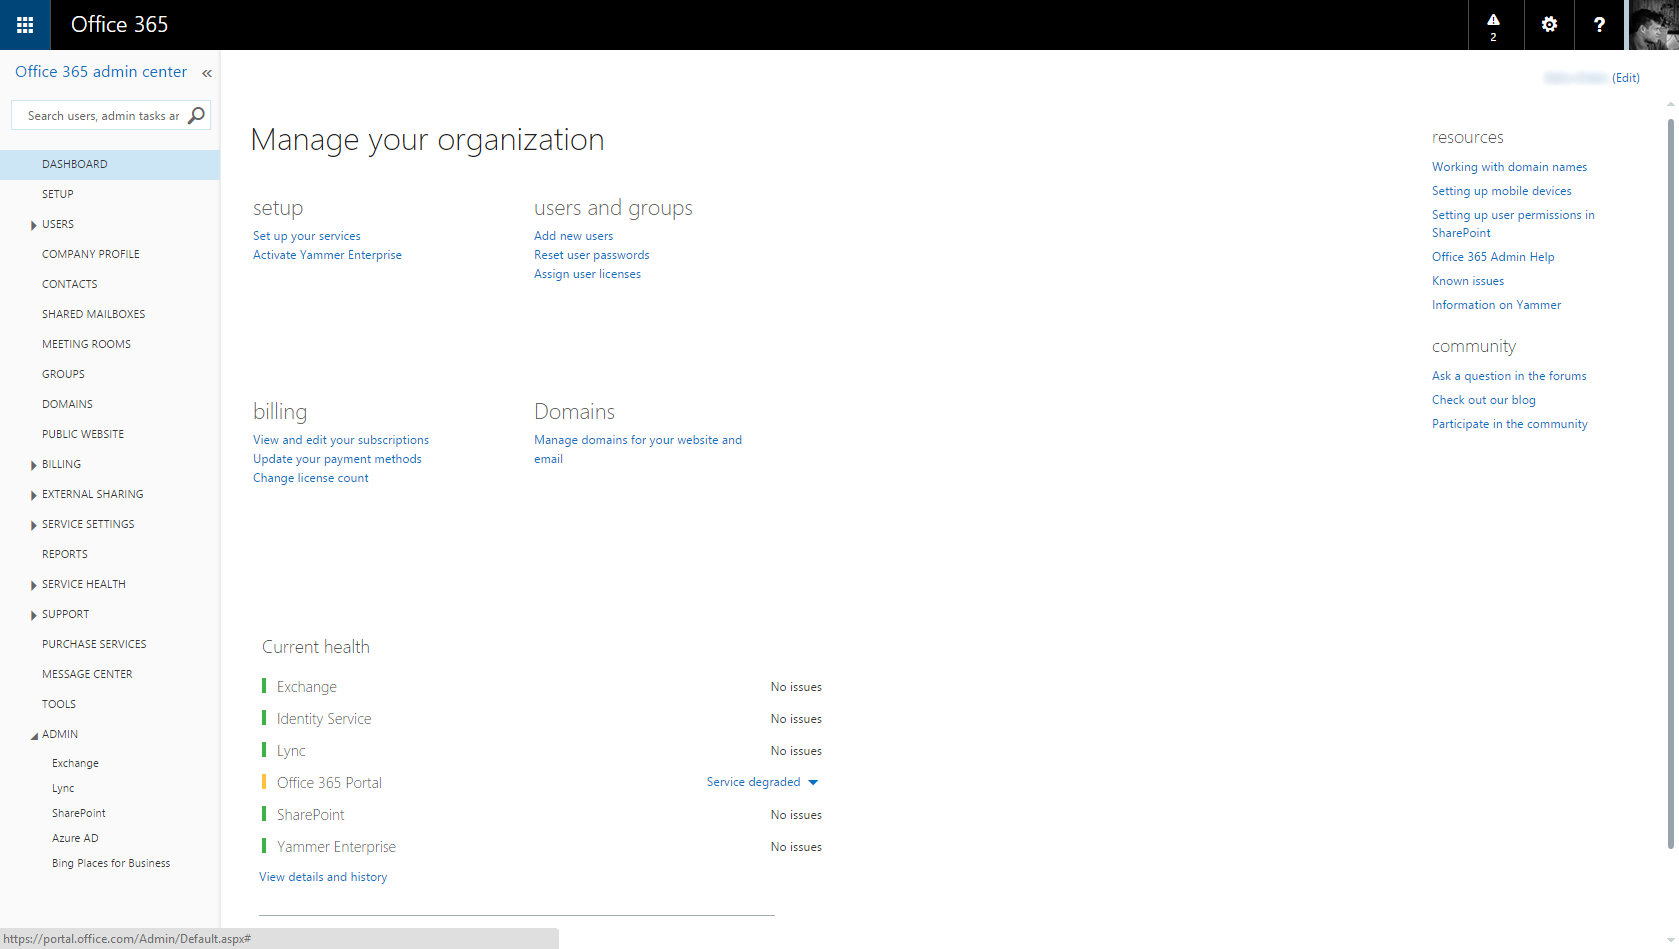
The default branding uses a blue accent colour which is used for the clickable App shortcut button in the top-left corner and is used to colour the page body text. The default header colour is black. To change the branding, click the Company Profile link in the left navigation bar in the portal. This will take you to the page where you configure your company name and address etc. Once on this page, there is a link in the left navigation for Custom Theming which you want to click.

Office 365 Admin Center Custom Theming

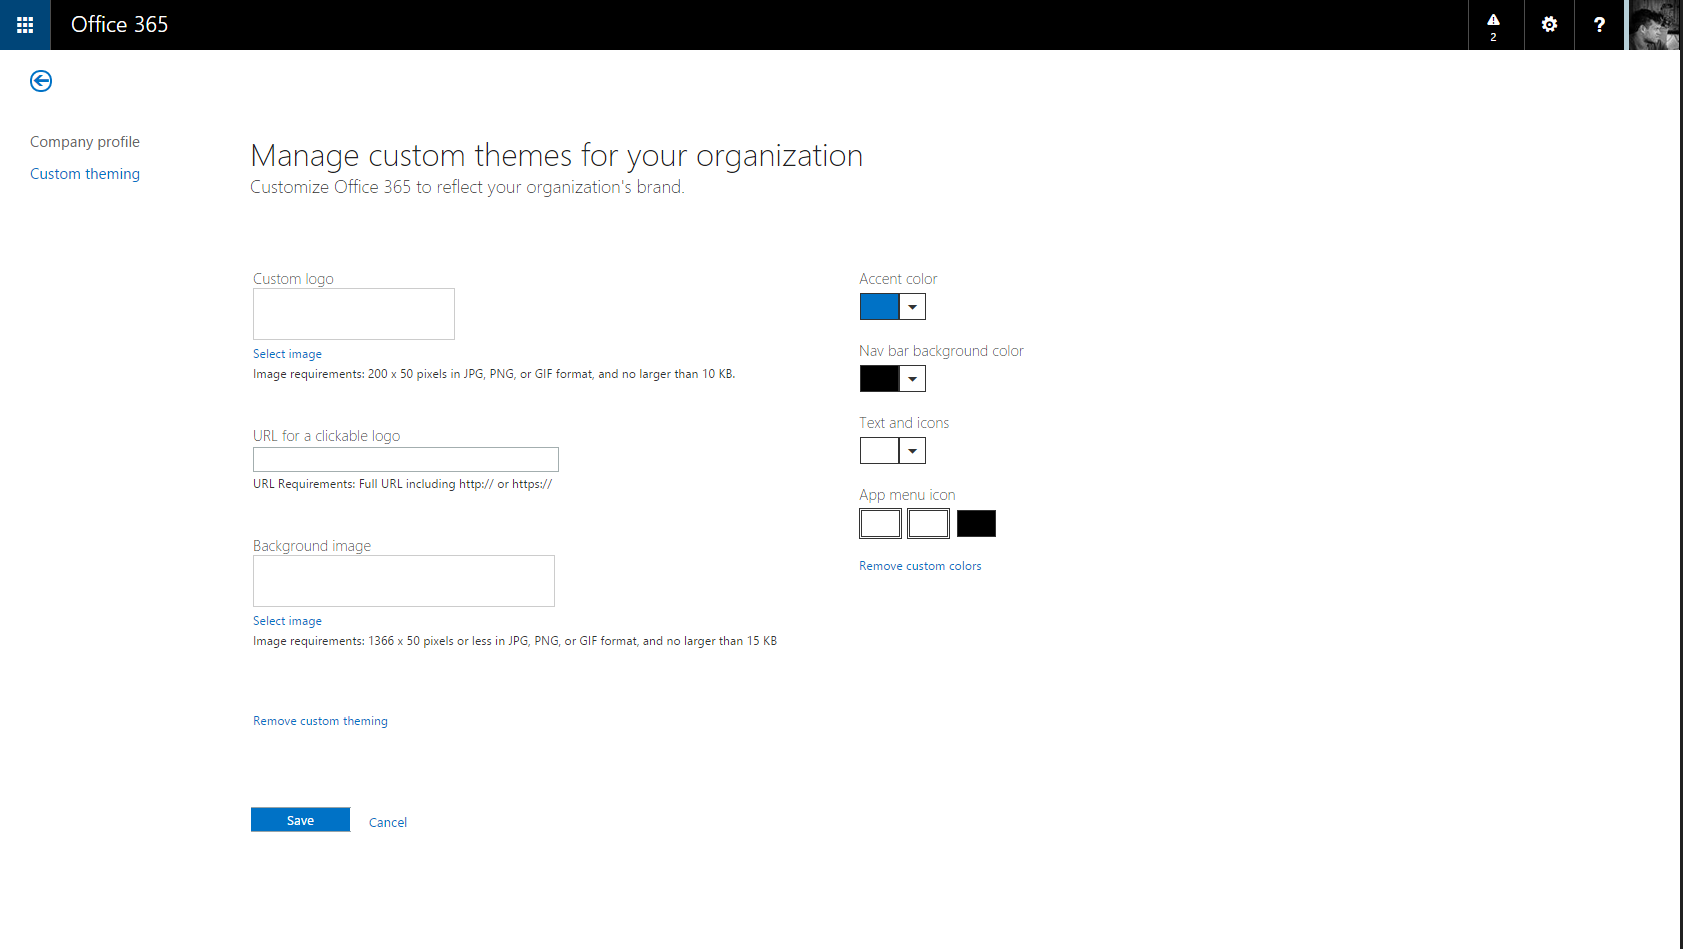
On the Custom Theming page, you can see there are several options for applying your branding to the portals and apps in Office 365. Custom Logo does what you would expect by allowing you to add your company logo to the pages. URL for Clickable Logo allows you to add a hyperlink to the company logo perhaps to direct people to your SharePoint Online intranet site or to your public website.

Background Image allows you to apply an image to the background of the header. If you use a gradient effect header or a patterned image on your public website,  you could apply this here to give a consistent look and feel across your internal and external facing portals.

To the right, we have options for Accent Colour, Nav Bar Background Colour, Text and Icons and App Menu Icon colours.

Accent colour is the colour used for the app shortcut icon in the upper left corner of the Office 365 sites and apps and is also used to colour hyperlinks and buttons on the pages. Nav Bar Background Colour applies to the Nav Bar if you have not applied a background image and applies to the whole bar except for the shortcut icon in the left corner. The Text and Icons colour applies to the title shown in the navigation bar along with the buttons in the upper right corner of the portal next to the user profile picture. Lastly, App Menu Icon applies to the tile like icon used in the upper left shortcut. If you use a light accent colour then you many want use the black option for this icon, otherwise the other option is white.

Office 365 Admin Center Custom Theming Applied

One you have applied your colour and icon selections, click the Save button to apply the changes. The changes will be visible in the Admin Center straight away but they will take a little time to appear in other Office 365 sites and apps. I had to wait about 15 minutes for my Tenant sites and apps to reflect the changes.

One observation I made is the placement of the company logo in the navigation bar appears to be dead centre. To me this looks very odd and in other blogs and instructions I have seen online showing this process, their logos appear in the left corner. Suspecting it to be IE in Windows 10 Technical Preview at fault, I tried a Windows 8.1 machine using IE and Chrome with the same results. I’m not sure when this changed or why but needless to say, it looks odd to me so I’ve opted to remove the logo from my final implementation for my tenant but your results will vary.

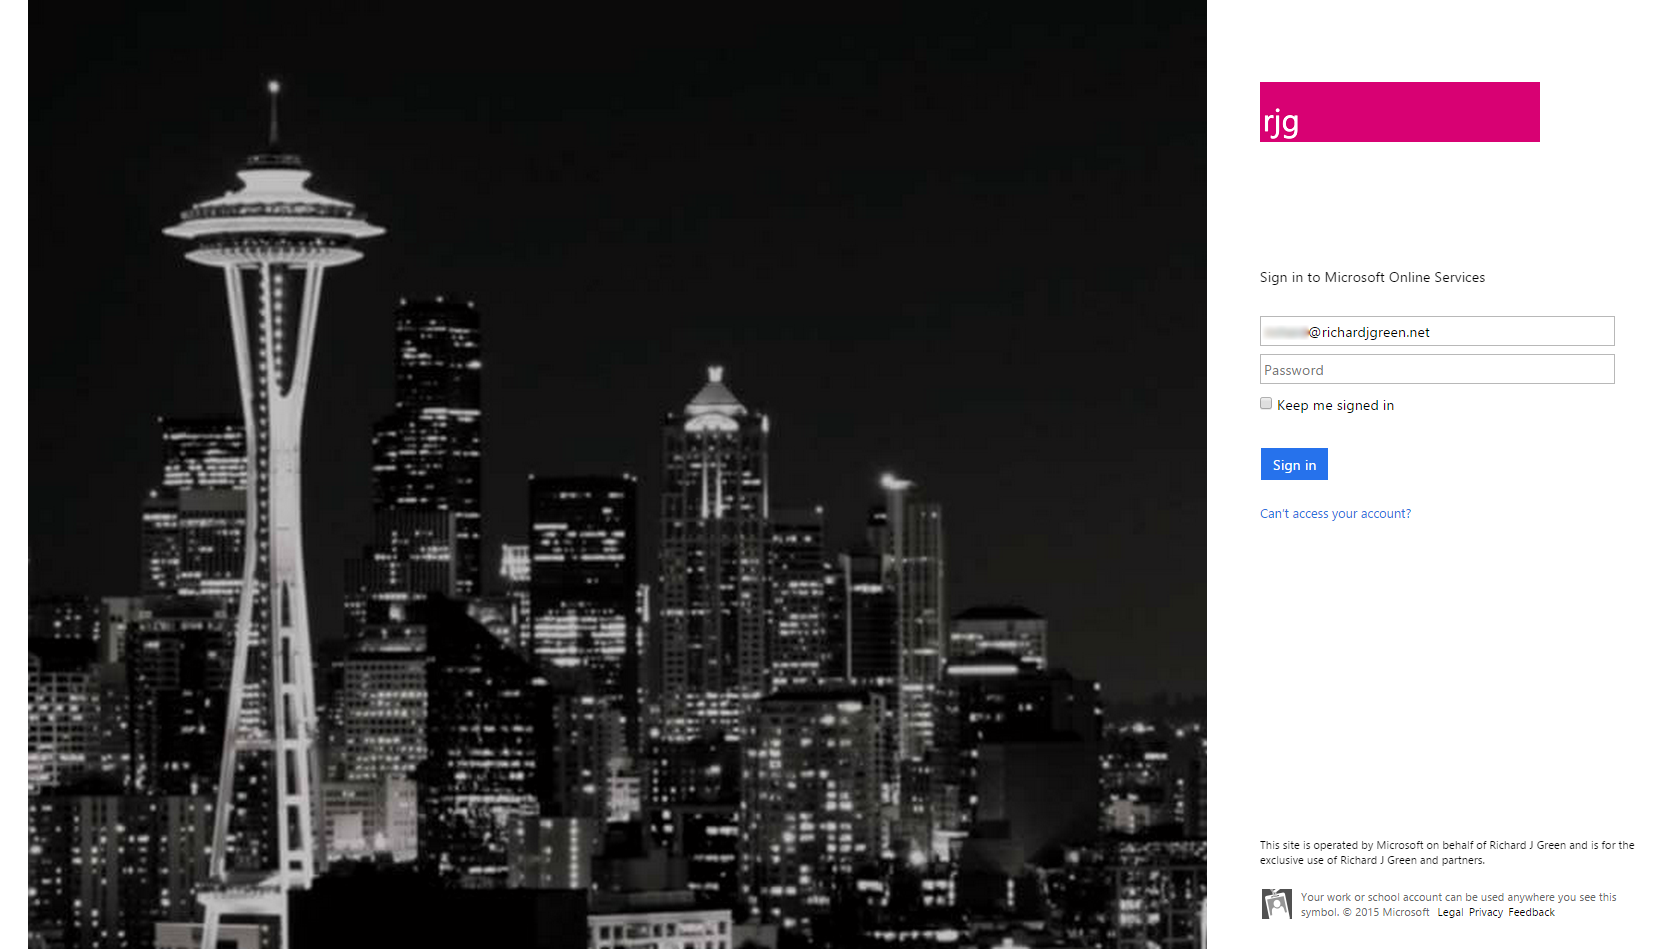
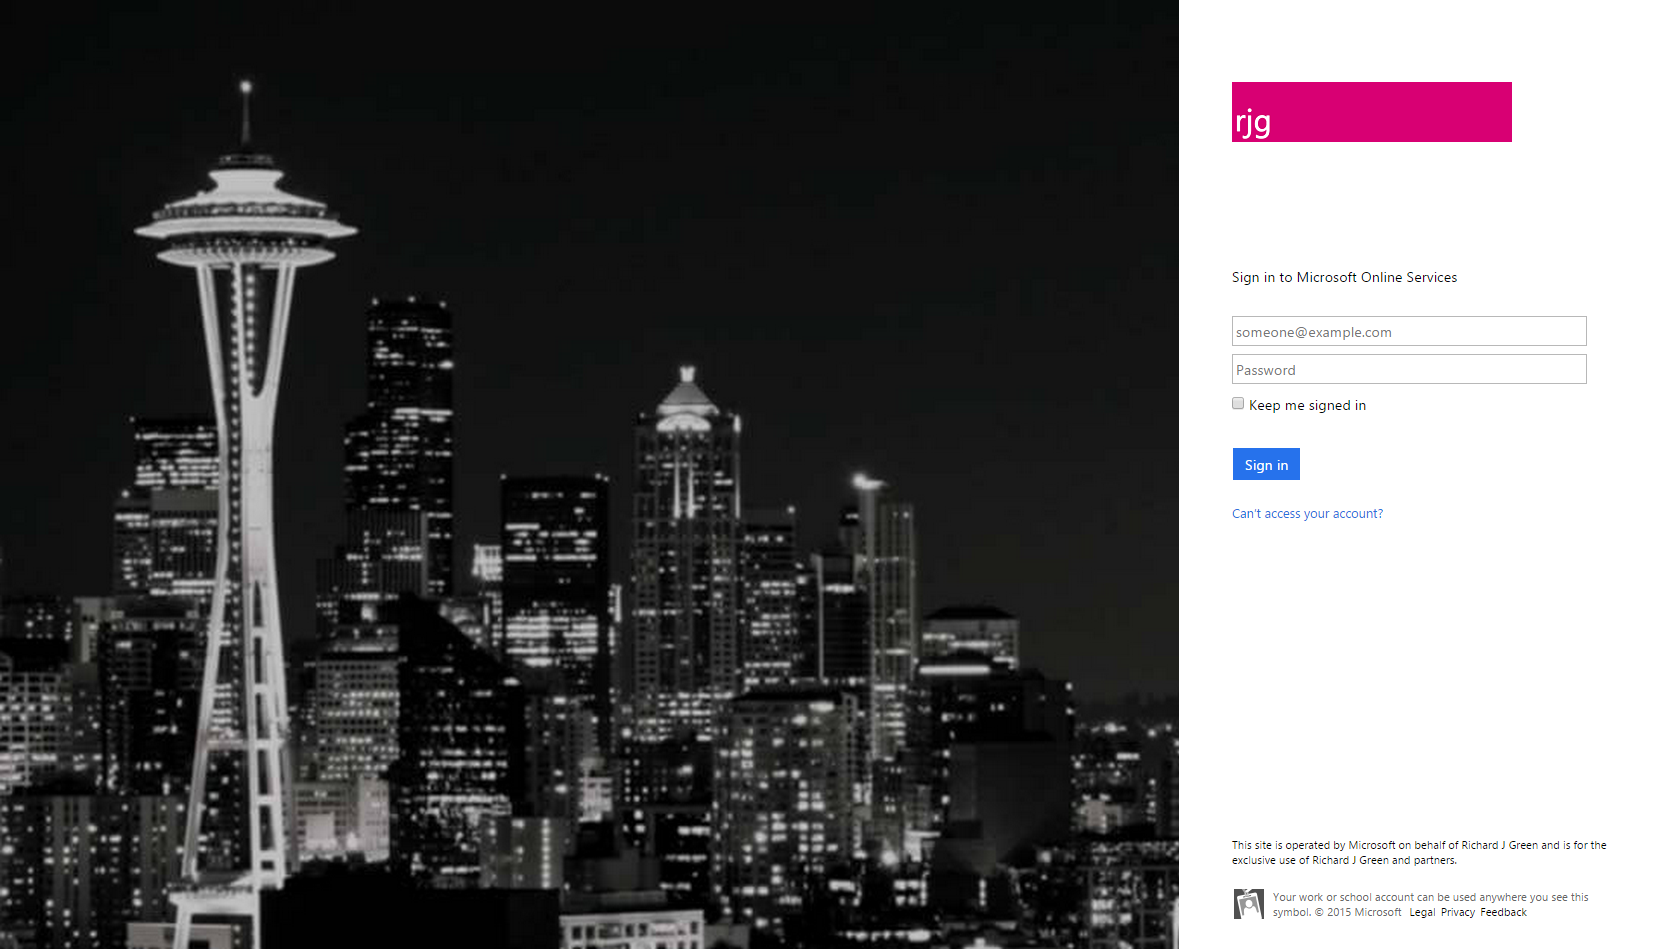
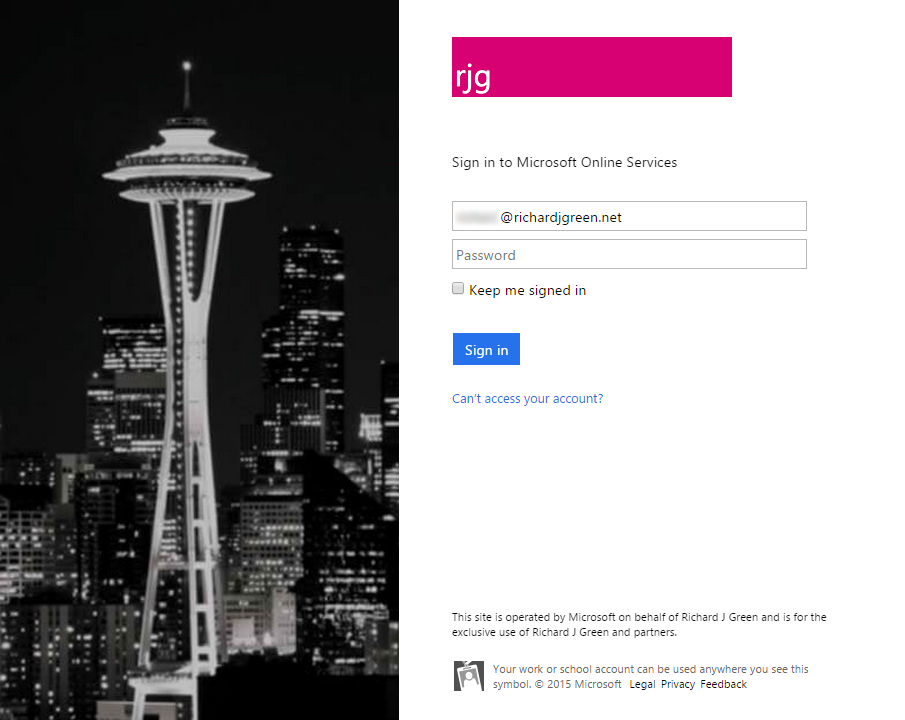
One you have given it some time for the changes to be applied across Office 365, here is how is looks in some of the user facing sites.

Office 365 Calendar Themed  Office 365 OneDrive Business Themed

Language Support for Office 365 and AAD Login

In my previous post, Company Branding for Office 365 and AAD Login, I showed you the steps to implement a company branded and customized login experience for Office 365 and Azure Active Directory. This post centred around using the default branding settings which for most organisations will probably be just fine but if you have employees in non-English speaking or English as a second language countries, you may want to provide them with a more regionalised experience using another language.

Luckily, Azure Active Directory allows us to do this with ease. Firstly, you need to configure the default settings so if you haven’t already, follow the steps in my previous post Company Branding for Office 365 and AAD Login to get that setup and working. Once you have it working and tested, you can head back to the Azure management portal at https://manage.windowsazure.com and login as a Global Administrator role user.

Once logged in, go to the Active Directory section from the left navigation pane and select the same directory that you customized previously. Once you are viewing the directory, click the Configure tab in from the top of the page and once again, select the green Customize Branding button.

Last time, you were taken immediately into the Customize Default Branding settings however on this second occasion, you will be shown an option first.

AAD Customize Branding Specific Language

The portal prompts you if you want to Edit Existing Branding Settings or Add Branding for a Specific Language. In this example, I want to add branding for my French users so I select the Add Branding Settings for a Specific Language option and select France from the drop-down language selection. Once you have selected your language, you are prompted to provide the same logos and text as previous for the default branding.

This is especially useful if you have provided the Sign In Page Text as you will likely want to provide this text in a non-English language. It could also be useful if your company trades under a different name or uses a different logo in another region to identify your brand better for those customers.

You can repeat this process as many times as you like for as many languages as you need however it’s worth noting that because each language uses different images and text, if you ever need to update the logos and text, you will need to update them for each language you have specified and configured. You can use this same options page to come back and edit your customizations at a later time also by select the Edit Existing Branding Settings option which is where you can also delete any customizations to return them to the Azure Active Directory defaults if you decide you no longer want to customize a specific language or the defaults at all.

Company Branding Office 365 and AAD Login

Last week, Microsoft announced via a blog post on the Office Blogs site at http://blogs.office.com/2015/02/17/sign-page-branding-cloud-user-self-service-password-reset-office-365/ that they were moving the ability to add company branding to the Azure Active Directory and Office 365 login pages from the Azure Active Directory Basic and Premium tiers down into the Free tier making this feature available to everyone.

This great news as for a lot of customers, Azure Active Directory Free provides all the service they are looking for and being able to have this fit into your corporate identity and branding makes users more comfortable that they are signing into a company authorised login portal.

In order to brand your corporate Azure Active Directory instance and your Office 365 login pages, login to the Azure Management Portal as a user with the Global Administrator role. For now, this needs to be managed via the legacy Azure portal at https://manage.windowsazure.com. Once you are logged into the portal, you need to head to the Active Directory node from the left navigation area.

Azure Portal

Once on the Active Directory page, select your Azure Active Directory instance. If you have more than one instance, select the instance which is responsible for the domains that you want to be branded with your corporate identity for Azure Active Directory and Office 365 sign-in.

Azure Portal AAD

On the properties for your Azure Active Directory instance, you will notice the green button Customize Branding which you would not have seen in the portal previously if you are an Azure Active Directory Free customer. Click the button to open the properties for branding and customization. Assuming this is the first time that your settings have been customized, you will be taken to the Customize Default Branding properties.

AAD Customize Default Branding

The Banner Logo image is used on all of the various sign-in pages for Azure Active Directory and Office 365 and should contain your company logo. The Tile Logo is to provide a square Modern UI version of your logo. I have yet to actually find anywhere that this Tile Logo is used so if you come across it, do let me know. In either case, the logos can be provided in .png or .jpeg format. I would highly recommend using an image minifier such as TinyPNG to compress your images without distortion with the view to help improve load times of these pages.

Sign In Page Text is displayed on all login pages and is used as a legal disclaimer or login help message. You can use this to display a message to provide help information to end-users such as a service desk phone number or you could use it to show a legal message matching your on-premise Windows server and client logon banner. This is entered as plain text and does not support HTML or other formatting such as hyperlinks.

Sign In Page Illustration allows you to provide a large image that is used prominently on the login pages for Azure Active Directory and Office 365 and it works in partnership with the Sign In Page Background Colour setting. The illustration takes either a .png or a .jpeg file to provide a rich client experience. The background colour is applied to the same container on the login page as the illustration and is used when the user is on a low bandwidth device.

Once you have entered all of the logos and text, click the tick button to save the changes. Once saved, give it a couple of minutes before testing to allow time for the Azure Active Directory instance to replicate throughout Azure and all of the login pages to be updated.

If you visit https://login.microsoftonline.com  you will see the generic login page, however once you enter your email address, the page will update to show your new branding.

AAD Default Login  AAD Branded Full Login

In the two images above, we can see the default login on the left and once I enter my email address, the image on the right shows my branding. The default highway image has been replaced by my Seattle skyline image along with the Office 365 logo replaced by my corporate identity. If I was on a low bandwidth device then instead of the Seattle image, I would be shown this portion of the screen as a solid block of colour using the hexadecimal value I provided on the branding page. The banner message I provided is shown at the bottom of the page in the right third.

If you direct clients to the Office 365 or Azure Active Directory login page from internal sites or a link on your public website then you may be interested in updating those hyperlinks to use the Realm URL. The Realm URL is a query string added to the end of the default URL pre-warning the portal which domain you are going to log in to and as such, the portal is pre-branded meaning that your users will never see the default Office 365 branded page.

To use the Realm URL, you need to update your hyperlinks to https://login.microsoftonline.com/?whr=richardjgreen.net replacing the domain name after the ?whr= query string with your own domain name.

AAD Branded Realm URL

As you see on the image above, I have navigated to the Microsoft Online login page using my Ream URL and without entering my email address to provide it with the domain identity for branding, the site is pre-branded for my company.

AAD Branded Compact Login  AAD Branded Mobile Login

In the two images above, you can see how the customized login page scales with the screen real estate. The left image shows a compressed width page on a client with a 4:3 standard aspect ratio. The right portion of the screen remains unchanged but the illustration image on the left is cropped. The crop to the image is applied to the right edge, so when choosing your illustration image, make sure any important parts of the image are on the left as this is the portion which will always be visible regardless of screen size.

The second of the images above shows a mobile device viewing the page. In this view port, the illustration is completely hidden and we see just the login boxes, the corporate banner logo and the message text.

I trust that you will all enjoy seeing a customized login page for your company and enjoy it even more knowing that it’s not freely available for all Azure Active Directory and Office 365 users.