billing

Save with BYOL and Azure Hybrid Benefit

In my post from earlier today, I talked about the benefits of using Azure Instance Reservations to save money on the compute of IaaS virtual machines. When we think about the components that make up an IaaS VM, we have a few: the VM instance and configuration, the storage, and the software that runs on it. For most people, the software at the most basic level will be either Microsoft Windows or Linux and likely some application software layered on top such as SQL Server.

When we are talking about Microsoft Windows there is a license associated with running the operating system and when you commit to running a Microsoft Azure IaaS VM running Microsoft Windows, the cost of that virtual machine includes that license. If you are an enterprise client of Microsoft’s with an Enterprise Agreement you will likely already have entitlement some Windows Server licenses through that agreement. If you already have licenses that you are paying for, why would you want to pay for them again in Azure? The obvious answer is that you wouldn’t unless your intentions are to do away with the Enterprise Agreement and license everything through retail channels.

Microsoft Azure offers a lesser known option called Azure Hybrid Benefit which is often referred to as Hybrid Usage Benefit (HUB for short). HUB allows you to apply your Enterprise Agreement licenses to your IaaS VMs deployed in Azure. What this means in cost terms is that the price of the Azure IaaS VM ceases to include the Windows Server license element and you are paying purely for the compute. The benefits of HUB are not limited to Windows Server either. You can also use the HUB option with SQL Server IaaS VMs deployed to Azure which means you no longer pay the list price in Azure for either the Windows Server or the SQL Server application license.

Read more…

Saving with Azure Reserved Instances

The cloud is everywhere we look in IT now: more, and more organisations are adopting cloud services of one flavour or another. One of the benefits of cloud is that the costs can come out of operational expenditure in nice little monthly packages instead of giant wedges of capital expenditure. While cloud also offers us the commodity of scale providing services faster, better protected, and more reliable than we can often build ourselves on-premises for equivalent cost but that doesn’t mean we need to pay the recommended retail price.

In this article, I’m going to cover a little-known feature in Microsoft Azure called Reserved Instances (RIs). Previously called Compute Pre-Purchase, this feature is available to anybody using a Pay As You Go (PAYG) subscription or an Enterprise Agreement Subscription. If you are using any other type of subscription such as one bundled as part of an offer then you will not be able to participate. Reserved Instances are only available for Infrastructure-as-a-Service (IaaS) virtual machines. They cannot be used for any other types of service.

Read more…

Microsoft Azure Billing Alert Service

Last week, I dropped a post about how to enable and utilize the New Service Tiers for Azure SQL Databases. In this post, I’d like to show to you another preview feature available in Microsoft Azure, the Billing Alert Service. Whilst I see this service being of more interest to consumers and small enterprises consuming Microsoft Azure services, this isn’t to say that a cost conscious large organisation couldn’t benefit from this and best of all, it’s totally free to enable and consume.

Where I see value in this feature is tracking the cost of your subscriptions. Whilst it’s possible to activate a spending limit on a subscription, this isn’t without it’s own issues. A spending limit once imposed and reached will stop and terminate all services in your subscription. My blog for example went offline for 24hrs last month because I’d hit a spending limit imposed. I’ve since removed this and instead use the Billing Alert Service to help me track my spending and kerb excessive usage when I get near the amount I’m happy to spend.

It’s important to note that this is a preview feature. This doesn’t mean that the service doesn’t work but it does mean that Microsoft could make changes to the service or pull it entirely at some point so just bear this in mind.

Enabling the Billing Alert Service

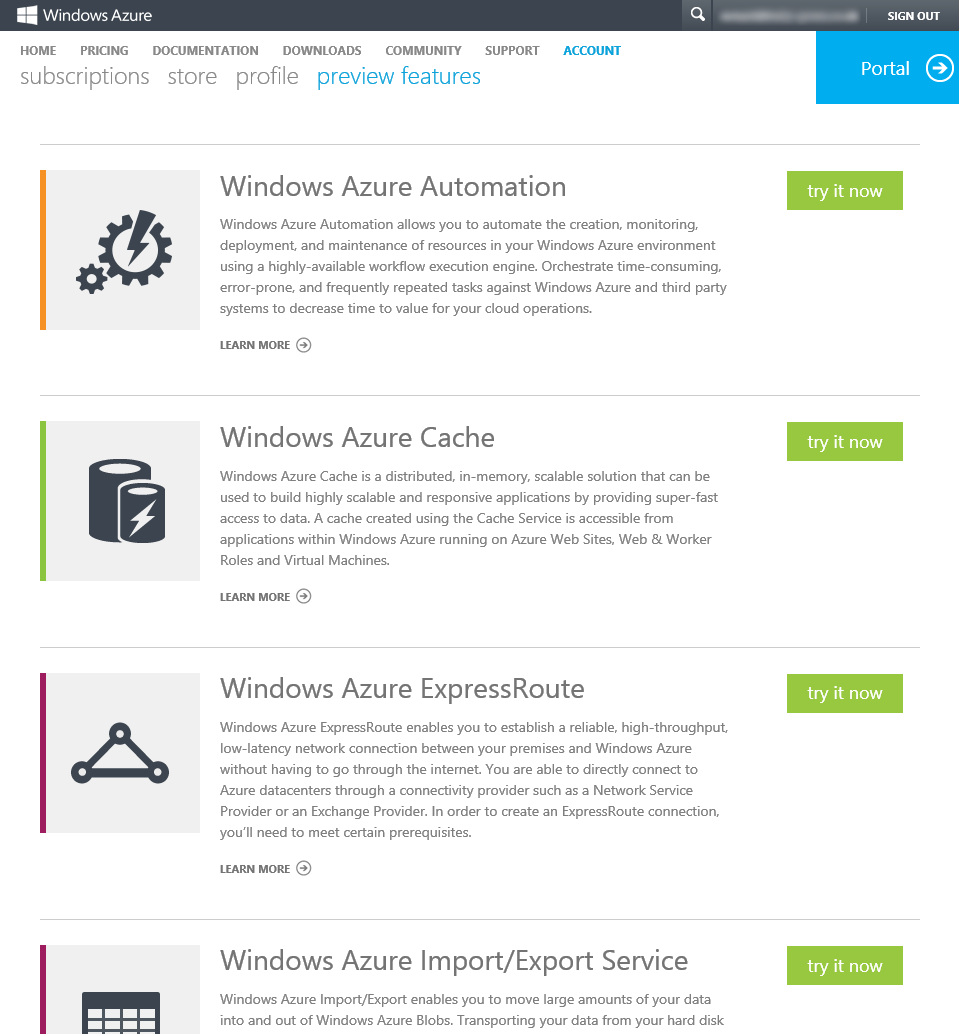
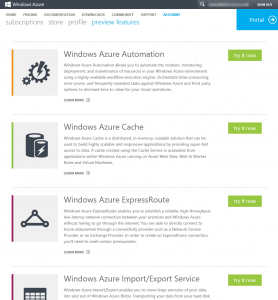
Enabling the Billing Alert Service is easy from the Microsoft Azure Account Portal which you can access at the URL https://account.windowsazure.com and login with the account used to control your subscription. From here, select the Preview Features link in the top navigation to access a list of features which are available for you to access in preview.

Azure Portal Preview Features

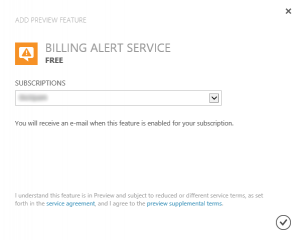
Scrolling through the list, somewhere near the bottom of the list, you will find the Billing Alert Service. Hit the Try It Now button to activate the feature.

Billing Alert Service

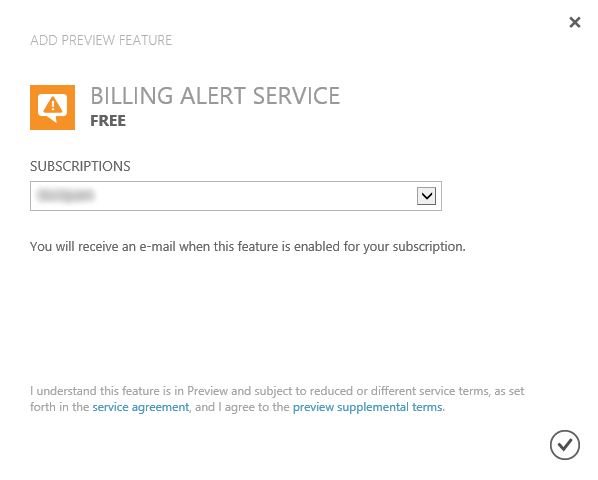
Once you’ve selected the button, you will be prompted for which subscription to activate the feature. If you have more than one subscription, select the appropriate one and click the Tick button to complete the operation which I found did take some time to complete.

Adding Billing Alert Preview Feature

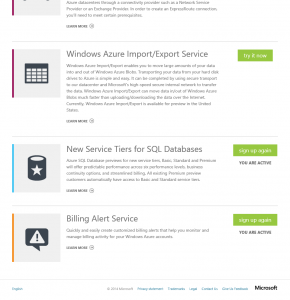
Once activated, you will see the status of the feature reported below the Try It Now button as You Are Active. In the screenshot below, you can see I am currently activated for both the Billing Alert Service and the New Service Tires for SQL Databases which I covered in the previous post on Microsoft Azure preview features.

Billing Alert Service Active

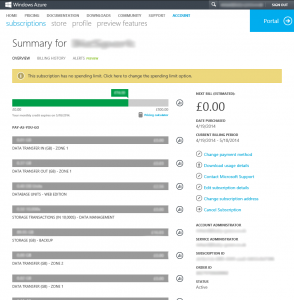
With the feature now activated, we can use it to setup some billing alerts. Unlike most other features in preview in Microsoft Azure, the Billing Alert Service is accessed through the Account Portal and not the Management Portal. Click the Subscriptions link in the top bar to access a list of your subscriptions.

Configuring the Billing Alert Service

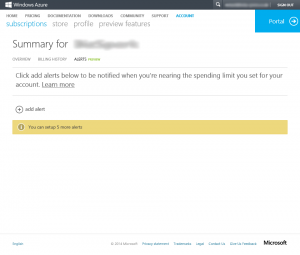
Here on the Subscriptions Overview page, the statistics for the subscription with billing amounts and usage consumption are shown and we now have a new link for Alerts Preview which is just below the main title.

Azure Subscription Overview

Accessing the feature for the first time, we can see that we have no alerts configured for billing and there is a link to add a new alert. The yellow information bar tells us that we can create up to five billing alerts which is probably going to be sufficient for most people. I’m going to be creating two for my subscription: one approaching my preferred monthly spending limit so that I can calm things down a little and one when I hit the preferred limit so that I can shut down anything that can wait or that I no longer need.

Billing Alert No Alerts Configured

Click the Add Alert button to get started creating a new alert.

Billing Alert Configure New Alert

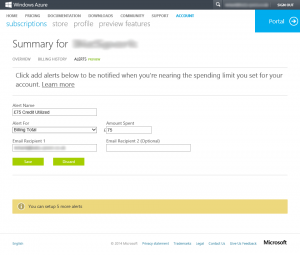
On the new alert page, there aren’t actually many options or settings to configure. Firstly, you need to set a title for your alert which will appear in the email which is sent out so make this factual so that you can see quickly from the email what the alert is warning you about.

Next, we can set what type of alert to send and there are currently two types. The default is what I am using, Billing Total which tracks the amount of spend. The second type is Monetary Credits which changes the context to amount remaining. If you want to track what you are spending in money then use the first option. If you are using a subscription with free spending credits such as MSDN or the like then you may wish to use the latter to track how much of your free entitlement you have left.

Once you’ve set the alert type, set what value to use. In this example, I’m sending out an alert once I’ve spent £75 in a billing month period.

Lastly, we configure the alert recipients. In my case, this is to my personal, singular email address but there is nothing to stop you from adding a distribution list address here so you could configure a distribution list in Microsoft Exchange or Office 365 with all of the parties with a vested interest in your Microsoft Azure subscription as members to receive the alerts.

Once you’ve added the address or addresses for your alert recipients, select the Save button to save the alert definition.

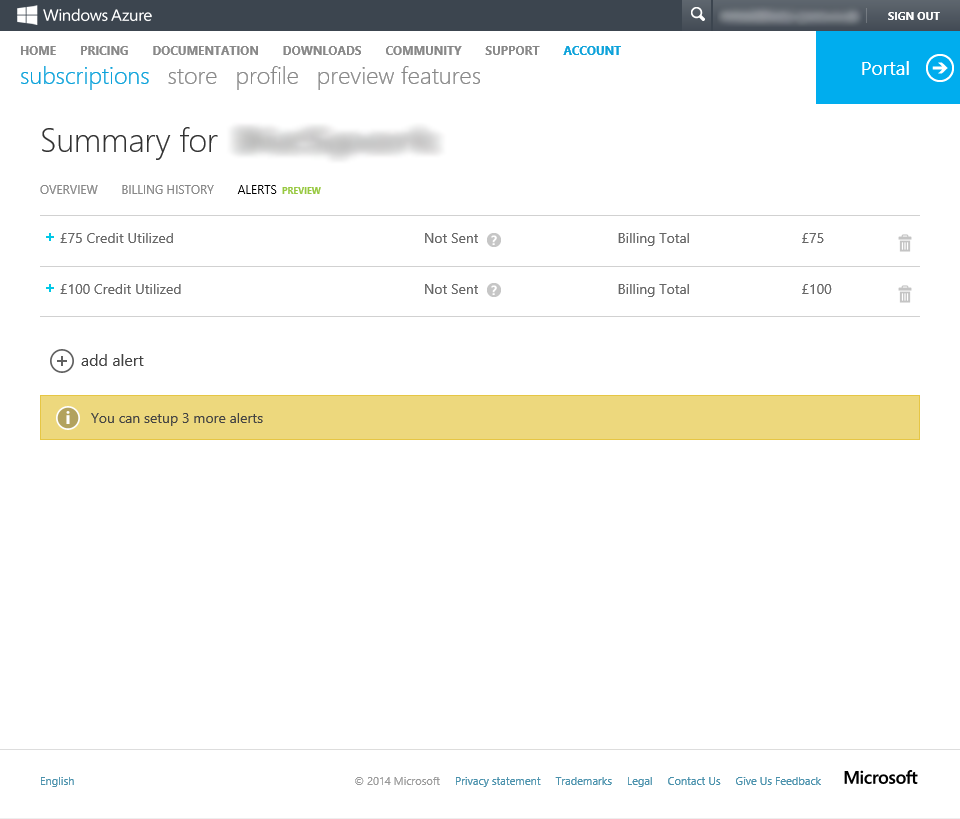
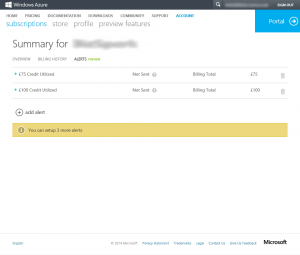
I took the liberty of creating my second alert offline but here is how the console looks with the two alerts added.

Billing Alert Two Alerts Configured

With alerts created, you will receive a welcome email confirming that the alert was setup which allows you to verify the email or distribution list address you used. There is a delete button on the right of the interface allowing you drop and delete alerts as you wish at a later stage.

I hope that this has been helpful for you who want to try and keep tabs on your Microsoft Azure spend.

One Week in Azure

My blog has been running in Windows Azure now for one week so I thought I’d post an update on how the billing is coming along and also the usage of the platform.

I’ve just dived into my subscription summary and here are the charges thus far:
Data Transfer Out (GB) – Zone 1 – 0.6GB (5GB Free)
Compute Hours for Cloud Services – 21.28hrs / £1.08

If the above holds true to the remaining three weeks of my billing cycle then I am looking at having consumed 2.4GB of egress data transfer which is less than half of the free allowance and I will have consumed 85.12hrs of compute time producing a bill of £4.32. As I predicted in my original post, the number of compute hours my blog is consuming is much less than the hours consumption shown on the Windows Azure Pricing Calculator.

At this rate of consumption, my annual bill for the site will be £51.84. When you consider that I was previously paying around £150 a year for a hosting plan with lower quality hosting providers offering much more clunky and cumbersome management interfaces and inferior billing transparency, I think I’m getting an amazing deal.

I am paying more than I had originally hoped for the Backup Recovery Services feature which I use to backup my Windows Server 2012 Essentials server to the cloud, protecting all of mine and my wife’s documents and files along with all of our family pictures of the kids growing up but. For the peace of mind having that data properly protected I’m happy to pay it. I actually made a change to the retention period for my backups in Azure earlier this week so fingers crossed that, that will reduce my bills going forwards a little.

Aside from billing, what else is there to show? Below is a screenshot of the Windows Azure Monitor page for the blog. As you can see, there is a huge spike at the beginning of the week. This was caused by me doing the deployment and maintenance of the site including uploading all of the WordPress files, doing the WordPress upgrade and then upgrading all of the plugins. As you can see though, it settles down nicely after this. All of this is running on a Shared Website Mode single instance. I don’t generate enough traffic to consider adding a second instance and scaling out the site although I might do it one day just to test it.

Blog on Windows Azure