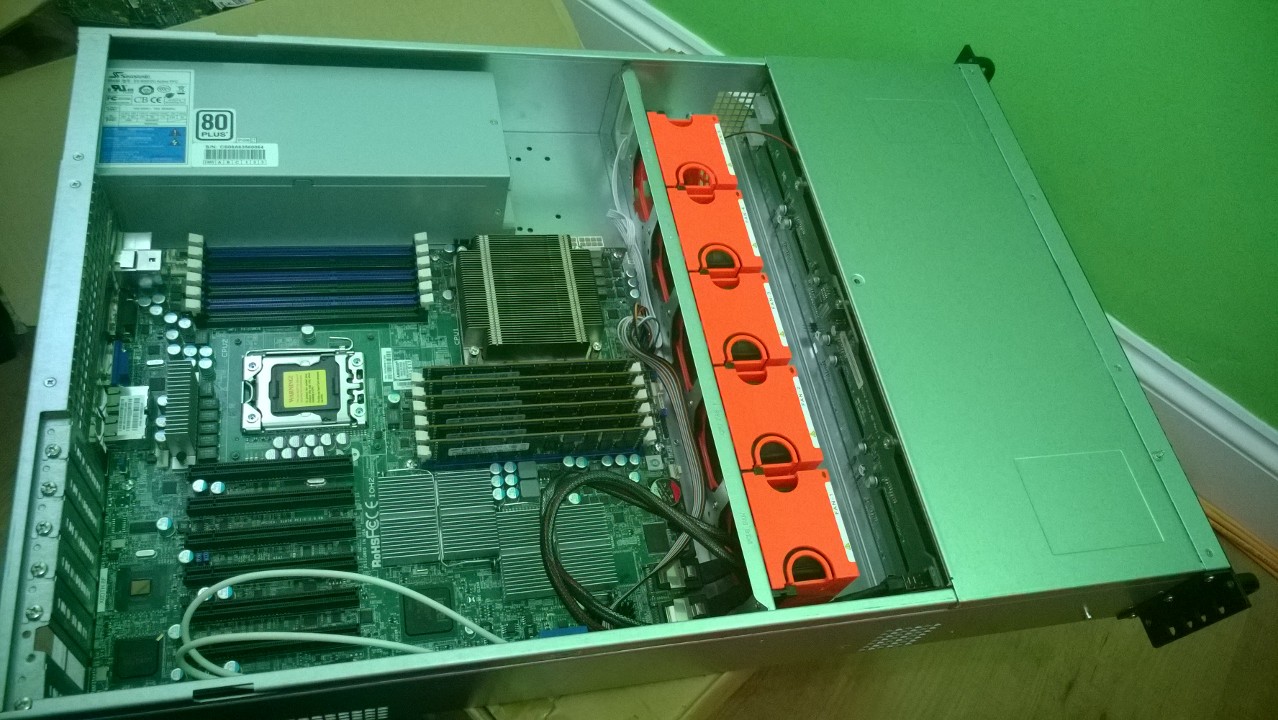
In case you haven’t gathered, progress on the home lab build has been frankly awful and it’s entirely my fault for putting other things first like sitting and watching TV. Those of you who follow me on Twitter will have seen back in April, I tweeted a picture of the build starting on the 2U Hyper-V server and all of the components I’ve had delivered thus far have been installed. For those of you who don’t, here’s the picture I tweeted.
In case you haven’t gathered, progress on the home lab build has been frankly awful and it’s entirely my fault for putting other things first like sitting and watching TV. Those of you who follow me on Twitter will have seen back in April, I tweeted a picture of the build starting on the 2U Hyper-V server and all of the components I’ve had delivered thus far have been installed. For those of you who don’t, here’s the picture I tweeted.
Motherboard Installation
Installing the motherboard was a complete pain. The Supermicro X8DTH-6F motherboard has it’s SAS connectors on the very front edge and although this case is designed for extended ATX motherboard installation, it is done so just. To get the motherboard in, I had to pre-attach the SAS cables to the ports on the motherboard and I had to get the board in at some interesting angles to make it fit down. Once installed though, it all looks good. Fortunately for me, the case fans are at the front and the fan guard is at the rear of the fan module otherwise I’d have to come up with an alternative solution for the SAS cabling due to cable to fan death risk. A top tip from me is to install the power supply after the motherboard so that you have the maximum room available to get your board in.
Aside from the issue with SAS connector placement which is frankly, a Supermicro issue, not an X-Case one, the case is brilliant. It’s really solid, sturdy and well built. There are cable guides and pathways in all the right places to route power and SAS cables to the disk backplane. The top lid is secured with a single cross head screw and a locking clip which makes access really easy. The drive caddies slide in and out with ease and look the part too.
This is obviously not finished as you’ll see that none of the power supply cabling is installed, the network card isn’t installed and the cabling that is there looks a bit untidy. The SAS SFF-8087 cables are a bit longer than I would have liked, but I wasn’t able to find cables in lengths shorter than 0.5m from a quality vendor like LSI or Adaptec so I had to go with those as I didn’t want to chance cheap eBay cables in this build melting or the like.
Power Supply Cabling
The power supply cabling supplied with the Seasonic unit is, as always, long enough to cable up any possible combination of case which I think is wrong being that this is a rack mount power supply, the configuration would never look too dissimilar from mine right now. I mocked the installation of the cables and there is so much spare cable to lose in the void between the disk backplane and the fans that I will lose half of my cooling due to blockages. There is also a lot of SATA and PCI-E connectors on the looms which I’m not going to be using adding to the mess.
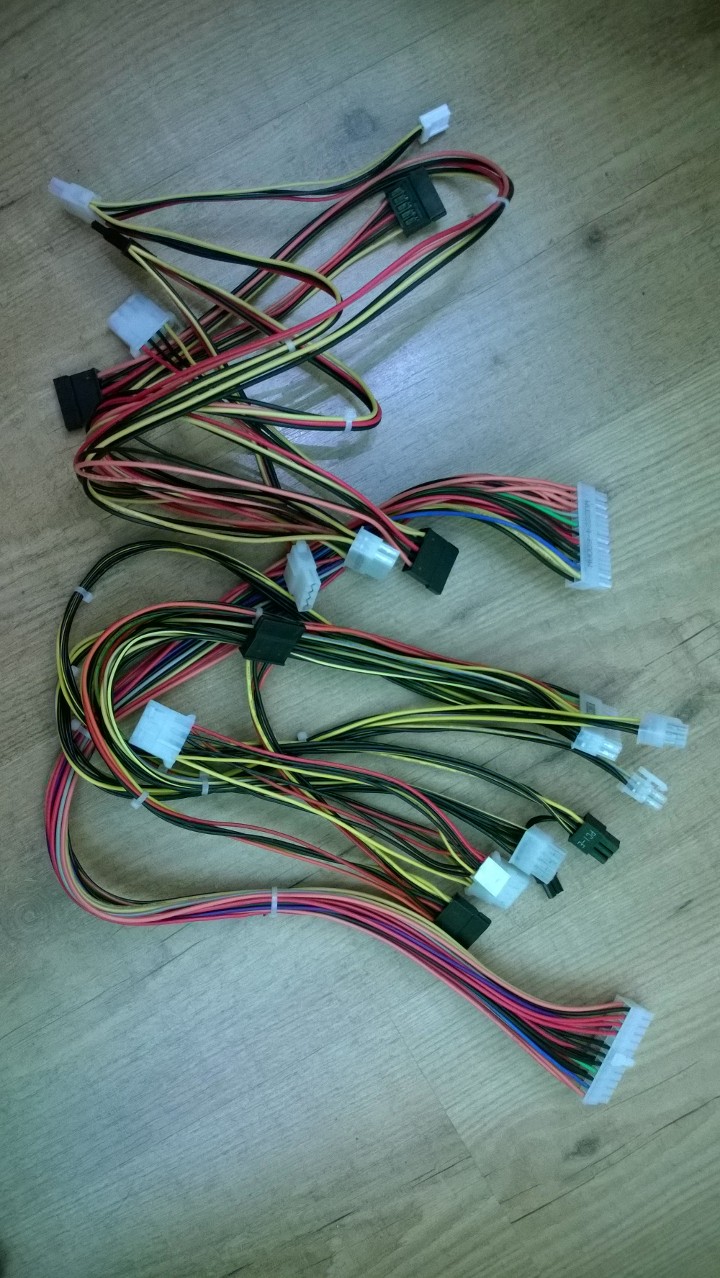
The only connectors I need for this build are the motherboard 24-pin, two 8-pin EPS and four molex to drive the case fans and the disk backplane so there is a lot of excess there for my needs. Because I don’t want to lose that much cooling efficiency and I don’t want to have to lose all of that spare cable in the case and have it looking a mess, I’ve ordered up some heat shrink wrap, cable braiding and replacement ATX connector pins. Once all of these come, I’m going to be modding all of the power supply cabling to the correct length for use and dropping the connectors I don’t need. This is going to make the internals run cooler with the improved airflow and it’s going to look a whole load neater when finished. Yes, it’s going to add some time to the build and two fold for both servers but it will be worth it in the long run if not just for my own perfectionist requirements.
These extras have cost me about £10 per server to order in which is pocket change compared to the price of the rest of the build so shying away from spending this is just compromising. It should all be here in a couple of days and it will probably take me a couple of days to get it all right and how I want but I’ll be sure to post a picture or two once finished. Needless to say, there is going to be more cable left on the cutting room floor then there is going to be installed inside the case. For the 3U storage server there is a slightly different requirement in that I’m going to need six molex, an additional two over the Hyper-V server due to the additional disk capacity but that’s easy enough to sort out.
Changes to the Shopping List
Since the original shopping list, I have made some changes to the builds for technical and budgetary reasons.
All of the memory DIMMs are now PC3-10600R instead of the planned PC3L-10600R. Although these DIMMS are lacking the L denotation for low power, they difference in power draw and heat output is frankly minimal and the extra cost of the L type DIMMs I couldn’t justify. I’ve also increased the memory amount in the Storage Server from 12GB to 24GB so that I can cache more of the hot blocks in memory once I get it all running.
Since I took the picture at the top of the post, I made the decision to build the Hyper-V 2U server with both of it’s CPU sockets populated too. This means that I’ve got three DIMMs populated per CPU to match the channels and I’ve now got a system with two Quad Core Intel L5630 Xeon CPUs installed. I will likely in the future install the additional 6 DIMMs to take me up from 48GB to 96GB memory.
Lastly, the UPS which I stated may well be the APC 1500VA 2U rack mount UPS has indeed been purchased as the APC 1500VA. I had my eyes on a 2000VA but I managed to get the 1500VA for a steal.
Up Next
In the next post, I’ll post the completed builds including all of the cabling that took me so many months to do.