vmm

Automatically Label the OS Drive on New VMs

In my quest for private cloud (and public) nirvana, I’m always looking for ways to automate parts of the first run user experience so that as IT Pros, we can build and deliver services to users which fit the bill right out of the gate. In a previous post from earlier this year, in a post entitled Automatically Assign DVD Drive Letter VMM Private Cloud, I walked you through the process of using a PowerShell script that would run as a GUI Run Once script as part of a VMM initiated virtual machine deployment to set the DVD Drive letter.

Since I posted this article, I’ve made a couple of improvements to the environment that I wanted to share with you all and in this first post, I will cover off how to automatically label and name the OS drive on our newly deployed virtual machines. This process involves applies registry keys. As with my first post, you could achieve the same results with Group Policy, however I like all of my modifications to be applied to the local machine so that if the machine is deployed as a non-domain joined server into a DMZ or if there is an issue with the first time Group Policy gets processed, these settings still get applied but I will cover both methods here. This would also work in a multi-tenant or hosting environment where VMs may not being landing in your own domain or environment.

Add the Script to the VM Template

If you followed my previous post, you will be familiar with mounting the .vhd file for the VM Template on another server to modify the local file system. If you are unsure of this, please refer back to my original article Automatically Assign DVD Drive Letter VMM Private Cloud for guidance.

With the .vhd file mounted, we are going to add a new PowerShell script to the FirstRun folder named Set-OSDriveLabel.ps1 and it will contain the following.

# Set-OSDriveLabel.ps1
# v1.0 2nd June 2015 by Richard J Green

# Sets the OS Install Volume Label to the Value in the DriveLabel Variable
$DriveLabel = "OS"
$OSDrive = $env:SystemDrive
$OSDrive = $OSDrive.Substring(0,$OSDrive.Length-1)

New-Item -Path HKLM:\SOFTWARE\Wow6432Node\Microsoft\Windows\CurrentVersion\Explorer\DriveIcons -Name $OSDrive -Force
New-Item -Path HKLM:\SOFTWARE\Wow6432Node\Microsoft\Windows\CurrentVersion\Explorer\DriveIcons\$OSDrive -Name DefaultLabel -Force
Set-Item -Path HKLM:\SOFTWARE\Wow6432Node\Microsoft\Windows\CurrentVersion\Explorer\DriveIcons\$OSDrive\DefaultLabel -Value $DriveLabel -Force

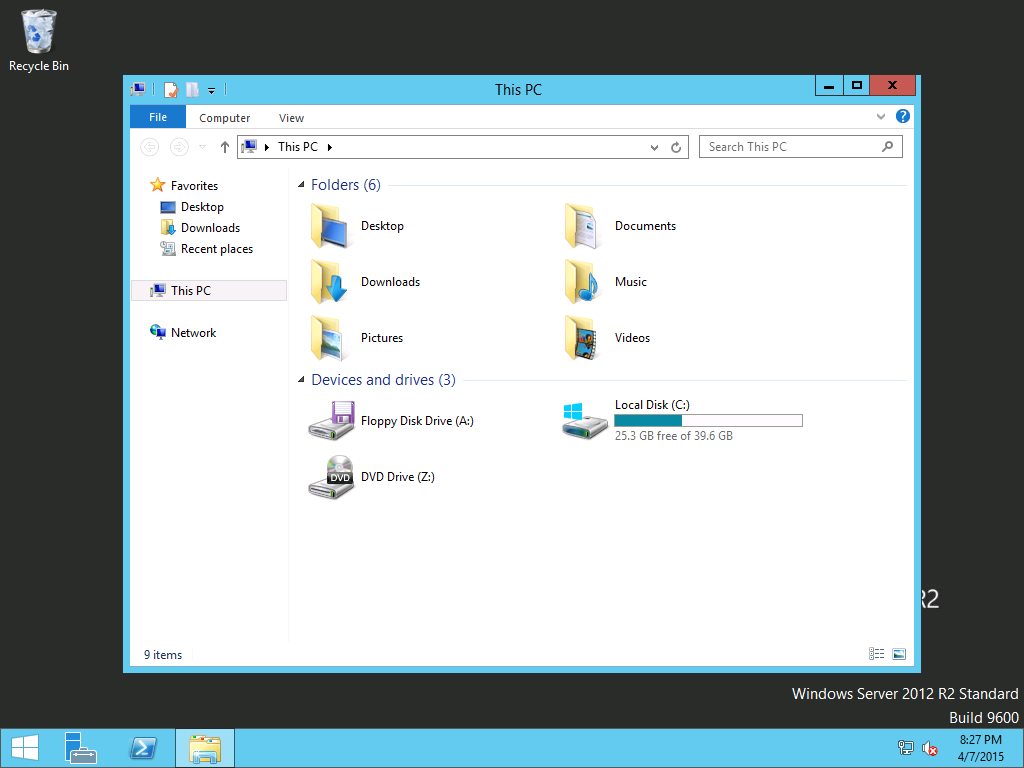
Short and sweet, this script will detect the Windows installation drive from the PowerShell SystemDrive environment variable and set this drive letter to use the label OS as defined in the DriveLabel variable.

One important note here is that this setting is applied to the Wow6432Node on a 64-bit server. If you were applying this to a client OS that was 32-bit then you would need to remove the Wow6432Node portion of the registry key location. I find this a peculiar one given that this change effects Windows Explorer which is a 64-bit process.

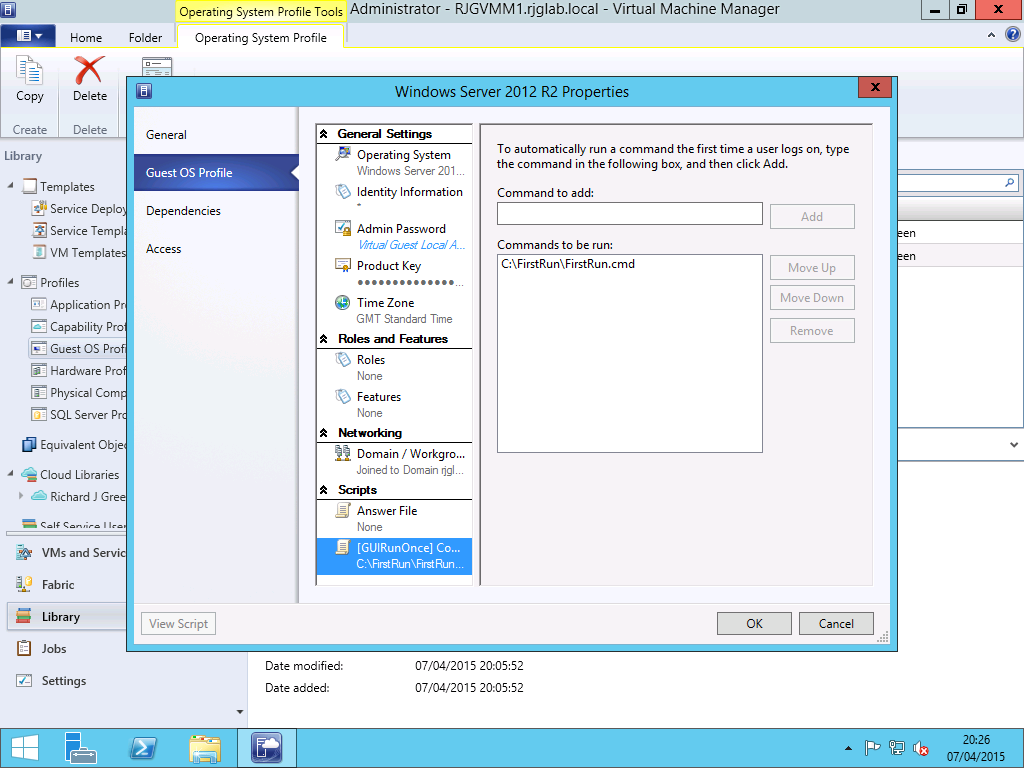
With the PowerShell script saved in the FirstRun folder, we need to update the FirstRun.cmd wrapper script that invokes the containerised PowerShell scripts in the appropriate escalated manner. Simply add the following lines to the script before the clean-up section at the end.

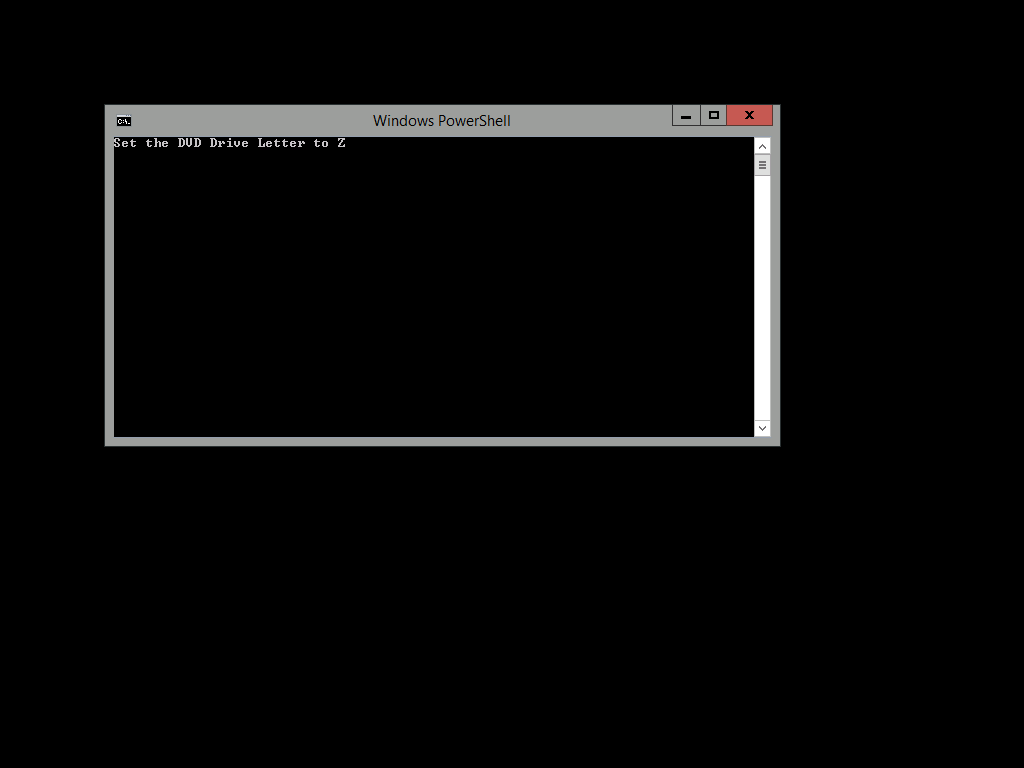
:: Launch PowerShell and Label the OS Drive to OS
echo Set OS Drive Label to OS
PowerShell.exe -NoLogo -Sta -NoProfile -ExecutionPolicy Unrestricted -File %SystemDrive%\FirstRun\Set-OSDriveLabl.ps1

I hope this takes away another manual step from your VM build processes and brings you one step closer to nirvana. In another post coming soon, I will have instructions on how to hide some of the folders from the This PC or “My Computer” folder which don’t really belong on a server and another post to clarify the steps on creating Network Locations for the This PC folder.

Automatically Assign DVD Drive Letter VMM Private Cloud

When you are running a private cloud, automation is the key to success and having everything automated and running in a repeatable fashion every time is important.

When using Virtual Machine Manager to deploy VMs into a Hyper-V (or VMware) environment, it is fairly common for the VMs we deploy to have multiple drive letters such as C: for the operating system and D: for the data directories and server application installations. One of the problems with this setup is the virtual DVD Drive interfering with your drive lettering.

Like many administrators, I like to move my DVD Drive to the Z: drive so that it is still there to allow me to mount .iso files on the VM using stored .iso files in the VMM Library Share but that way, I know that all my data drives are kept together. Unfortunately, Windows Server will automatically assign the DVD Drive to the D: letter which means a manual task is required to move it to another letter however I have a nice little solution that will move it to the Z: drive or any letter you desire using the VMM GUI Run Once commands.

To make this work, we need to perform two distinct activities. One is to add some files to support this change to our VM Template and the second is to configure VMM to do the work.

Adding Files to the VM Template

I’m assuming in this post that you have a working VM Template configured in VMM. If you don’t then you should get that sorted first as deploying VMs using VMM lives around good quality templates and not deploying VMs with blank hard disks and installing the OS from the .iso image.

On either your VMM Library Share server or on another server, using Computer Management, attach the VHD file for the VM Template so that you can get access to the disk.

On the disk, I created a folder call FirstRun at the root of the drive. Inside this folder, we are going to add two script files. One is a simple command script and the other is a PowerShell script. Through my testing, it appears VMM isn’t quite so impressed with launching PowerShell scripts from the GUI Run Once commands and there is also the matter of PowerShell Execution Policy to factor in, both of which we can get around by using a command script to bootstrap the PowerShell script.

The first script is called FirstRun.cmd and contains the following.

:: First Run Configuration Script
:: v1.0 7th April 2015 by Richard J Green

:: Assigns DVD Drive to Z: Drive and Perform Clean-Up

@echo off
title First Run Configuration Script

:: Launch PowerShell and Set the DVD Drive Letter to Z
echo Set the DVD Drive Letter to Z
PowerShell.exe -NoLogo -Sta -NoProfile -ExecutionPolicy Unrestricted -File %SystemDrive%\FirstRun\Set-DriveLetter.ps1

:: Clean-Up Script Files from VM
echo Clean-Up Script Files
cd\
rd /S /Q FirstRun

This script simply launches a PowerShell session and forces PowerShell into single threaded mode to avoid any multi-threading issues, it does not attempt to load a PowerShell profile which speeds things up and it sets the inline Execution Policy to Unrestricted. This restriction only applies to this instance of PowerShell and not the system as a whole which is how we get around PowerShell Execution Policy defaulting to Restricted (we can’t be sure Group Policy will have been processed by this point so any GPO setting to lower the policy to RemoteSigned (for example) may not be ready). Lastly, we call in a PowerShell script file which does our real work.

At the end of this script, it runs a quick rd command which deletes our FirstRun directly meaning that your resulting VM deployment isn’t left with the first run deployment scripts and files on it so we are cleaning up after ourselves.

The second script is the real worker script, the PowerShell which is going to configure your drive letter.

# Set-DriveLetter.ps1
# v1.0 7th April 2015 by Richard J Green

# Sets the Drive Letter for the DVD Drive to Z
(GWMI Win32_CDROMDrive).Drive | %{$a = mountvol $_ /l;mountvol $_ /d;$a = $a.Trim();mountvol Z: $a}

This script is even shorter and simply locates any removable media drives via WMI and then remounts the drive to the Z: drive. If you want to use a different drive letter, simply change it at the end of the line. The PowerShell for this is courtesy of Derek Seaman at http://www.derekseaman.com/2010/04/change-volume-drive-letter-with.html.

Although I am using this for merely changing the DVD Drive letter right now, I can see me expanding these First Run scripts over time to do more work for me on VM deployments.

Once you have added the two script files into the FirstRun directory in the VM .vhd template, using Computer Management on the server, unmounts the .vhd file so that the changes are saved back into the template.

Configuring VMM GUI Run Once Commands

With the template now configured, open your Virtual Machine Manager console and head to the Library pane. Depending on how you use VMM, you will need to configure this directly on your VM Template or on your Guest OS Profile. I use a Guest OS Profile with all of my VM deployments as I keep my VM Template configuration as low as possible to allow for maximum re-use so I will be showing you how to configure this on a Guest OS Profile.

Edit the Properties of your Guest OS Profile that requires these scripts to run and select the Guest OS Profile tab and then the [GUIRunOnce] Commands option from the bottom of the configuration options list. IN the right of the Properties window, in the Command to Add field, enter the path to your FirstRun.cmd script stored in your VM Template.

VMM Guest OS Profile GUIRunOnce

Testing the First Run Script

After configuring the commands on the Guest OS Profile in VMM, I deployed a VM into my environment based on the VM Template with the files embedded and using the Guest OS Profile for customisation of the template during deployment. Once the deployment was complete, I logged on to the VM using my normal server administration credentials and I was greeted by the sight of the FirstRun.cmd command prompt script running and as the title bar in the screenshot below shows, we can see it is currently running a Windows PowerShell application which means that the called in PowerShell .ps1 script is running.

Once the logon is complete, I opened Computer and was greeted with the sight of the DVD Drive on the Z: letter as desired. Browsing the contents of the C: drive, the FirstRun directory has been removed and there is no trace of the scripts or directory having ever been there.

VM First Logon Running Script  VM DVD Drive on Z

It is important to remember that this script will run when a user first logs on to the server and not automatically as part of provisioning. This is how GUI Run Once commands in VMM are designed to work and the expected behaviour.

If you wanted this to be completely seamless, you could use the AutoLogonCredential parameter in VMM on your VM Template to configure VMM to automatically logon as the local administrator account at the end of deployment which would trigger the GUI Run Once script, perform any first run activities and have the final step of your FirstRun.cmd script be to either restart the VM to complete any configuration or to simply log off the server with the logoff command. I may well try this for myself and update the post when I get a chance to let you know how this works for real.

Explaining NUMA Spanning in Hyper-V

When we work in virtualized worlds with Microsoft Hyper-V, there are no many things we have to worry about when it comes to processors. Most of these things come with acronyms which people don’t really understand but they know they need and these and one of these is NUMA Spanning which I’m going to try and explain here and convey why we want to avoid NUMA Spanning where possible and I’m going to do it all in fairly simple terms to keep the topic light. In reality, NUMA architectures may be more complex than this.

NUMA Spanning or Non-Uniform Memory Address Spanning was a feature introduced into motherboard chipsets by Intel and AMD. Intel implemented it with the feature set Quick Path Interconnect (QPI) in 2007 and AMD implemented it with HyperTransport in 2003. NUMA uses a construct of nodes in it’s architecture. As the name suggests, NUMA refers to system memory (RAM) and how we use memory and more specifically, how we determine which memory in the system to use.

Single NUMA Node

Single NUMA Node

In the most simple system, you have a single NUMA node. A single NUMA node is achieved either in a system with a single socket processor or by using a motherboard and processor combination which does not support the concept of NUMA. With a single NUMA node, all memory is treated as equal and a VM running on a hypervisor on this configuration system would use any memory available to it without preference.

Multiple NUMA Nodes

Two NUMA Nodes

In a typical system that we see today with multiple processor sockets and with a processor and motherboard configuration that supports NUMA, we have multiple NUMA nodes. NUMA nodes are determined by the arrangement of memory DIMMs in relation to the processor sockets on the motherboard. In a hugely oversimplified sample system with two CPU sockets, each loaded up with a single core processor and 6 DIMMs per socket, each DIMM slot populated with an 8GB DIMM (12 DIMMs total). In this configuration we have two NUMA nodes, and in each NUMA node, we have one CPU socket and it’s directly connected 48GB of memory.

The reason for this relates to the memory controller within the processor and the interconnect paths on the motherboard. The Intel Xeon processor for example has an integrated memory controller. This memory controller is responsible for the address and resource management of the six DIMMs attached to the six DIMM slots on the motherboard linked to this processor socket. For this processor to access this memory it takes the quickest possible path, directly between the processor and the memory and this is referred to as Uniform Memory Access.

For this processor to access memory that is in a DIMM slot that is linked to our second processor socket, it has to cross the interconnect on the motherboard and via the memory controller on the second CPU. All of this takes mere nanoseconds to perform but it is additional latency that we want to avoid in order to achieve maximum system performance. We also need to remember that if we have a good virtual machine consolidation ratio on our physical host, this may be happening for multiple VMs all over the place and that adds up to lots of nanoseconds all of the time. This is NUMA Spanning at work. The processor is breaking out of its own NUMA node to access Non-Uniform Memory in another NUMA node.

Considerations for NUMA Spanning and VM Sizing

NUMA Spanning has a bearing on how we should be sizing our VMs that we deploy to our Hyper-V hosts. In my sample server configuration above, I have 48GB of memory per NUMA node. To minimize the chances of VMs spanning these NUMA nodes, we therefore need to deploy our VMs with sizing considerations linked to this. If I deployed 23 VMs with 4GB of memory each, that equals 92GB. This would mean 48GB memory in the first NUMA node could be totally allocated for VM workload and 44GB of memory allocated to VMs in the second NUMA node leaving 4GB of memory for the parent partition of Hyper-V to operate in. None of these VMs would span NUMA nodes because 48GB/4GB is 12 which means 12 entire VMs can fit per NUMA node.

If I deployed 20 VMs but this time with 4.5GB of memory each, this would require 90GB memory for virtual workloads and leave 6GB for hosting the parent partition of Hyper-V. The problem here is that 48GB/4.5GB doesn’t fit, we have left overs and uneven numbers. 10 of our VMs would fit entirely into the first NUMA node and 9 of our VMs would fit entirely within the second NUMA node but our 20th VM would be in no man’s land and would be left to have half its memory in both of the NUMA nodes.

In good design practice, we should try to size our VMs to match our NUMA architecture. Take my sample server configuration of 48GB per NUMA node, we should use VMs with memory sizes of either 2GB, 4GB, 6GB, 8GB, 12GB, 24GB or 48GB. Anything other than this has a real risk to be NUMA spanned.

Considerations for Disabling NUMA Spanning

So now that we understand what NUMA Spanning is and the potential decrease in performance it can cause, we need to look at it with a virtualization lens as this is where it really takes effect to the maximum. The hypervisor understands the NUMA architecture of the host through the detection of the hardware within. When a VM tries to start and the hypervisor attempts to allocate memory for the VM, it will always try to first get memory within the NUMA node for the processor that is being used for the virtual workload but sometimes that may not be possible due to other workloads blocking the memory.

For the most part, leaving NUMA Spanning enabled is totally fine but if you are really trying to squeeze performance from a system, a virtual SQL Server perhaps, NUMA Spanning would be something we would like to have turned off. NUMA Spanning is enabled by default in both VMware and Hyper-V and it is enabled at the host level but we can override this configuration on both a per hypervisor host level and a per VM level.

I am not for one minute going to recommend that you disable NUMA Spanning at the host level as this might impact your ability to run your workloads. If NUMA Spanning is disabled for the host and the host is not able to accommodate the memory demand of the VM within a single NUMA node, the power on request for the VM will fail and you will be unable to turn on the machine however if you have some VMs which have NUMA Spanning disabled and others with it enabled, you can have your host work like a memory based jigsaw puzzle, fitting things in where it can.

Having SQL Servers and performance sensitive VMs running with NUMA Spanning disabled would be advantageous to their performance and having NUMA Spanning disabled on VMs which are not performance sensitive allows them to use whatever memory is available and cross NUMA nodes as required giving you the best combination of maximum performance for your intensive workloads and the resources required to run those that are not.

Using VMM Hardware Profiles to Manage NUMA Spanning

VMM Hardware Profile NUMA Spanning

So assuming we have a Hyper-V environment that is managed by Virtual Machine Manager (VMM), we can make this really easy to manage without having to bother our users or systems administrators with understanding NUMA Spanning. When we deploy VMs we can base our VMs on Hardware Profiles. A VMM Hardware Profile has the NUMA Spanning option available to us and simply, we would create multiple Hardware Profiles for our workload types, some of which would be for general purpose servers with NUMA Spanning enabled whilst other Hardware Profiles would be configured specifically to be used by performance sensitive workloads with the NUMA Spanning setting disabled in the profile.

The key to remember here is that if you have VMs that are already deployed in your environment you will need to update their configuration. Hardware Profiles in VMM are not linked to the VMs that we deploy so once a VM is deployed, any changes to the Hardware Profile that it was deployed from do not filter down to the VM. The other thing to note is that NUMA Spanning configuration is only applied at VM Startup and during Live or Quick Migration. If you want your VMs to update the NUMA Spanning configuration after you have changed the setting you will either need to stop and start the VM or migrate it to another host in your Hyper-V Failover Cluster.

SCOM Hyper-V Management Pack Extensions

If you’ve ever been responsible for the management or monitoring of a Hyper-V virtualization platform, you’ve no doubt wanted and needed to monitor it for performance and capacity. The go to choice for monitoring Hyper-V is System Center Operations Manager (SCOM) and if you are using Virtual Machine Manager (VMM) to manage your Hyper-V environment then you could have and should have configured the PRO Tips integration between SCOM and VMM.

With all of this said, both the default SCOM Hyper-V Management Pack and the monitoring improvements that come with the VMM Management Packs and integration are still pretty lacklustre and don’t give you all the information and intelligence you would really like to have.

Luckily for us all, Codeplex comes to the rescue with the Hyper-V Management Pack Extensions. Available for SCOM 2012 and 2012 R2, the Management Pack provides the following (taken from the Codeplex project page):

New features on release 1.0.1.282
Support for Windows Server 2012 R2 hyper-V
Hyper-V Extended Replica Monitoring and Dashboard
Minor code optimizations

Features on release 1.0.1.206
VMs Integration Services Version monitor
Hyper-V Replica Health Monitoring Dashboard and States
SMB Shares I/O latency monitor
VMs Snapshots monitoring
Management Pack Performance improvements

Included features from previous release
Hyper-V Hypervisor Logical processor monitoring
Hyper-V Hypervisor Virtual processor monitoring
Hyper-V Dynamic Memory monitoring
Hyper-V Virtual Networks monitoring
NUMA remote pages monitoring
SLAT enabled processor detection
Hyper-V VHDs monitoring
Physical and Logical Disk monitoring
Host Available Memory monitoring
Stopped and Failed VMs monitoring
Failed Live Migrations monitoring

The requirements to get the Management Pack installed are low which makes implementation really easy. If you keep your core packs updated there is good chance you’ve already got the three required packs installed, Windows OS 6.0.7061.0, Windows Server Hyper-V 6.2.6641.0 and Windows Server Cluster 6.0.7063.0.

The project suggests there is documentation but it seems to be absent so what you will want to know is what is the behaviour going to be upon installation? If you have a development Management Group for SCOM then install it here first to test and verify as you should always be doing. The Management Pack is largely disabled by default which is ideal but there are a couple of rules enabled by default to watch out for so check the rules and change the default state for the two enabled rules to disabled if you desire.

As is the norm with disabled rules in SCOM, create a group which either explicitly or dynamically targets your Hyper-V hosts and override the rules for the group to enable them. The rules are broken down into Windows Server 2012 and Windows Server 2012 R2 sets so you can opt to enable one, the other or both according to the OS version you are using for your Hyper-V deployments.

If you do have the VMM integration with SCOM configured and you are using Hyper-V Dynamic Memory, you will notice very quickly if you enable all the rules in the  Hyper-V Management Pack Extensions that you will start receiving duplicate alerts for memory pressure so make a decision where you want to get your memory pressure alerts from be it the VMM Management Pack or the Hyper-V Extensions Management Pack and override and disable alert generation for the one you don’t want.

There is still one metric missing even from this very thorough Hyper-V Extensions Management Pack and that is the collection of the CPU Wait Time Per Dispatch performance counter, the Hyper-V equivalent of the VMware vSphere CPU Ready counter. I’ll cover this one in a later post with a custom Performance Collection Rule.

You can download the Management Pack from Codeplex at http://hypervmpe2012.codeplex.com/. I hope it finds you well and enjoy your newly found Hyper-V monitoring intelligence.

Logical Network Creation Error in VMM 2012 R2

If you are working with System Center Virtual Machine Manager (VMM) and trying to configure Logical Networks on a Hyper-V host, here is an issue you need to be aware of.

If the display name of the network adapters on your host contain the square bracket characters (Eg. [ or ]) then the creation of the Logical Network on the host will fail with a rather spurious error message. Check the display name of all of the adapters on the host and ensure that they do not contain the square bracket characters before you go through any other troubleshooting. You could save yourself an hour or two.

License Types with Automatic Virtual Machine Activation

A couple of weeks ago, I posted an article on how to use Automatic Virtual Machine Activation (AVMA) with Windows Server 2012 R2 and Hyper-V. I wanted to follow this up with a brief note on license types Microsoft provide and how they seem to work with AVMA.

In production environments you will be using keys purchased through either a Select, Volume License or other commercial agreement and in test and development, you may well be using keys from MSDN or TechNet according to how you operate.

It appears through some testing I did that AVMA only works with operating system media and license keys obtained through volume license channels and that for operating system source media downloaded from TechNet or MSDN that the AVMA client key will not be accepted as a valid one. This is especially worth noting if you are using VMM to automate the deployment of a virtual machine onto Hyper-V as the result will be that steps in the VMM virtual machine creation process will fail after the Customizing Virtual Machine phase. Connecting to the newly spawned VM with either the Connect via Console option in VMM or from Hyper-V Manager will reveal the machine is stuck at the license key entry step of the operating system OOBE process.

If you are using a single VMM instance to manage your production and testing and development clouds and guest workloads and you plan on using AVMA for virtual machine activation that you will need to have provisioned separate virtual machine templates and Guest OS Profiles in your VMM library for your various environments using the respective media from TechNet, MSDN or volume license to be able to properly compete an automated VMM virtual machine deployment.

Hyper-V Integration Services Error in VMM 2012 R2

When working with System Center Virtual Machine Manager 2012 R2 recently, I encountered an issue whereby deploying a Windows Server 2012 R2 virtual machine from template worked great but deploying a Windows Server 2008 R2 virtual machine from template reported a failure in the VMM Jobs view. The error shown is that Hyper-V Integration Services reported an error installing and generated the error code 60001.

When working with virtual guests it is important to consider the requirements for the guest operating system. In this incident, the issue was caused by using Windows Server 2008 R2 as the guest operating system however as per the About Virtual Machines and Guest Operating Systems page on TechNet at http://technet.microsoft.com/en-us/library/cc794868(v=ws.10).aspx for Windows Server 2008 R2, you must be running Service Pack 1.

After using an updated template with Service Pack 1 incorporated, the error no longer occurs when deploying the guest operating system. A lesson to us all to double check everything. I had assumed that the .iso file I was using for Windows Server 2008 R2 incorporate Service Pack 1 however clearly on this occasion, it didn’t.

Import Custom Phyiscal Resources in VMM 2012

This evening, I have been working to create some Physical Resource Packages in System Center VMM 2012 for a project at work. VMM by default supports the following file types and extensions for resources:

  • Answer Files (.inf .ini .xml)
  • ISO Images (.iso)
  • Script Files (.ps1 .sql)
  • Virtual Floppy Disks (.flp .vld)
  • Virtual Hard Disk (.vhd .vmdk)

The resource package I am trying to create will be used as part of an Application Profile to allow VMM to install a server-side application as part of a Service Template Deployment, however as the installation file consists of a .msi Windows Installer Package, VMM wouldn’t import it.

Looking at the pre-defined resource packages, I noticed that the Server App-V and the Web Deploy resource packages contained .msi files and they were imported okay, so what was the difference?

The difference is in the handling. VMM by default asks for a folder path where your custom resources reside after which it will import them into a library. By default, once you provide a path, VMM will import all supported objects from path. To add unsupported objects such as .exe and .msi files for Application Profiles, you must append the folder name for your source files with .cr.

This addition causes VMM to import the entire folder regardless of content. In my example, my folder name went from Microsoft_iSCSI_Software_Target to Microsoft_iSCSI_Software_Target.cr and VMM now has the package imported.