private cloud

Automatically Label the OS Drive on New VMs

In my quest for private cloud (and public) nirvana, I’m always looking for ways to automate parts of the first run user experience so that as IT Pros, we can build and deliver services to users which fit the bill right out of the gate. In a previous post from earlier this year, in a post entitled Automatically Assign DVD Drive Letter VMM Private Cloud, I walked you through the process of using a PowerShell script that would run as a GUI Run Once script as part of a VMM initiated virtual machine deployment to set the DVD Drive letter.

Since I posted this article, I’ve made a couple of improvements to the environment that I wanted to share with you all and in this first post, I will cover off how to automatically label and name the OS drive on our newly deployed virtual machines. This process involves applies registry keys. As with my first post, you could achieve the same results with Group Policy, however I like all of my modifications to be applied to the local machine so that if the machine is deployed as a non-domain joined server into a DMZ or if there is an issue with the first time Group Policy gets processed, these settings still get applied but I will cover both methods here. This would also work in a multi-tenant or hosting environment where VMs may not being landing in your own domain or environment.

Add the Script to the VM Template

If you followed my previous post, you will be familiar with mounting the .vhd file for the VM Template on another server to modify the local file system. If you are unsure of this, please refer back to my original article Automatically Assign DVD Drive Letter VMM Private Cloud for guidance.

With the .vhd file mounted, we are going to add a new PowerShell script to the FirstRun folder named Set-OSDriveLabel.ps1 and it will contain the following.

# Set-OSDriveLabel.ps1
# v1.0 2nd June 2015 by Richard J Green

# Sets the OS Install Volume Label to the Value in the DriveLabel Variable
$DriveLabel = "OS"
$OSDrive = $env:SystemDrive
$OSDrive = $OSDrive.Substring(0,$OSDrive.Length-1)

New-Item -Path HKLM:\SOFTWARE\Wow6432Node\Microsoft\Windows\CurrentVersion\Explorer\DriveIcons -Name $OSDrive -Force
New-Item -Path HKLM:\SOFTWARE\Wow6432Node\Microsoft\Windows\CurrentVersion\Explorer\DriveIcons\$OSDrive -Name DefaultLabel -Force
Set-Item -Path HKLM:\SOFTWARE\Wow6432Node\Microsoft\Windows\CurrentVersion\Explorer\DriveIcons\$OSDrive\DefaultLabel -Value $DriveLabel -Force

Short and sweet, this script will detect the Windows installation drive from the PowerShell SystemDrive environment variable and set this drive letter to use the label OS as defined in the DriveLabel variable.

One important note here is that this setting is applied to the Wow6432Node on a 64-bit server. If you were applying this to a client OS that was 32-bit then you would need to remove the Wow6432Node portion of the registry key location. I find this a peculiar one given that this change effects Windows Explorer which is a 64-bit process.

With the PowerShell script saved in the FirstRun folder, we need to update the FirstRun.cmd wrapper script that invokes the containerised PowerShell scripts in the appropriate escalated manner. Simply add the following lines to the script before the clean-up section at the end.

:: Launch PowerShell and Label the OS Drive to OS
echo Set OS Drive Label to OS
PowerShell.exe -NoLogo -Sta -NoProfile -ExecutionPolicy Unrestricted -File %SystemDrive%\FirstRun\Set-OSDriveLabl.ps1

I hope this takes away another manual step from your VM build processes and brings you one step closer to nirvana. In another post coming soon, I will have instructions on how to hide some of the folders from the This PC or “My Computer” folder which don’t really belong on a server and another post to clarify the steps on creating Network Locations for the This PC folder.
Automatically Assign DVD Drive Letter VMM Private Cloud

When you are running a private cloud, automation is the key to success and having everything automated and running in a repeatable fashion every time is important.

When using Virtual Machine Manager to deploy VMs into a Hyper-V (or VMware) environment, it is fairly common for the VMs we deploy to have multiple drive letters such as C: for the operating system and D: for the data directories and server application installations. One of the problems with this setup is the virtual DVD Drive interfering with your drive lettering.

Like many administrators, I like to move my DVD Drive to the Z: drive so that it is still there to allow me to mount .iso files on the VM using stored .iso files in the VMM Library Share but that way, I know that all my data drives are kept together. Unfortunately, Windows Server will automatically assign the DVD Drive to the D: letter which means a manual task is required to move it to another letter however I have a nice little solution that will move it to the Z: drive or any letter you desire using the VMM GUI Run Once commands.

To make this work, we need to perform two distinct activities. One is to add some files to support this change to our VM Template and the second is to configure VMM to do the work.

Adding Files to the VM Template

I’m assuming in this post that you have a working VM Template configured in VMM. If you don’t then you should get that sorted first as deploying VMs using VMM lives around good quality templates and not deploying VMs with blank hard disks and installing the OS from the .iso image.

On either your VMM Library Share server or on another server, using Computer Management, attach the VHD file for the VM Template so that you can get access to the disk.

On the disk, I created a folder call FirstRun at the root of the drive. Inside this folder, we are going to add two script files. One is a simple command script and the other is a PowerShell script. Through my testing, it appears VMM isn’t quite so impressed with launching PowerShell scripts from the GUI Run Once commands and there is also the matter of PowerShell Execution Policy to factor in, both of which we can get around by using a command script to bootstrap the PowerShell script.

The first script is called FirstRun.cmd and contains the following.

:: First Run Configuration Script
:: v1.0 7th April 2015 by Richard J Green

:: Assigns DVD Drive to Z: Drive and Perform Clean-Up

@echo off
title First Run Configuration Script

:: Launch PowerShell and Set the DVD Drive Letter to Z
echo Set the DVD Drive Letter to Z
PowerShell.exe -NoLogo -Sta -NoProfile -ExecutionPolicy Unrestricted -File %SystemDrive%\FirstRun\Set-DriveLetter.ps1

:: Clean-Up Script Files from VM
echo Clean-Up Script Files
cd\
rd /S /Q FirstRun

This script simply launches a PowerShell session and forces PowerShell into single threaded mode to avoid any multi-threading issues, it does not attempt to load a PowerShell profile which speeds things up and it sets the inline Execution Policy to Unrestricted. This restriction only applies to this instance of PowerShell and not the system as a whole which is how we get around PowerShell Execution Policy defaulting to Restricted (we can’t be sure Group Policy will have been processed by this point so any GPO setting to lower the policy to RemoteSigned (for example) may not be ready). Lastly, we call in a PowerShell script file which does our real work.

At the end of this script, it runs a quick rd command which deletes our FirstRun directly meaning that your resulting VM deployment isn’t left with the first run deployment scripts and files on it so we are cleaning up after ourselves.

The second script is the real worker script, the PowerShell which is going to configure your drive letter.

# Set-DriveLetter.ps1
# v1.0 7th April 2015 by Richard J Green

# Sets the Drive Letter for the DVD Drive to Z
(GWMI Win32_CDROMDrive).Drive | %{$a = mountvol $_ /l;mountvol $_ /d;$a = $a.Trim();mountvol Z: $a}

This script is even shorter and simply locates any removable media drives via WMI and then remounts the drive to the Z: drive. If you want to use a different drive letter, simply change it at the end of the line. The PowerShell for this is courtesy of Derek Seaman at http://www.derekseaman.com/2010/04/change-volume-drive-letter-with.html.

Although I am using this for merely changing the DVD Drive letter right now, I can see me expanding these First Run scripts over time to do more work for me on VM deployments.

Once you have added the two script files into the FirstRun directory in the VM .vhd template, using Computer Management on the server, unmounts the .vhd file so that the changes are saved back into the template.

Configuring VMM GUI Run Once Commands

With the template now configured, open your Virtual Machine Manager console and head to the Library pane. Depending on how you use VMM, you will need to configure this directly on your VM Template or on your Guest OS Profile. I use a Guest OS Profile with all of my VM deployments as I keep my VM Template configuration as low as possible to allow for maximum re-use so I will be showing you how to configure this on a Guest OS Profile.

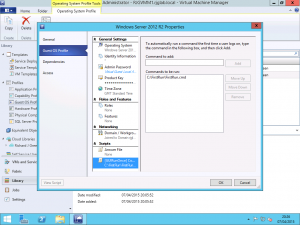
Edit the Properties of your Guest OS Profile that requires these scripts to run and select the Guest OS Profile tab and then the [GUIRunOnce] Commands option from the bottom of the configuration options list. IN the right of the Properties window, in the Command to Add field, enter the path to your FirstRun.cmd script stored in your VM Template.

VMM Guest OS Profile GUIRunOnce

Testing the First Run Script

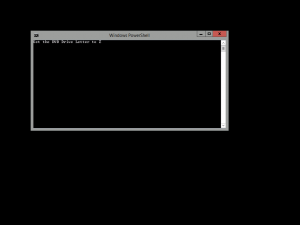
After configuring the commands on the Guest OS Profile in VMM, I deployed a VM into my environment based on the VM Template with the files embedded and using the Guest OS Profile for customisation of the template during deployment. Once the deployment was complete, I logged on to the VM using my normal server administration credentials and I was greeted by the sight of the FirstRun.cmd command prompt script running and as the title bar in the screenshot below shows, we can see it is currently running a Windows PowerShell application which means that the called in PowerShell .ps1 script is running.

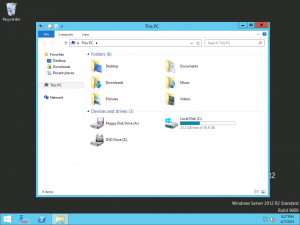
Once the logon is complete, I opened Computer and was greeted with the sight of the DVD Drive on the Z: letter as desired. Browsing the contents of the C: drive, the FirstRun directory has been removed and there is no trace of the scripts or directory having ever been there.

VM First Logon Running Script  VM DVD Drive on Z

It is important to remember that this script will run when a user first logs on to the server and not automatically as part of provisioning. This is how GUI Run Once commands in VMM are designed to work and the expected behaviour.

If you wanted this to be completely seamless, you could use the AutoLogonCredential parameter in VMM on your VM Template to configure VMM to automatically logon as the local administrator account at the end of deployment which would trigger the GUI Run Once script, perform any first run activities and have the final step of your FirstRun.cmd script be to either restart the VM to complete any configuration or to simply log off the server with the logoff command. I may well try this for myself and update the post when I get a chance to let you know how this works for real.